
How to replace the gearstick gaiter.
The leather gear stick gaiter isn’t one of the most talked about items, but there may be times when you need, or want to change it.
You might fancy a change of colour, or as in my case, the existing one may be damaged.
The procedure is fairly easy and doesn’t require any great skills.
The only special tool you will need is a lever that won’t damage the console. I have a plastic trim removal tool that does the job. You can use screwdrivers etc, but you run the risk of stressing the plastic or chipping the paint if painted.
The first thing to do is buy a new gaiter. I bought mine off e-bay for £5.99 from a seller called Topgaiters.
To remove the gaiter we must start by removing the gear knob.
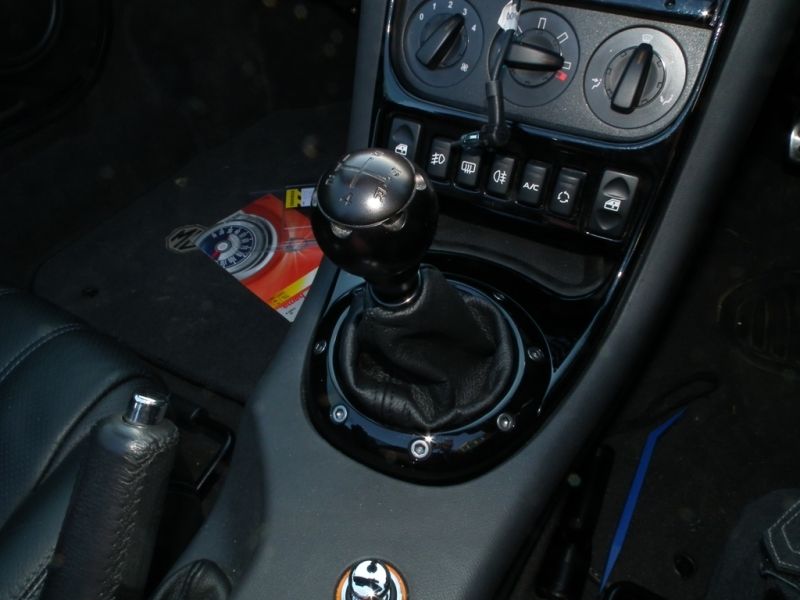
Depending on what knob you have depends on the removal procedure, but the LE500 one is held on by a spring clip, so one good tug of your knob and it should come off in your hand.

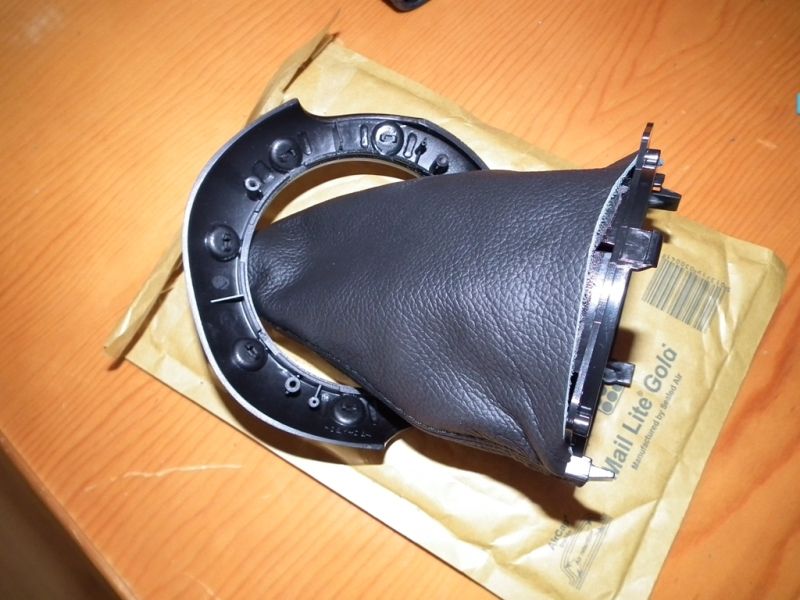
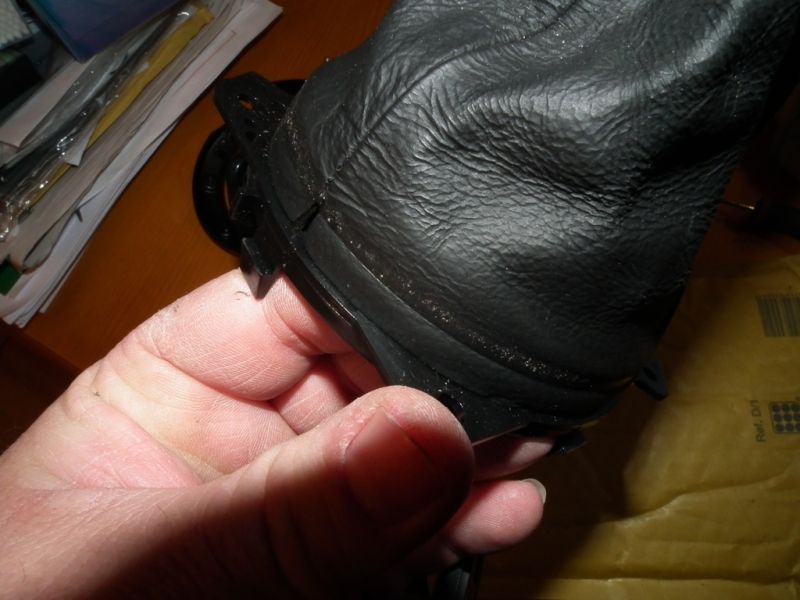
Next you need to lever out the bottom ring that holds the gaiter in place. It is held in by 4 clips at the 12, 3, 6 and 9 o’clock positions. You should be able to carefully lever the rear out until the clip releases and then the ring will pull clear.

Be careful, as the ring is only plastic and may be painted. Do not use excessive force.
Once the lower ring has been released the gaiter will slide up the shaft and can be removed.
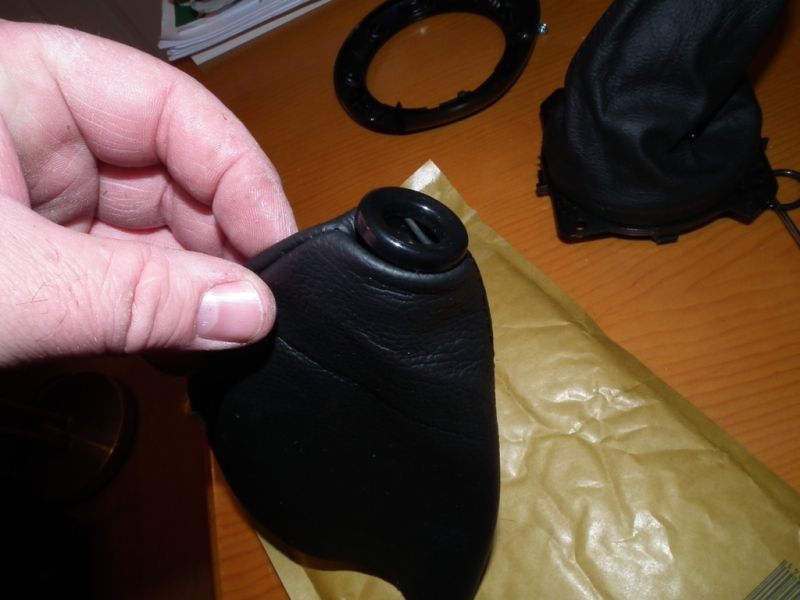
Undo the 4 Philips screws under the bottom ring and slide the cover up and over the gaiter.
The top of the gaiter has a fixing that grips the gear stick.
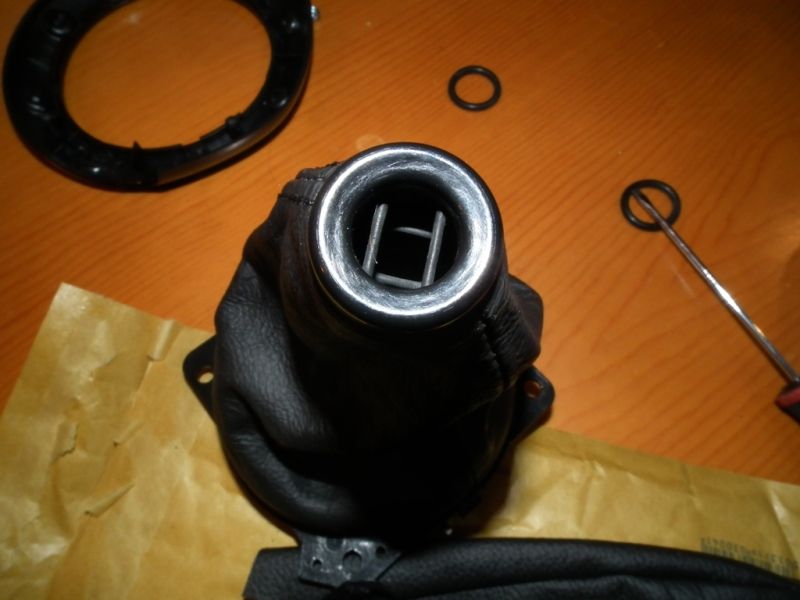
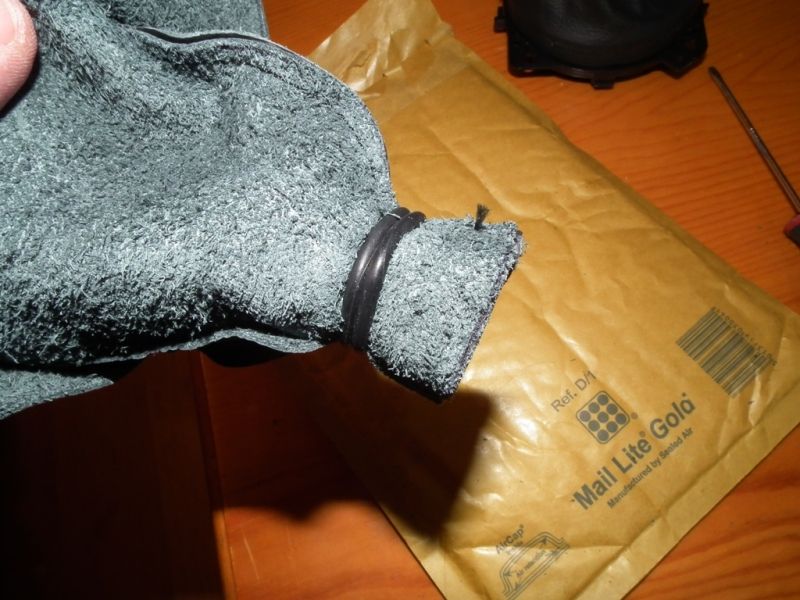
Turn the gaiter inside out and you will see that this is held in place by 2 rubber bands.
Use a screwdriver to lever the rubber bands off
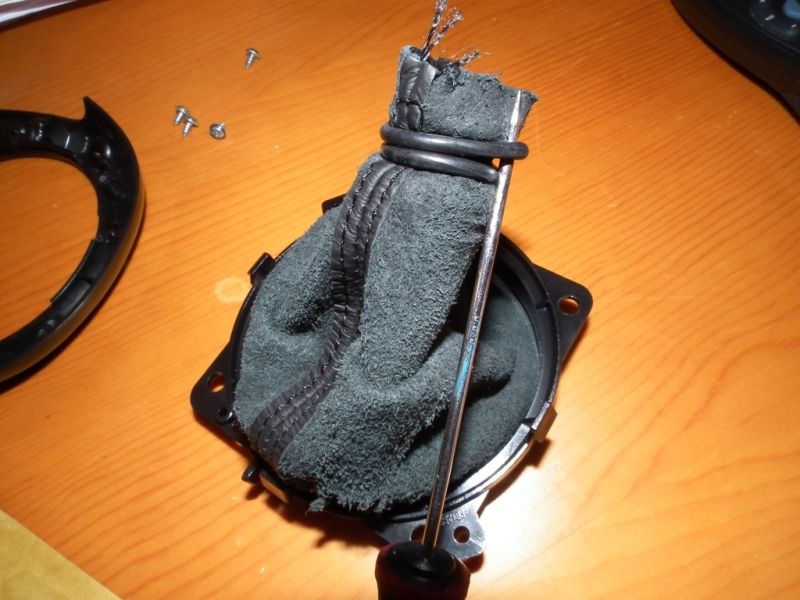
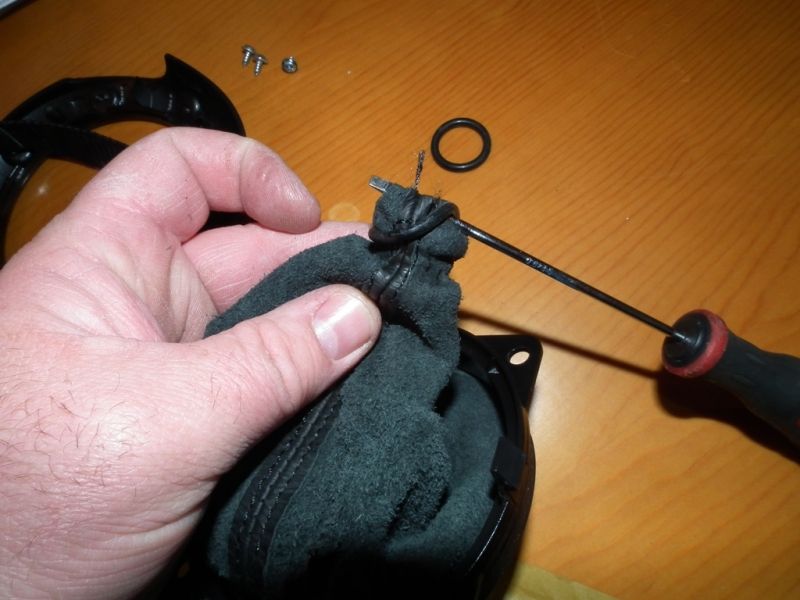
And pop the fitting out ready to fit in the new gaiter.

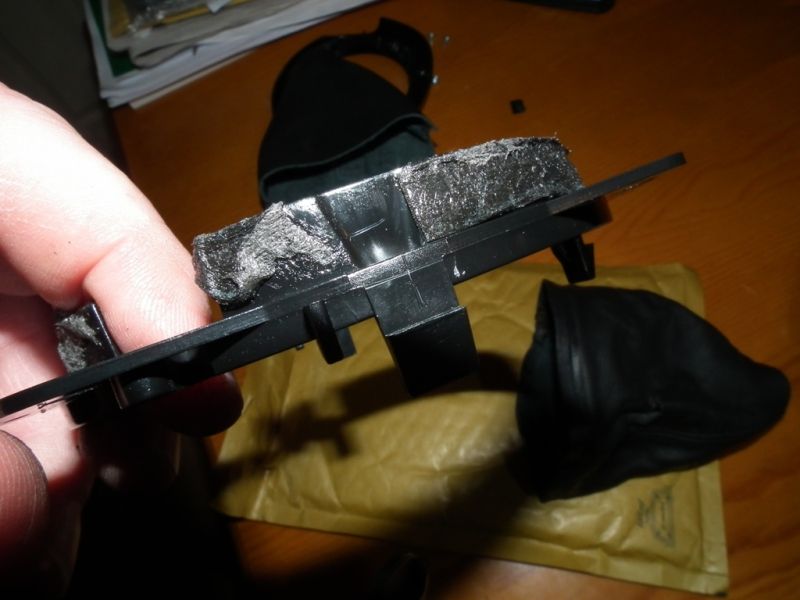
The original gaiter is glued to the lower fitting using double sided tape. Carefully peel off the old gaiter.

It may be worth marking the fitting so that you remember where the rear seam goes.
Once this is removed, you are now ready to fit the new gaiter.
Fit the upper fitting.
Turn the gaiter inside out and lever the rubber bands over the fitting to hold it in place. Make sure that the top fitting is level and the leather is not gathered.

Now turn the gaiter the right way round and offer it over the bottom fitting. I didn’t bother gluing it.
Make sure it is level all the way around and the rear seam lines up with the mark you made.
Now slide the outer ring down the gaiter and secure to the lower fitting with the 4 Philips screws.
The gaiter is now ready to refit.
Slide it down the gearstick and position the lower ring. If you get it just right you should be able to push it into place until the 4 clips click in.

Now refit the gear knob and you are done.
You might fancy a change of colour, or as in my case, the existing one may be damaged.
The procedure is fairly easy and doesn’t require any great skills.
The only special tool you will need is a lever that won’t damage the console. I have a plastic trim removal tool that does the job. You can use screwdrivers etc, but you run the risk of stressing the plastic or chipping the paint if painted.
The first thing to do is buy a new gaiter. I bought mine off e-bay for £5.99 from a seller called Topgaiters.
To remove the gaiter we must start by removing the gear knob.
Depending on what knob you have depends on the removal procedure, but the LE500 one is held on by a spring clip, so one good tug of your knob and it should come off in your hand.
Next you need to lever out the bottom ring that holds the gaiter in place. It is held in by 4 clips at the 12, 3, 6 and 9 o’clock positions. You should be able to carefully lever the rear out until the clip releases and then the ring will pull clear.
Be careful, as the ring is only plastic and may be painted. Do not use excessive force.
Once the lower ring has been released the gaiter will slide up the shaft and can be removed.
Undo the 4 Philips screws under the bottom ring and slide the cover up and over the gaiter.
The top of the gaiter has a fixing that grips the gear stick.
Turn the gaiter inside out and you will see that this is held in place by 2 rubber bands.
Use a screwdriver to lever the rubber bands off
And pop the fitting out ready to fit in the new gaiter.
The original gaiter is glued to the lower fitting using double sided tape. Carefully peel off the old gaiter.
It may be worth marking the fitting so that you remember where the rear seam goes.
Once this is removed, you are now ready to fit the new gaiter.
Fit the upper fitting.
Turn the gaiter inside out and lever the rubber bands over the fitting to hold it in place. Make sure that the top fitting is level and the leather is not gathered.
Now turn the gaiter the right way round and offer it over the bottom fitting. I didn’t bother gluing it.
Make sure it is level all the way around and the rear seam lines up with the mark you made.
Now slide the outer ring down the gaiter and secure to the lower fitting with the 4 Philips screws.
The gaiter is now ready to refit.
Slide it down the gearstick and position the lower ring. If you get it just right you should be able to push it into place until the 4 clips click in.
Now refit the gear knob and you are done.
Last Edit:12 years 9 months ago
by cjj
Last edit: 12 years 9 months ago by cjj.
The following user(s) said Thank You: Leigh Ping, KFMGTF
Please Log in or Create an account to join the conversation.
Replied by rayb on topic Re: How to replace the gearstick gaiter.
Posted 12 years 9 months ago #44137
love the look on the gaiter surround nice black, silver is so last 10 yr ago. i wonder if its possible to spray my gear knob black aswell
[img]i54.tinypic.com/2hdto4p.jpg[/img]

Last Edit:12 years 9 months ago
by rayb
Last edit: 12 years 9 months ago by rayb.
Please Log in or Create an account to join the conversation.
Replied by cjj on topic Re: How to replace the gearstick gaiter.
Posted 12 years 9 months ago #44138
Errr, spray away. I'm not sure we want to see pics though. :sick:
Seriously, the paint would just wear off. There are plenty of black ones on e-bay and they aren't expensive.
Seriously, the paint would just wear off. There are plenty of black ones on e-bay and they aren't expensive.
Last Edit:12 years 9 months ago
by cjj
Last edit: 12 years 9 months ago by cjj.
Please Log in or Create an account to join the conversation.
- David Aiketgate
-
 Offline
- David
-

- mgf mk2 freestyle mpi 16" wheels, in Anthracite.
- Posts: 20366
- Thanks: 4459
Replied by David Aiketgate on topic Re: How to replace the gearstick gaiter.
Posted 12 years 9 months ago #44140
Good stuff! :broon:
Additional info:- The standard MGR gearknobs unscrew from the gear lever. :yesnod:
Additional info:- The standard MGR gearknobs unscrew from the gear lever. :yesnod:
David
:shrug:
Please Log in or Create an account to join the conversation.
Replied by rayb on topic Re: How to replace the gearstick gaiter.
Posted 12 years 9 months ago #44141
if you buy a original black one being married wouldnt my wedding ring wear the finish off aswell,erm i wonder if plasticote would work, seen some on fleabay to darn expensive tho for a gear knob
[img]i54.tinypic.com/2hdto4p.jpg[/img]
Last Edit:12 years 9 months ago
by rayb
Last edit: 12 years 9 months ago by rayb.
Please Log in or Create an account to join the conversation.
Replied by PQD44 on topic Re: How to replace the gearstick gaiter.
Posted 12 years 9 months ago #44142
Whilst you're in this area, you could shorten the gear lever and gaiter
see this previous How To

by PQD44
Please Log in or Create an account to join the conversation.
Replied by cjj on topic Re: How to replace the gearstick gaiter.
Posted 12 years 9 months ago #44190
I'm fine with the length of my knob thanks. ")
by cjj
Please Log in or Create an account to join the conversation.
- David Aiketgate
-
Offline
- David
-
- mgf mk2 freestyle mpi 16" wheels, in Anthracite.
- Posts: 20366
- Thanks: 4459
Replied by David Aiketgate on topic Re: How to replace the gearstick gaiter.
Posted 12 years 9 months ago #44192
You may be...have you asked Anne? 
David
:shrug:
Please Log in or Create an account to join the conversation.
- Leigh Ping
-
 Offline
- Moderator
-

- Posts: 6838
- Thanks: 1631
Replied by Leigh Ping on topic Re: How to replace the gearstick gaiter.
Posted 12 years 9 months ago #44202
Now located in 'Bling mods'.
Great guide. Thanks. :broon:
Great guide. Thanks. :broon:
by Leigh Ping
Please Log in or Create an account to join the conversation.
Time to create page: 0.513 seconds