How to fit a heated windscreen.
For those of us who use our F/TFs all year round, we tend to find misted or frozen windscreens a bit of a pain. Often they can be iced up on the inside as well as the outside. If you have an electrically heated glass rear window, then you will know how handy it is to demist or de-ice the rear window at the touch of a button. Why can’t we have this on the windscreen? Well, you can.
You can’t buy a heated windscreen off the shelf, as they never made them for the F/TF, but there are companies out there that will make them for you. Only catch is, they normally only do them in minimum quantities, such as 10.
Due to a group buy, several of us now have these windscreens.
Today a couple of us had them fitted and I wired one in, this is how we did it.
Obviously, the first thing you need is a heated windscreen.
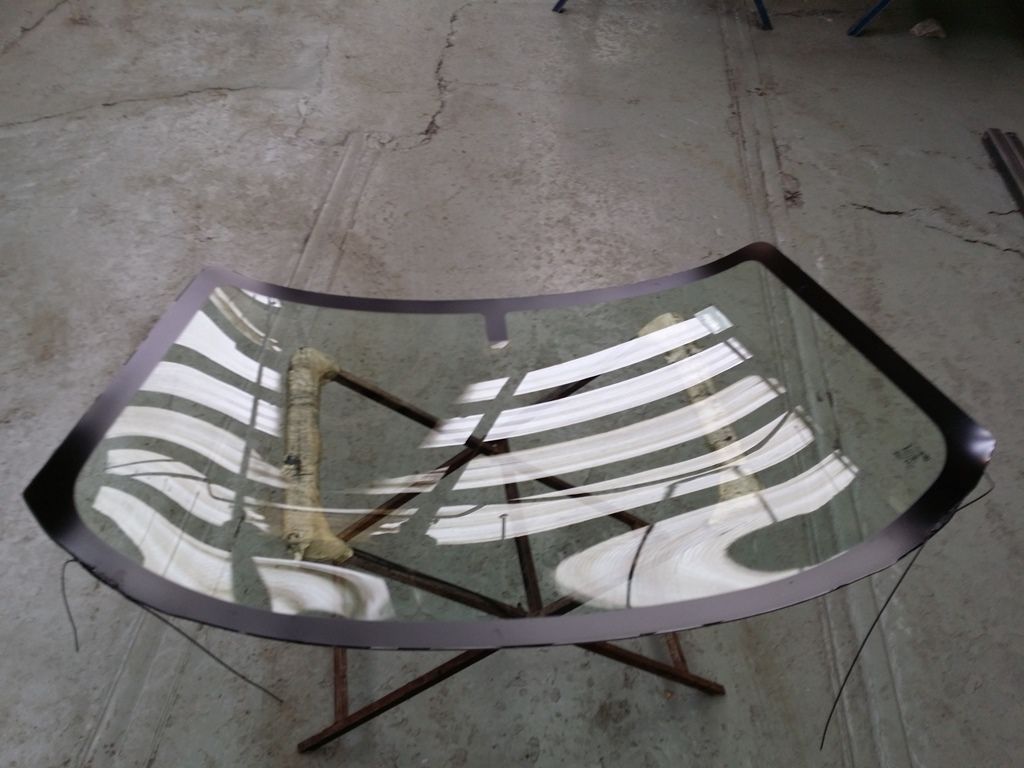
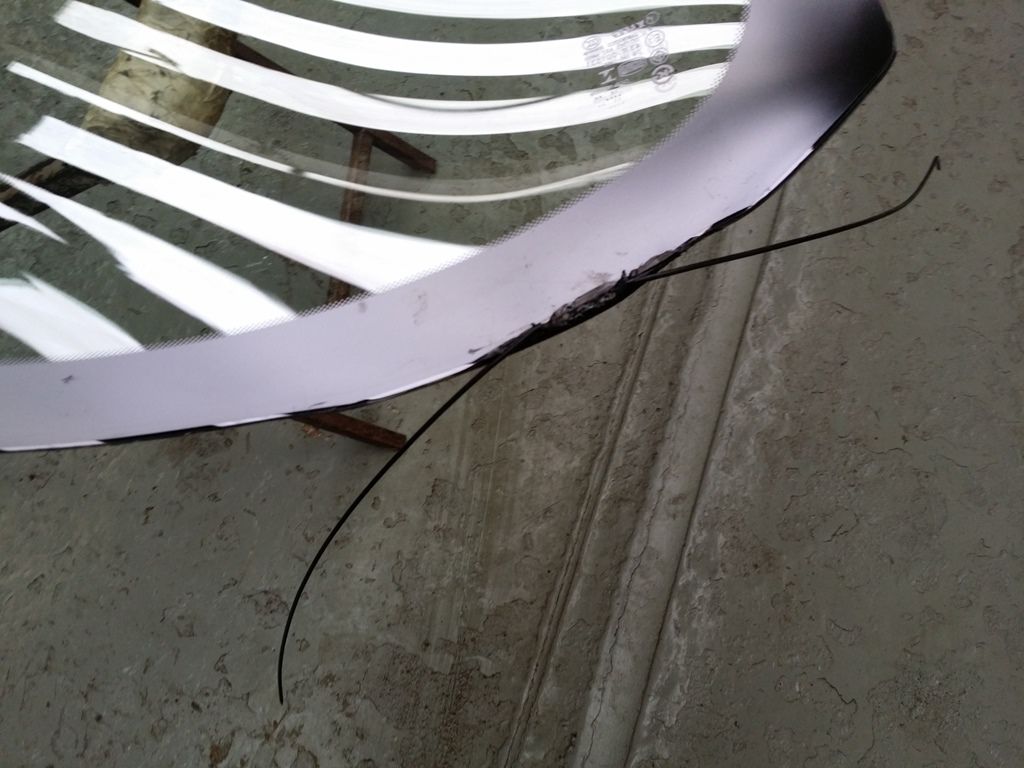
The windscreen has 2 separate elements sandwiched between the layers of glass, which exit out of the base of the windscreen in the form of 2 sets of “tails”.
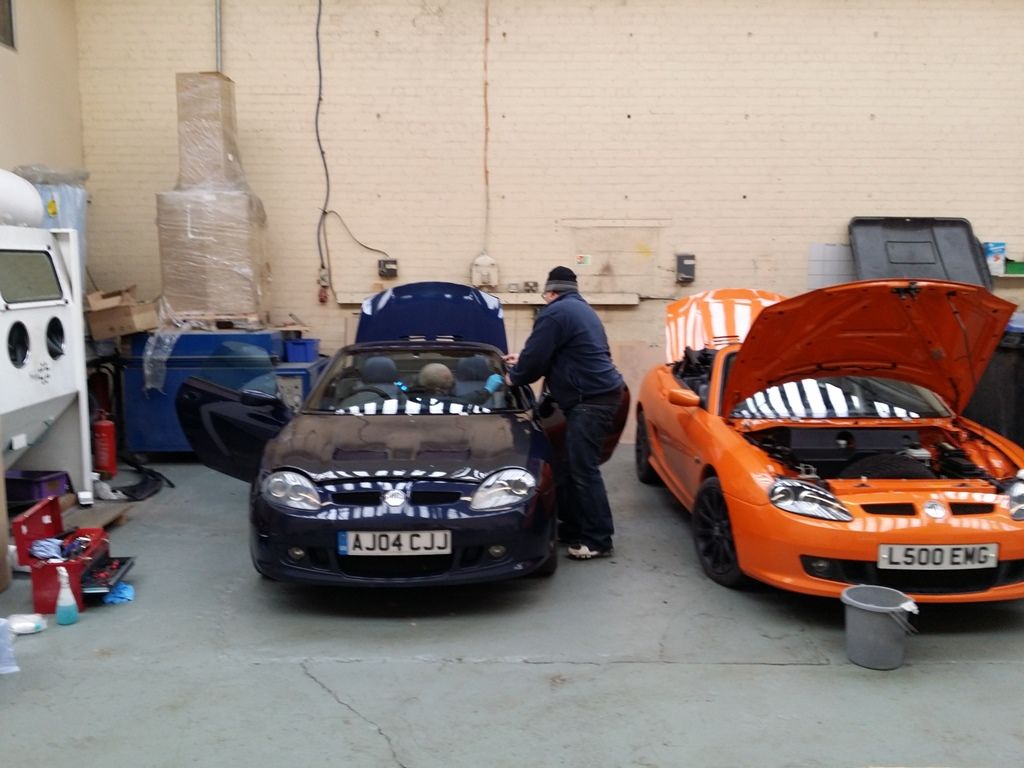
The first thing we did is enrol the help of 2 willing volunteers. Well, actually, it was 2 paid guys from a windscreen fitting company.
This takes care of the actual fitting of the screen to the car. Not a job I would attempt, as it is bonded to the car and forms part of the structure.
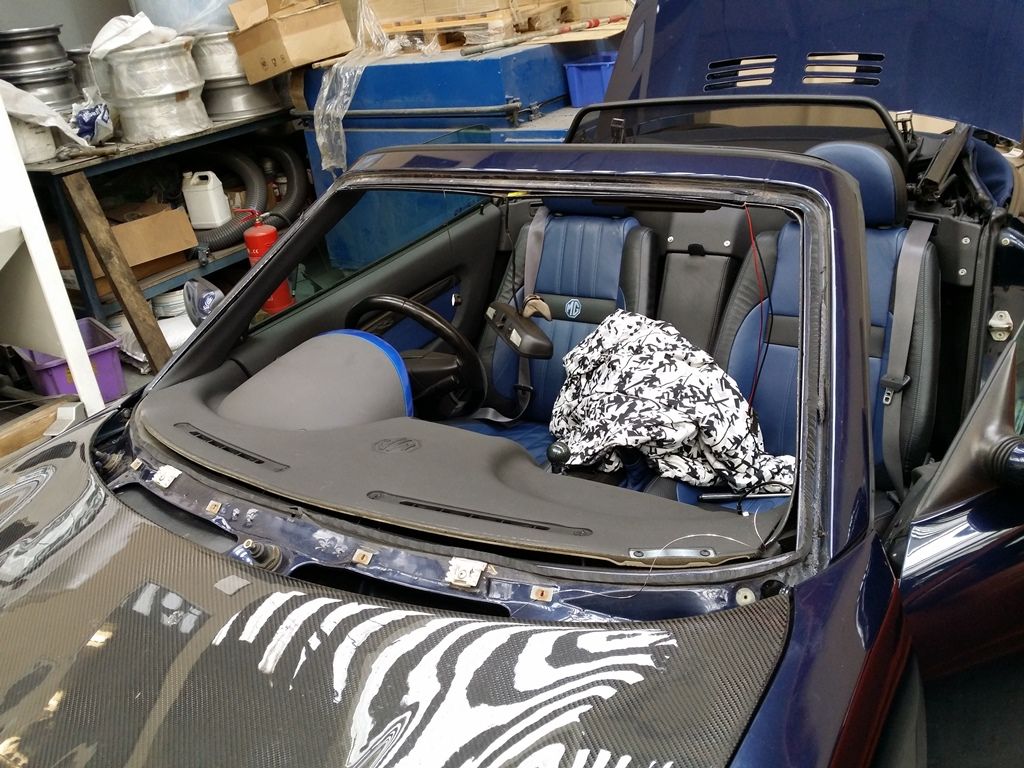
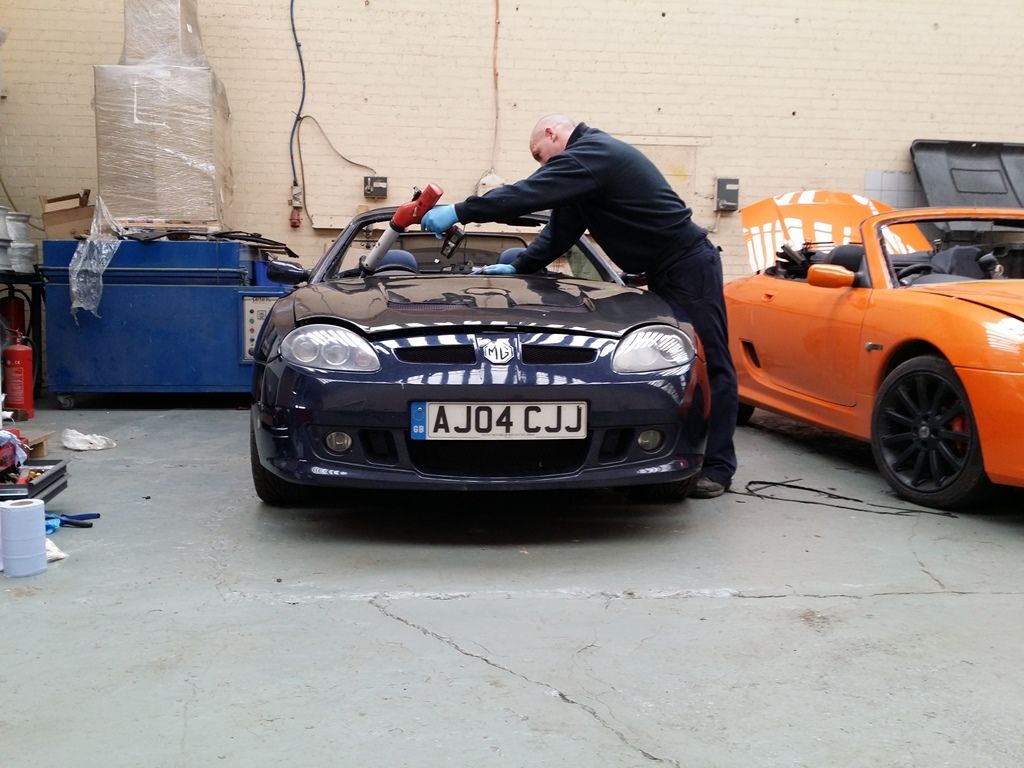
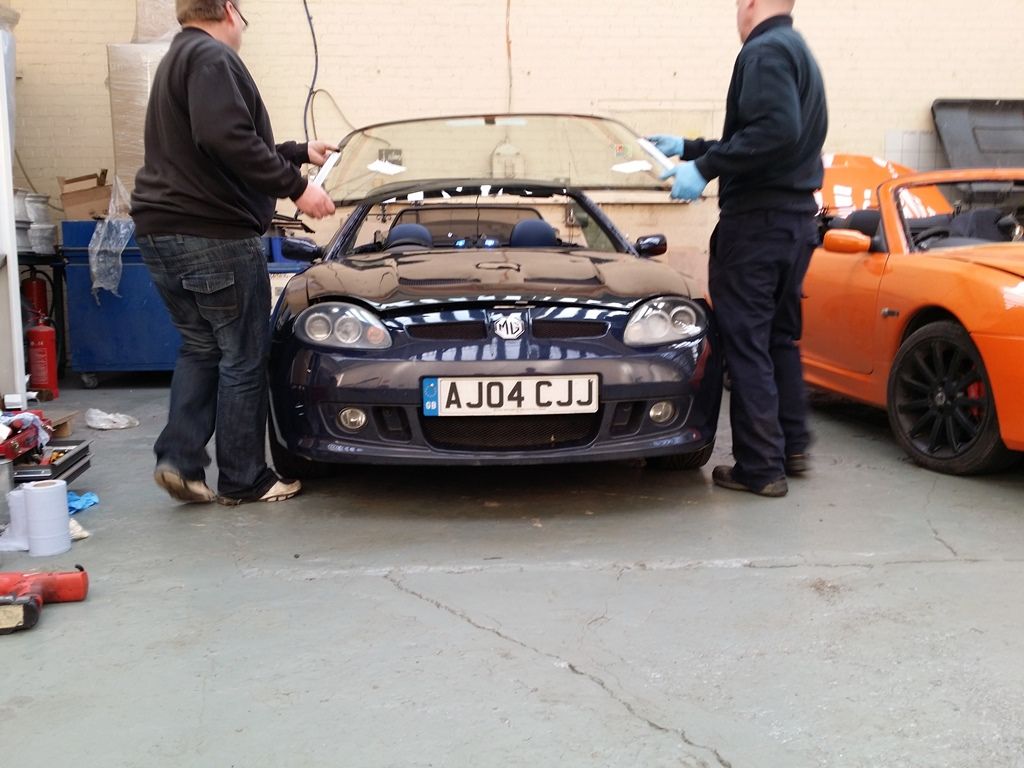
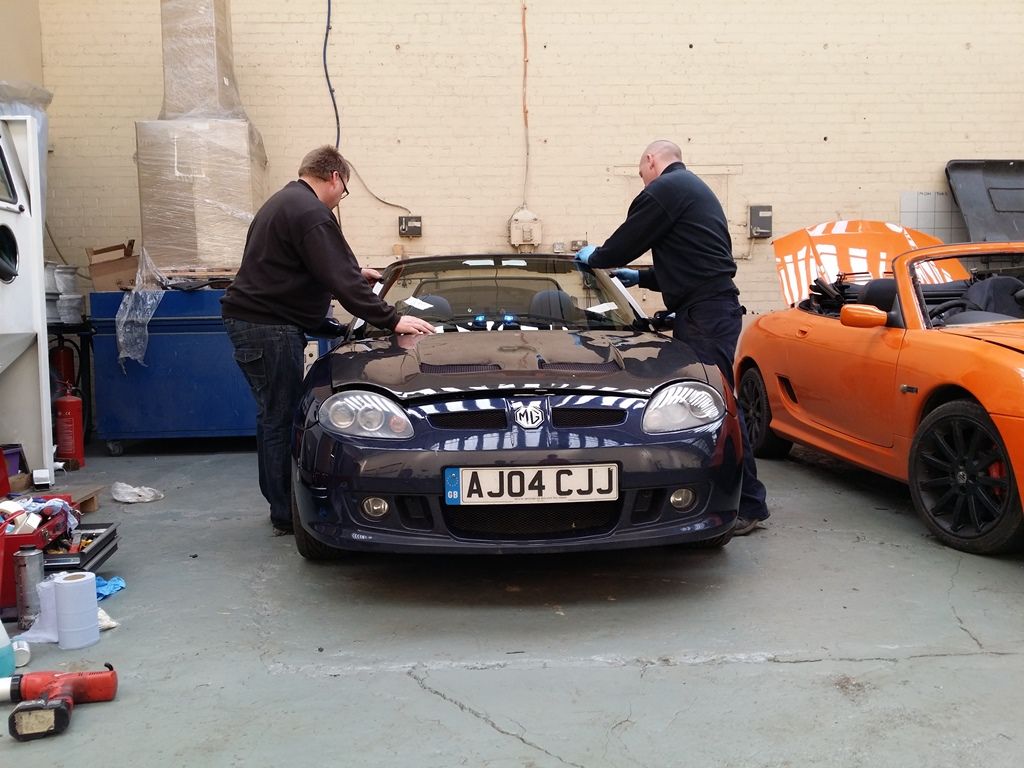
Now that the windscreen is fitted, the fun can start.
Disconnect the negative from the battery. Make sure the alarm is switched off and that you have any relevant codes for radios etc.
First you need to find the electrical load of the windscreen. In this case it is 2 x 12 Volts elements at 17 Amps a piece. That is a total load of 34 Amps.
You have 2 choices of how to connect the elements to the battery. Both choices involve relays to control the large supply current from a small control current.
The tidiest choice is to use one relay to control both elements.
For this, you will need a 40 Amp Fuse holder and fuse, 40 Amp cable and a 40 Amp relay and suitable crimps.
These are examples of what you need, but bear in mind that if you are going for the one relay method you will need 40 Amp cable and fuseholder.
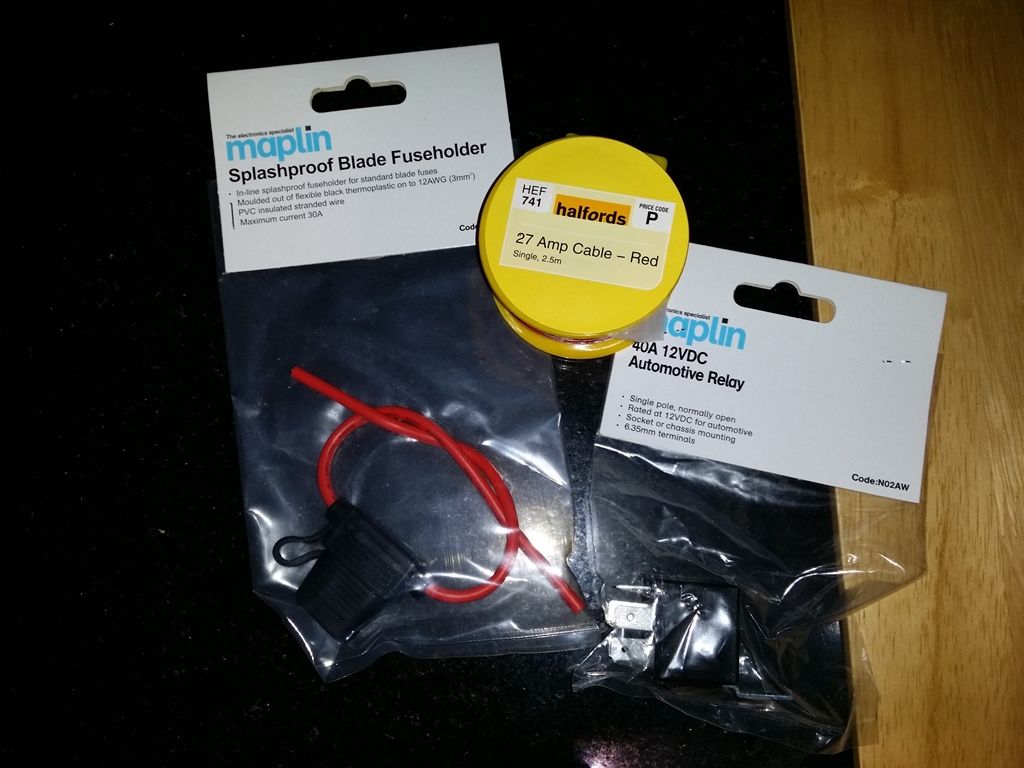
Your aim is to wire it up in accordance with the following diagram.

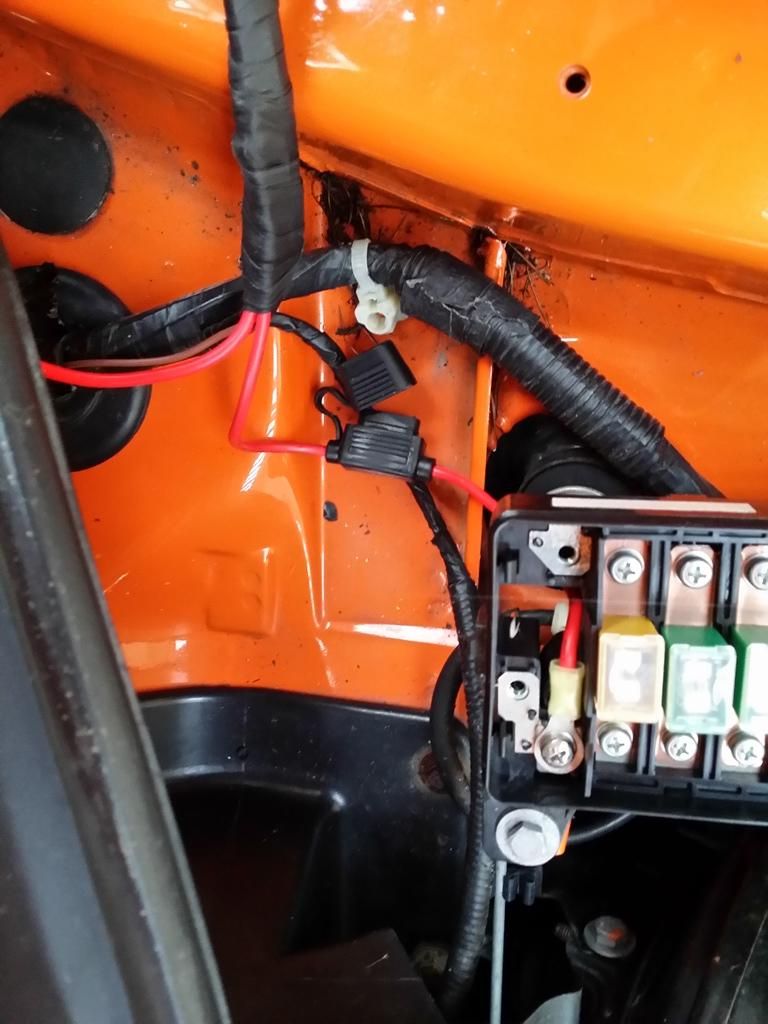
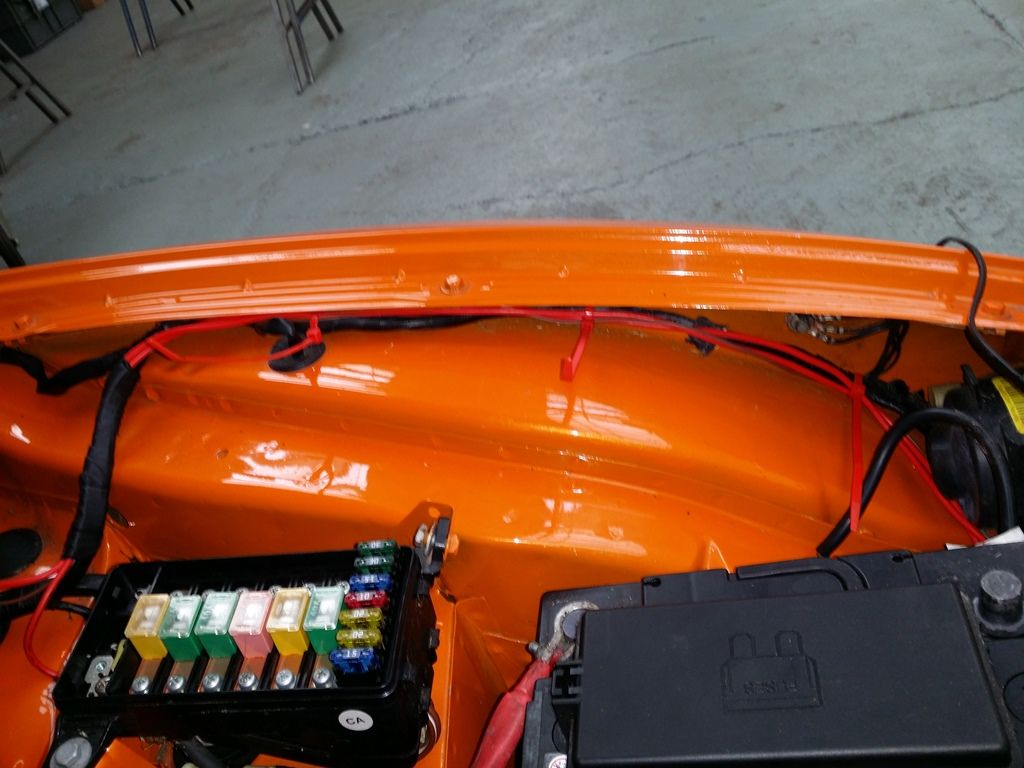
Crimp one end of the fuse holder with a suitable ring connector and connect to a suitable 12V supply capable of delivering 40 Amps. I connected to the bus bar in the under bonnet fuse box.
Chose a site to locate your relay, I chose the battery earth connection to the inner wing. You could drill a hole and use a self-tapping screw to secure the relay anywhere you want, but bear in mind that breaking the painted surface will probably cause a source of rust in the future.
Cut a short length of cable, only needs to be 5 amp or so, crimp a suitable ring terminal to one end and an insulated female spade connector to the other. This will then be the earth connection for your coil. One end pushes onto terminal 85 (or 86 if you want) of the relay, and the ring terminal has the bolt pass through it that secures the relay to the bodywork.
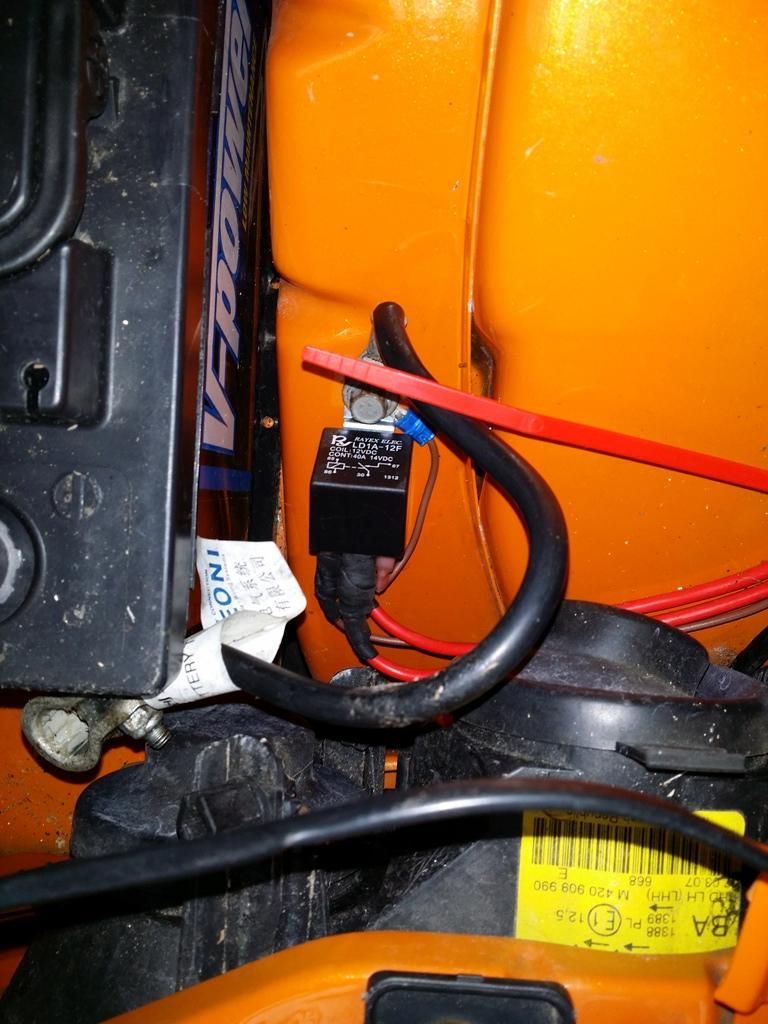
Now cut a length of similar cable, roughly the length of the car. At least enough to reach from the relay to the heated rear screen connector, following the loom. Crimp a suitable insulated female spade crimp onto one end and push onto terminal 86 (or 85 if you connected the earth to 86). Coil this cable up out of the way for the moment.
Now cut sufficient length of 40 Amp cable to reach from the relay to the fuse holder, following the loom. Use a suitable insulated inline crimp (Yellow) to connect this length of cable to the end of the wire coming out of the fuse holder and a suitable (yellow) insulated female spade crimp to the other end, which then pushes onto terminal 30 of the relay.
Cut another length of 40 Amp cable long enough to reach from the relay to one of the tails that comes from the windscreen. Again, crimp a female spade to one end (which pushes onto terminal 87 of the relay) and a yellow insulated crimp at the other end. Try to twist together the end of the tail and the end of the 40 Amp cable, push into one side of the crimp and crimp that end. Cut a short length of 40 Amp cable, and crimp into the other end of this crimp. This short length of cable should be long enough to reach the other tail at the passenger side of the windscreen. Use another yellow inline crimp to connect the 40 Amp cable to the passenger side tail.
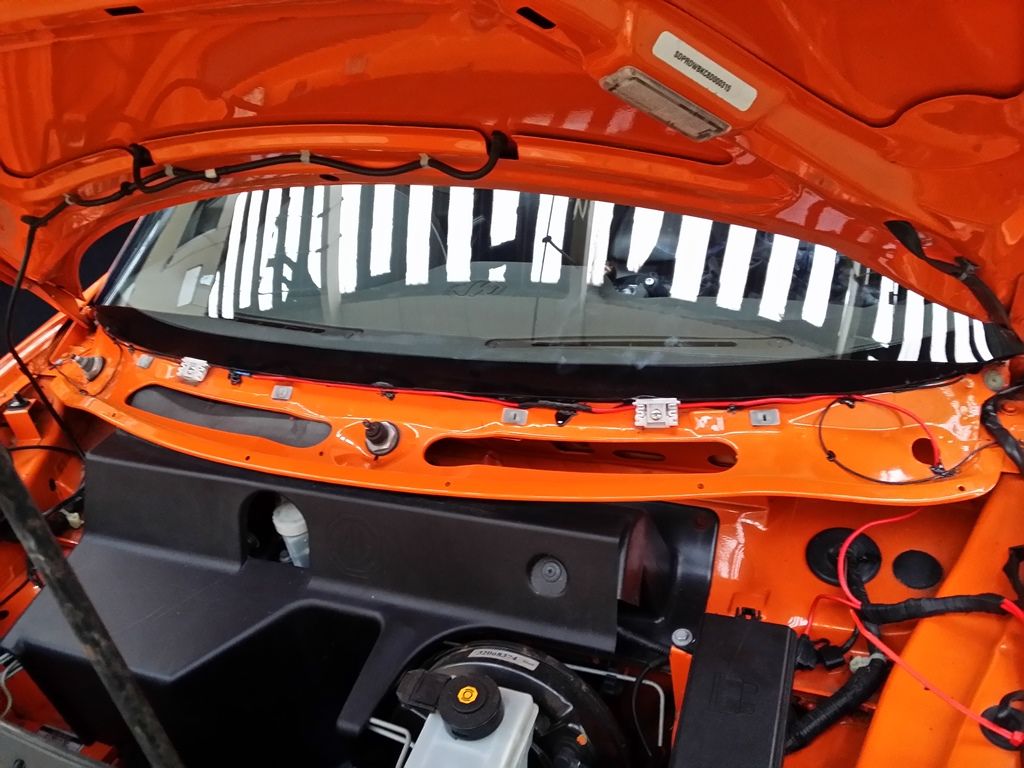
Try and be as neat as possible and ensure that the cables won’t get trapped or damaged when you put the scuttle panel back in place. I used a hot glue gun to hold the cables in place.
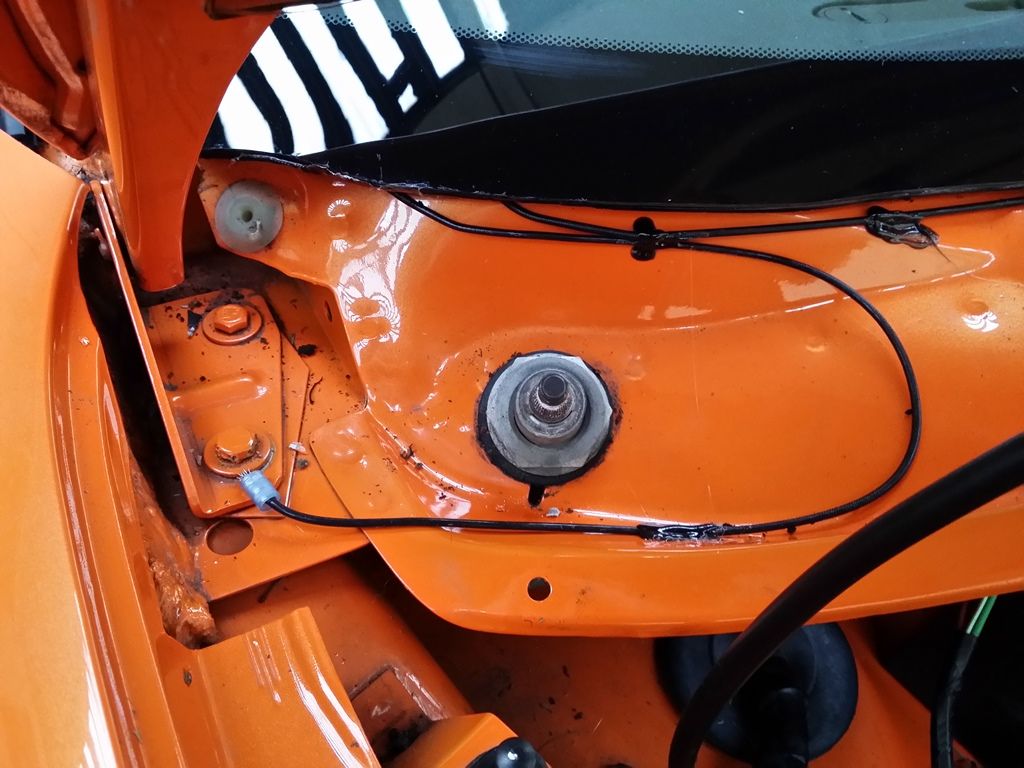
At this point you should still have 2 free tails, one at each end of the windscreen. These are your earth, or chassis connections.
You can choose how to connect to a good earth, but I crimped a suitable ring crimp to each one and bolted each one under the corresponding bonnet hinge.
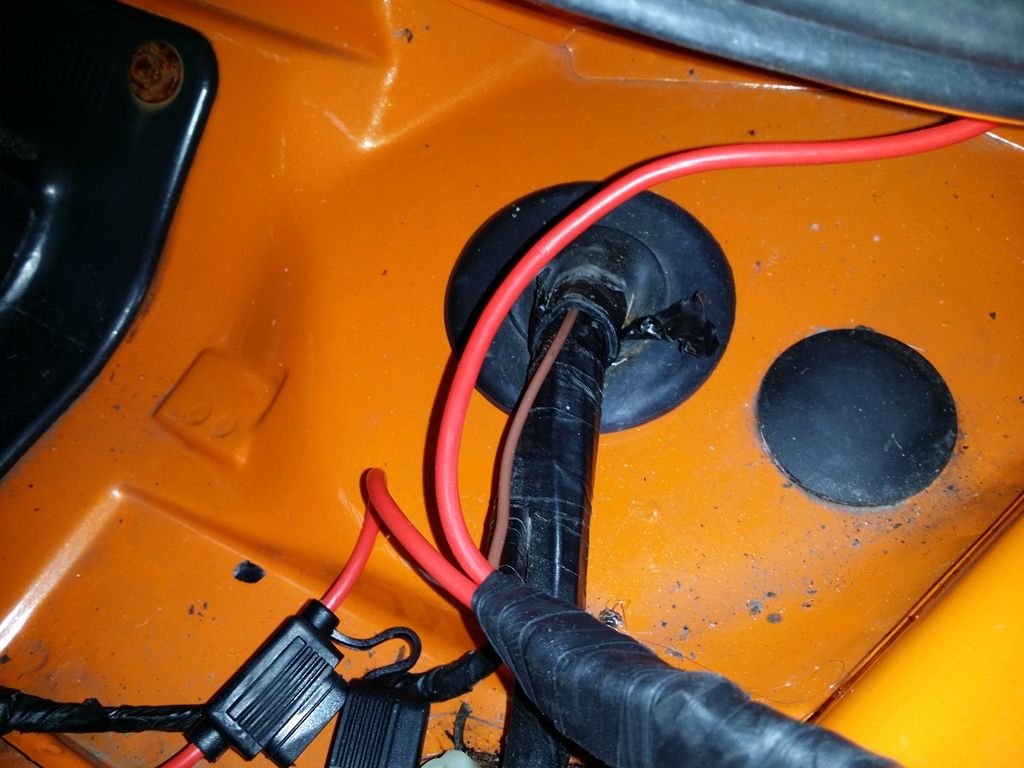
Now you need to feed the long cable from the relay, along the inner wing and find where the main loom goes through the bulkhead. You need to remove some of the loom tape and pull back the inner sheath of the grommet enough to feed the cable through to the inside of the car.
Unless you are a small child with long arms and 4 elbows, you will need to remove the glovebox to find the cable you have just pushed through. There are 2 cross head screws where your legs pass under the bottom of the glovebox, slacken these well off, but do not remove. The other two screws are inside the glovebox, just below the top corners. Remove these screws. Now let the top of the glovebox drop forward and slide the whole glovebox towards you.
There are 4 wires going to the light and the switch. If you disconnect these, make sure which way they connect so you can reconnect them later.
Now rest the glovebox on the floor or remove to give better access.
Pull the side carpet loose to gain access to the loom that runs along the side of the passenger seat.
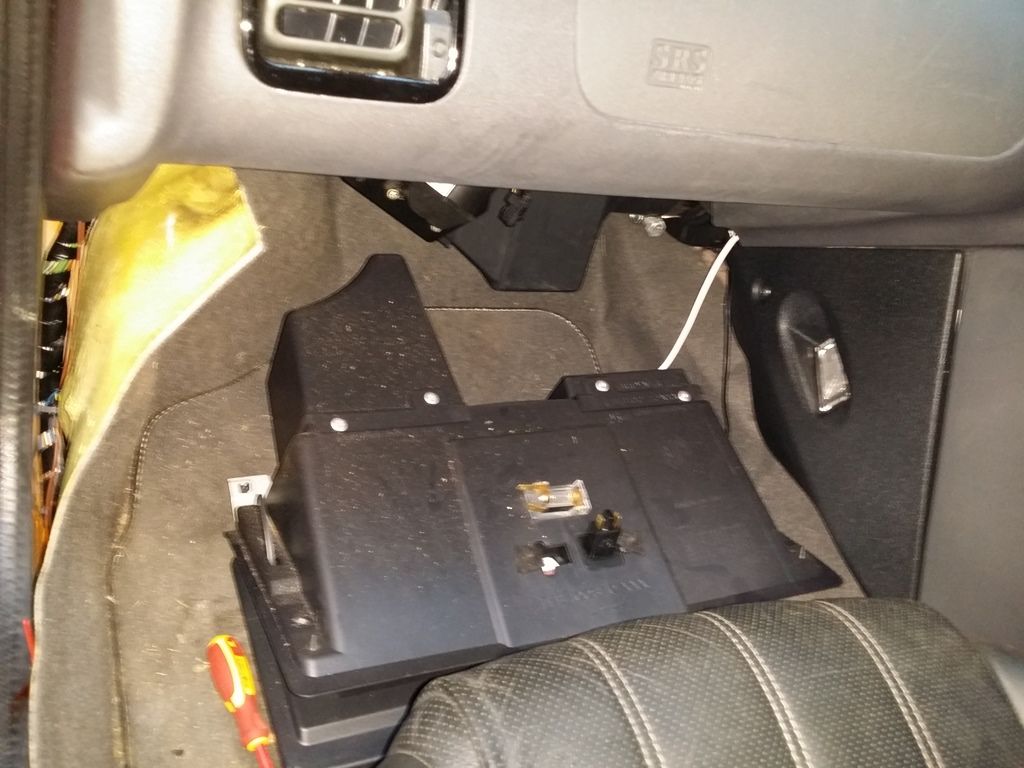
Pull the excess cable through and follow the loom as best you can.
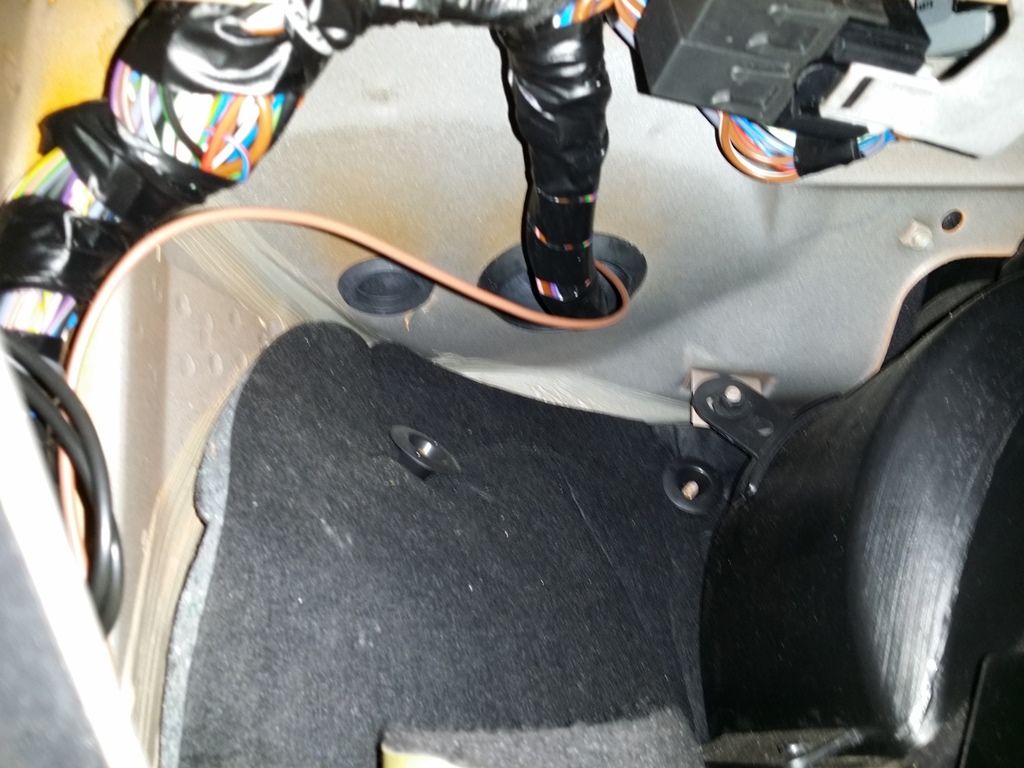
You could unpick the loom here and find the correct supply cable for the rear screen, but it is just as easy to follow the loom back to the actual connector.
Follow the loom along the side of the car, attaching using tywraps or similar to secure the cables.
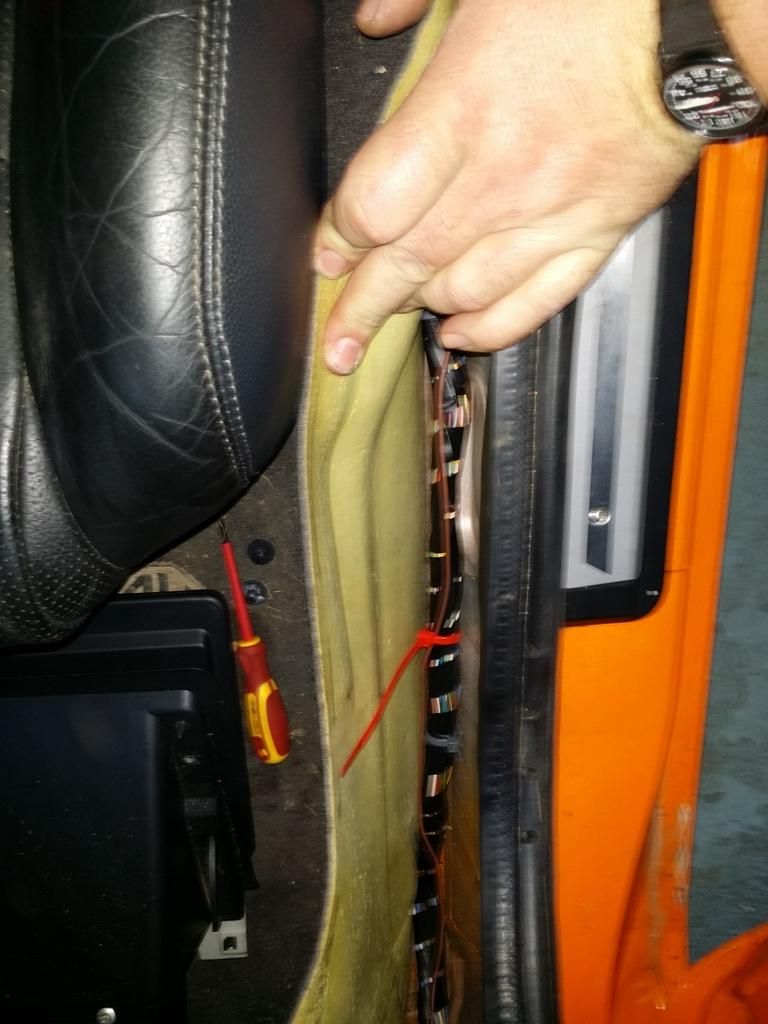
And up the rear bulkhead behind the passenger seat.
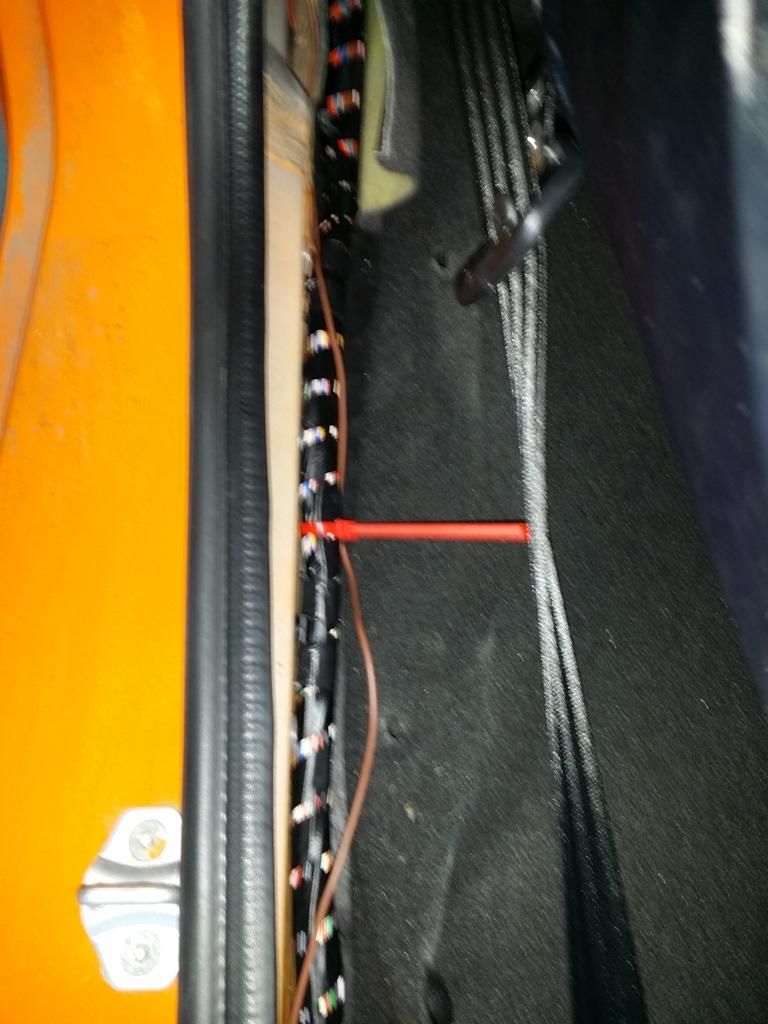
Now, release the rear screen and fold it up, also remove the plastic cover that sits over the sound proofing material. This gives better access to the supply cable and connector for the heated rear screen.
Down the passenger side of the seatbelt spool, you will find the cable and connector. You are looking for the positive switched supply cable. Using a meter I found it to be the green and black cable.
Cut the cable
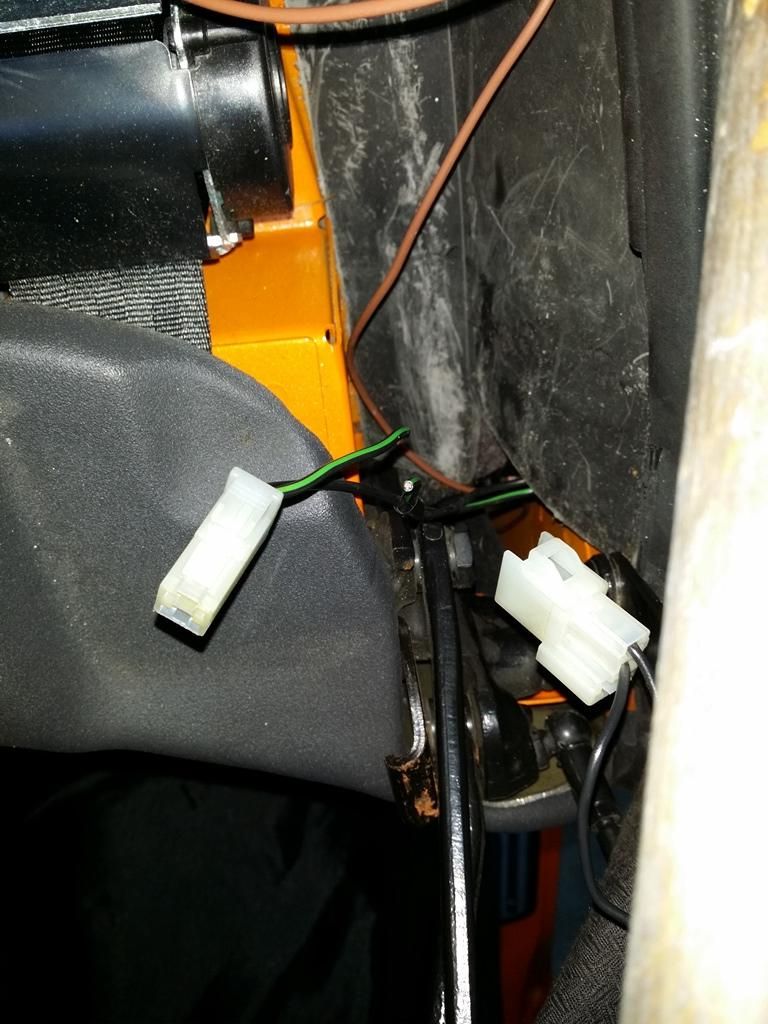
Strip the ends and, using an inline crimp, introduce the new cable and crimp the 3 cables together.
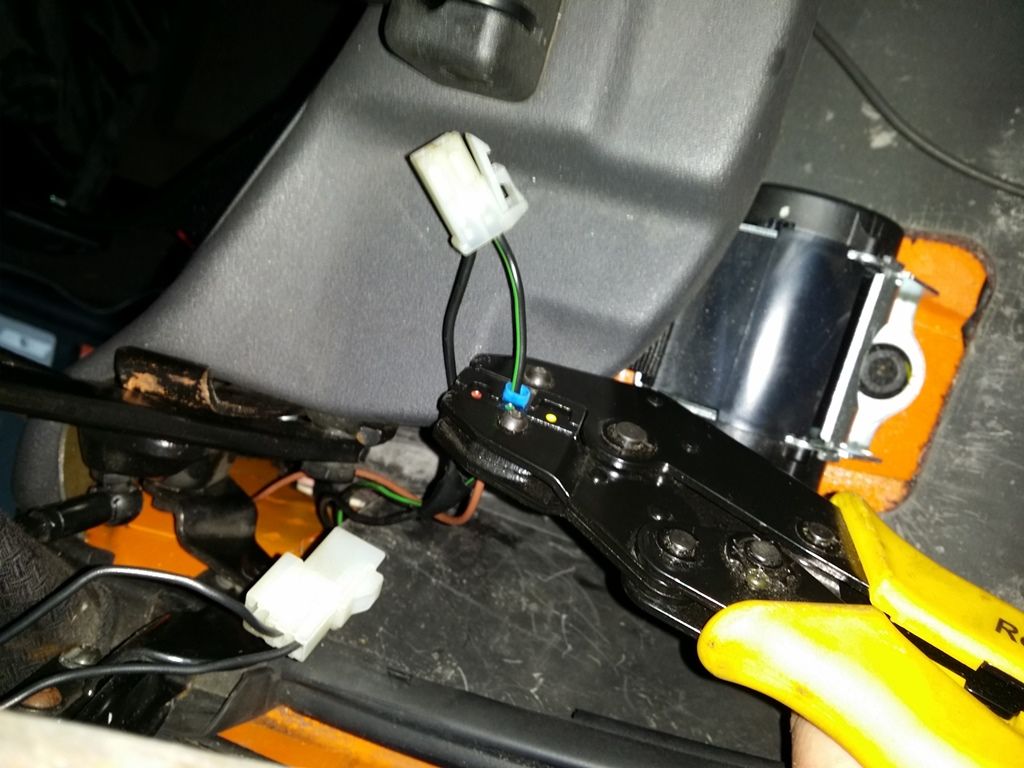
Now, reconnect the heated rear screen, put all the carpets back as they were and the rear screen back down, refit the glovebox (not forgetting to reconnect the cables) and you are ready to test.
Reconnect the battery, start the car and switch the rear heated screen on. When you switch the screen on, you should hear/feel the new relay that you have just installed click as it energises. If you don’t then something isn’t connected properly and you need to do some checks on your connections.
If it does work, switch off the rear screen and now place a 40Amp fuse in the new fuse holder that you have installed.
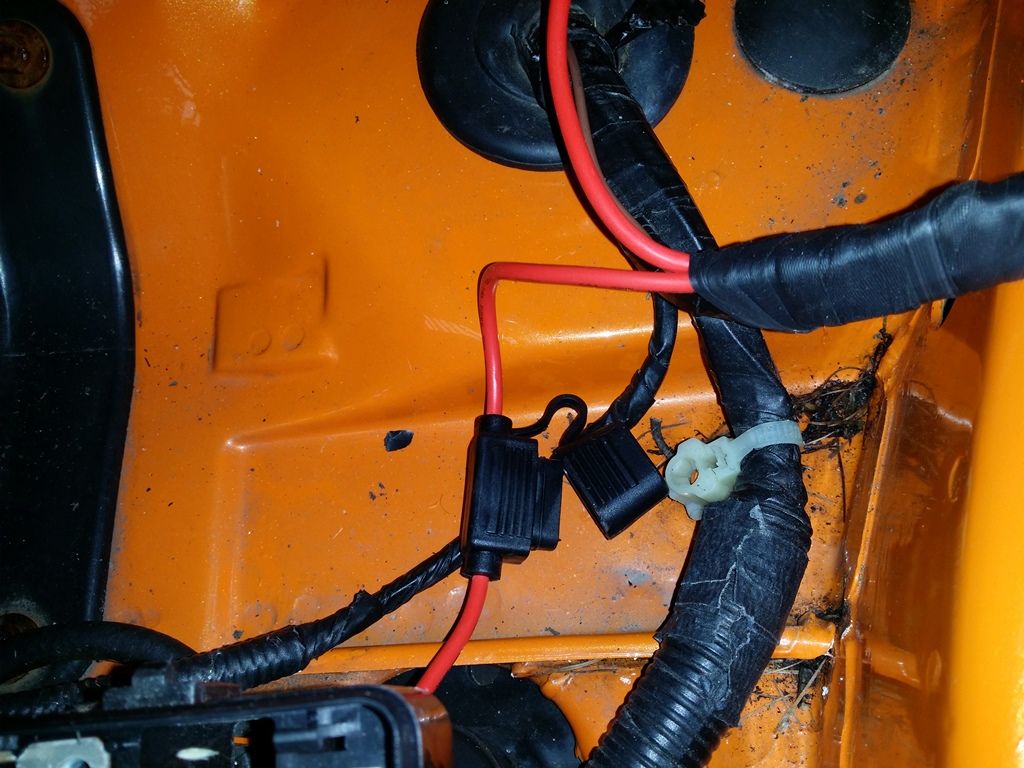
Now, switch on the rear screen again. You will probably hear the engine labour/slow slightly as the extra load is put on the alternator. Leave the windscreen on for a few minutes and you should feel that the screen is warmer. Leave the screen on for a few more minutes and feel the wiring, fuseholder and relay that you have just installed. These SHOULD NOT feel warm. If they are then they are carrying too much current.
Now you can tidy up the cables under the bonnet and refit the scuttle panel and wipers.
This installation assumes that you already have a heated rear screen. If you do not, then you can connect the signal cable from the relay to a positive supply in any way you want to.
My suggestion would be to take an ignition supply, through an on/off switch, to the relay. This is the simplest solution and means that when you switch off the ignition, you cannot leave the heated windscreen on.
My personal installation involves a timer and a momentary push switch. This means that when I press the button it will switch off after 2 minutes. This way I won’t forget to switch it off.
I will add pictures of my installation when I have done it.
Thanks to Mindy for letting me loose on her LE500.
You can’t buy a heated windscreen off the shelf, as they never made them for the F/TF, but there are companies out there that will make them for you. Only catch is, they normally only do them in minimum quantities, such as 10.
Due to a group buy, several of us now have these windscreens.
Today a couple of us had them fitted and I wired one in, this is how we did it.
Obviously, the first thing you need is a heated windscreen.

The windscreen has 2 separate elements sandwiched between the layers of glass, which exit out of the base of the windscreen in the form of 2 sets of “tails”.

The first thing we did is enrol the help of 2 willing volunteers. Well, actually, it was 2 paid guys from a windscreen fitting company.
This takes care of the actual fitting of the screen to the car. Not a job I would attempt, as it is bonded to the car and forms part of the structure.


Now that the windscreen is fitted, the fun can start.
Disconnect the negative from the battery. Make sure the alarm is switched off and that you have any relevant codes for radios etc.
First you need to find the electrical load of the windscreen. In this case it is 2 x 12 Volts elements at 17 Amps a piece. That is a total load of 34 Amps.
You have 2 choices of how to connect the elements to the battery. Both choices involve relays to control the large supply current from a small control current.
The tidiest choice is to use one relay to control both elements.
For this, you will need a 40 Amp Fuse holder and fuse, 40 Amp cable and a 40 Amp relay and suitable crimps.
These are examples of what you need, but bear in mind that if you are going for the one relay method you will need 40 Amp cable and fuseholder.

Your aim is to wire it up in accordance with the following diagram.

Crimp one end of the fuse holder with a suitable ring connector and connect to a suitable 12V supply capable of delivering 40 Amps. I connected to the bus bar in the under bonnet fuse box.

Chose a site to locate your relay, I chose the battery earth connection to the inner wing. You could drill a hole and use a self-tapping screw to secure the relay anywhere you want, but bear in mind that breaking the painted surface will probably cause a source of rust in the future.
Cut a short length of cable, only needs to be 5 amp or so, crimp a suitable ring terminal to one end and an insulated female spade connector to the other. This will then be the earth connection for your coil. One end pushes onto terminal 85 (or 86 if you want) of the relay, and the ring terminal has the bolt pass through it that secures the relay to the bodywork.

Now cut a length of similar cable, roughly the length of the car. At least enough to reach from the relay to the heated rear screen connector, following the loom. Crimp a suitable insulated female spade crimp onto one end and push onto terminal 86 (or 85 if you connected the earth to 86). Coil this cable up out of the way for the moment.
Now cut sufficient length of 40 Amp cable to reach from the relay to the fuse holder, following the loom. Use a suitable insulated inline crimp (Yellow) to connect this length of cable to the end of the wire coming out of the fuse holder and a suitable (yellow) insulated female spade crimp to the other end, which then pushes onto terminal 30 of the relay.
Cut another length of 40 Amp cable long enough to reach from the relay to one of the tails that comes from the windscreen. Again, crimp a female spade to one end (which pushes onto terminal 87 of the relay) and a yellow insulated crimp at the other end. Try to twist together the end of the tail and the end of the 40 Amp cable, push into one side of the crimp and crimp that end. Cut a short length of 40 Amp cable, and crimp into the other end of this crimp. This short length of cable should be long enough to reach the other tail at the passenger side of the windscreen. Use another yellow inline crimp to connect the 40 Amp cable to the passenger side tail.

Try and be as neat as possible and ensure that the cables won’t get trapped or damaged when you put the scuttle panel back in place. I used a hot glue gun to hold the cables in place.
At this point you should still have 2 free tails, one at each end of the windscreen. These are your earth, or chassis connections.
You can choose how to connect to a good earth, but I crimped a suitable ring crimp to each one and bolted each one under the corresponding bonnet hinge.

Now you need to feed the long cable from the relay, along the inner wing and find where the main loom goes through the bulkhead. You need to remove some of the loom tape and pull back the inner sheath of the grommet enough to feed the cable through to the inside of the car.

Unless you are a small child with long arms and 4 elbows, you will need to remove the glovebox to find the cable you have just pushed through. There are 2 cross head screws where your legs pass under the bottom of the glovebox, slacken these well off, but do not remove. The other two screws are inside the glovebox, just below the top corners. Remove these screws. Now let the top of the glovebox drop forward and slide the whole glovebox towards you.
There are 4 wires going to the light and the switch. If you disconnect these, make sure which way they connect so you can reconnect them later.
Now rest the glovebox on the floor or remove to give better access.
Pull the side carpet loose to gain access to the loom that runs along the side of the passenger seat.

Pull the excess cable through and follow the loom as best you can.

You could unpick the loom here and find the correct supply cable for the rear screen, but it is just as easy to follow the loom back to the actual connector.
Follow the loom along the side of the car, attaching using tywraps or similar to secure the cables.

And up the rear bulkhead behind the passenger seat.

Now, release the rear screen and fold it up, also remove the plastic cover that sits over the sound proofing material. This gives better access to the supply cable and connector for the heated rear screen.
Down the passenger side of the seatbelt spool, you will find the cable and connector. You are looking for the positive switched supply cable. Using a meter I found it to be the green and black cable.
Cut the cable

Strip the ends and, using an inline crimp, introduce the new cable and crimp the 3 cables together.

Now, reconnect the heated rear screen, put all the carpets back as they were and the rear screen back down, refit the glovebox (not forgetting to reconnect the cables) and you are ready to test.
Reconnect the battery, start the car and switch the rear heated screen on. When you switch the screen on, you should hear/feel the new relay that you have just installed click as it energises. If you don’t then something isn’t connected properly and you need to do some checks on your connections.
If it does work, switch off the rear screen and now place a 40Amp fuse in the new fuse holder that you have installed.

Now, switch on the rear screen again. You will probably hear the engine labour/slow slightly as the extra load is put on the alternator. Leave the windscreen on for a few minutes and you should feel that the screen is warmer. Leave the screen on for a few more minutes and feel the wiring, fuseholder and relay that you have just installed. These SHOULD NOT feel warm. If they are then they are carrying too much current.
Now you can tidy up the cables under the bonnet and refit the scuttle panel and wipers.

This installation assumes that you already have a heated rear screen. If you do not, then you can connect the signal cable from the relay to a positive supply in any way you want to.
My suggestion would be to take an ignition supply, through an on/off switch, to the relay. This is the simplest solution and means that when you switch off the ignition, you cannot leave the heated windscreen on.
My personal installation involves a timer and a momentary push switch. This means that when I press the button it will switch off after 2 minutes. This way I won’t forget to switch it off.
I will add pictures of my installation when I have done it.
Thanks to Mindy for letting me loose on her LE500.
by cjj
Please Log in or Create an account to join the conversation.
Hi Clive, great how-to once again! I had a heated windscreen at our huge family van VW Sharan. Was fine and comfortable in the winter mornings, but at night the windscreen seemed always be dusted and scratched by the little wires in the screen. It was terrible! So I'd better like to clean the screen by myself in the future. Never more a heated windscreen! :nonod:
What about yours? Are there metallic wires inside of the screen, too?
Christof
What about yours? Are there metallic wires inside of the screen, too?
Christof
by c.steffan
Please Log in or Create an account to join the conversation.
There will always be filaments there, but these are very fine. I went to London and back for the FRL run (about 750 miles in a couple of days) through day, night, rain etc, and I forgot about it until Anne reminded me that we had a heated screen fitted.
This is my 3rd car with it now. The Focus ST had it and you hardly ever noticed it to be fair.
This is my 3rd car with it now. The Focus ST had it and you hardly ever noticed it to be fair.
by cjj
Please Log in or Create an account to join the conversation.
- talkingcars
-
 Offline
- Moderator
-

- Posts: 6876
- Thanks: 1296
Replied by talkingcars on topic How to fit a heated windscreen.
Posted 9 years 10 months ago #156543
Nice one Clive.
We did 240 miles for FRL and Mrs TC didn't even notice I'd had the heated screen installed.
We did 240 miles for FRL and Mrs TC didn't even notice I'd had the heated screen installed.
Home to black Alfa Romeo 159 3.2 V6 Q4 ,green MGF VVC and red MG Maestro T16.
MG - the friendly marque.
by talkingcars
Please Log in or Create an account to join the conversation.
Time to create page: 0.542 seconds
