75th Anniversary
Anyway the headlight arrived and is in really nice clean condition. The outer casing was very grubby so a good scrub up and a touch of glue where the rubber seal/filler to the bumper was coming loose .......................................... Bostick fixed that
Please Log in or Create an account to join the conversation.
- The driving dutchman
-
 Offline
- Time served MGer
-

- Posts: 331
- Thanks: 88
Please Log in or Create an account to join the conversation.
evostick fixed that
Correction upon rechecking it was in fact a tube of Bostick :oops: a similiar type of cement to evostik. Only time will tell how well it lasts.
Please Log in or Create an account to join the conversation.
Please Log in or Create an account to join the conversation.
tjdonc wrote: As I am missing one bottom and both headlight rubbers from other side does anyone know where they can be obtained from ?
Bottom rubber??? Please explain.
I have two headlight rubber strips that came off misted headlights. I do not know if they are obtainable new.
Where abouts are you?
Please Log in or Create an account to join the conversation.
Today I can at least fit the rear calipers as the new order from Rimmers arrived:-
Expansion cap
Thermostat O rings
Bleed nipples
Nipple caps
Caliper carrier bolts and spring washers
And 4 new door handle bolts.
Once the calipers are fitted can of course connect the new Yellow HEL rear braided hoses witht eh new S/S banjo bolts. Then chack and clean the other brake lines as required before filling and bleeding the system. Now if I can source soem shocks suitable for the rear we will be getting somewhere.
Please Log in or Create an account to join the conversation.
Please Log in or Create an account to join the conversation.
These will fit in a jiffy bag to post no problem what do you think?
Please Log in or Create an account to join the conversation.
Please Log in or Create an account to join the conversation.
Removed the old temp caliper mounting bolts and fitted the new upgraded slightly longer ones then fitted wheels initially just to the rear and using one of those converted oil gun hydragas pumps began filling the system. It takes time using this but it's all we have so that's the way it has to be.
So that's the way it was done and after much pumping and many refills of the cylinder we had pressure showing so the rear was lowered onto it's wheels so it was then possible to tell if it was lifting or not. Well it lifted and once we had positive proof from gaps between tyres and wheel arch the front wheels were fitted and the front lowered.
Due to the height she was at it took some fiddling to get her down as she was up way beyond the jacks reach height wise for the sub frame swap but she is now down and on her wheels. The first thing noticed was how dreadful the gear change is ....................................... talk about sloppy. This has got the rectified so being a Mk1 interior it means the centre console has to come out. Luckily it needs to come out for the failed wood trim to be replaced so at least we can "Kill two birds with one stone" and do both jobs at the same time.
The cable end gaiters have perished ....................... I am sure that will shock you to hear!!!!!, so am thinking that a Satur upgraded bell crank might not be a bad idea just need to see if we an find some money down the back of the sofa or under the bed first!! Yep the budget has run out :crying:
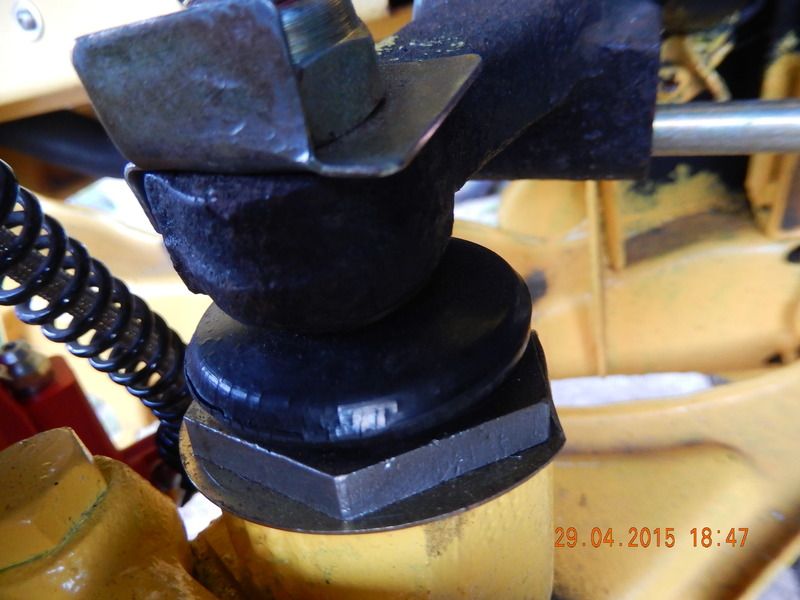
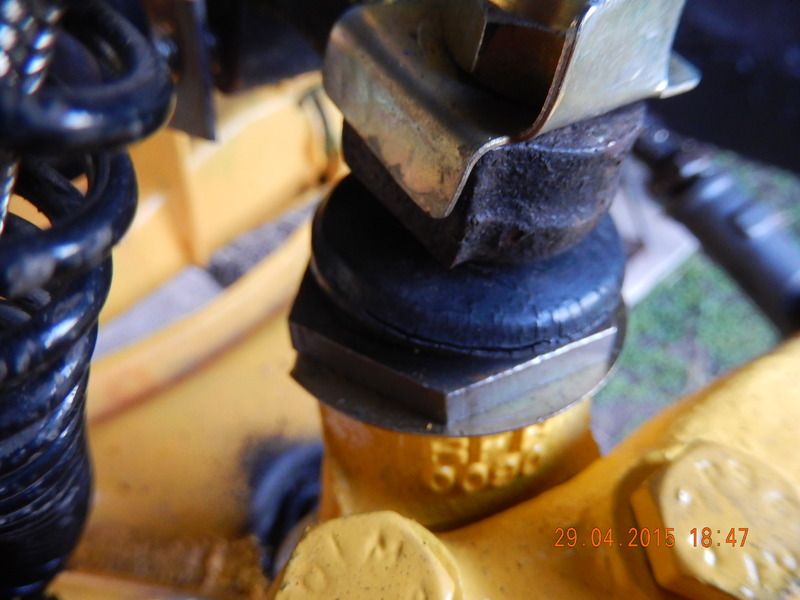
Annoyingly I spotted this when fitting the wheels:-


Brand new ball joints and the rubber boot is persihing before it's even been on the road!! Will take this up with the supplier but am really not pleased with the extra work this now entails :cus: as once can imagine. Rather than remove the new joints am wondering if we can just replace the faulty rubber boot?
Anyway she has spent the night sitting on her wheels and has been rolled backwards a bit and then forwards a bit so this morning the ride height can be looked at and more fluid pumped in as I an certain that yesterdays efforts were not enough. However it now means we can get her booked in for the sill repair as she is movable now
Please Log in or Create an account to join the conversation.
- The driving dutchman
-
 Offline
- Time served MGer
-

- Posts: 331
- Thanks: 88
Someone got some good advice ?
Please Log in or Create an account to join the conversation.
The driving dutchman wrote: As both Bostik and Evostick are brandnames I still haven't got a 'glue' :lol: which type of glue you have used for the head lightrubbers.
Someone got some good advice ?
both are contact glues. You may know the 'Pattex' brand?
Please Log in or Create an account to join the conversation.

