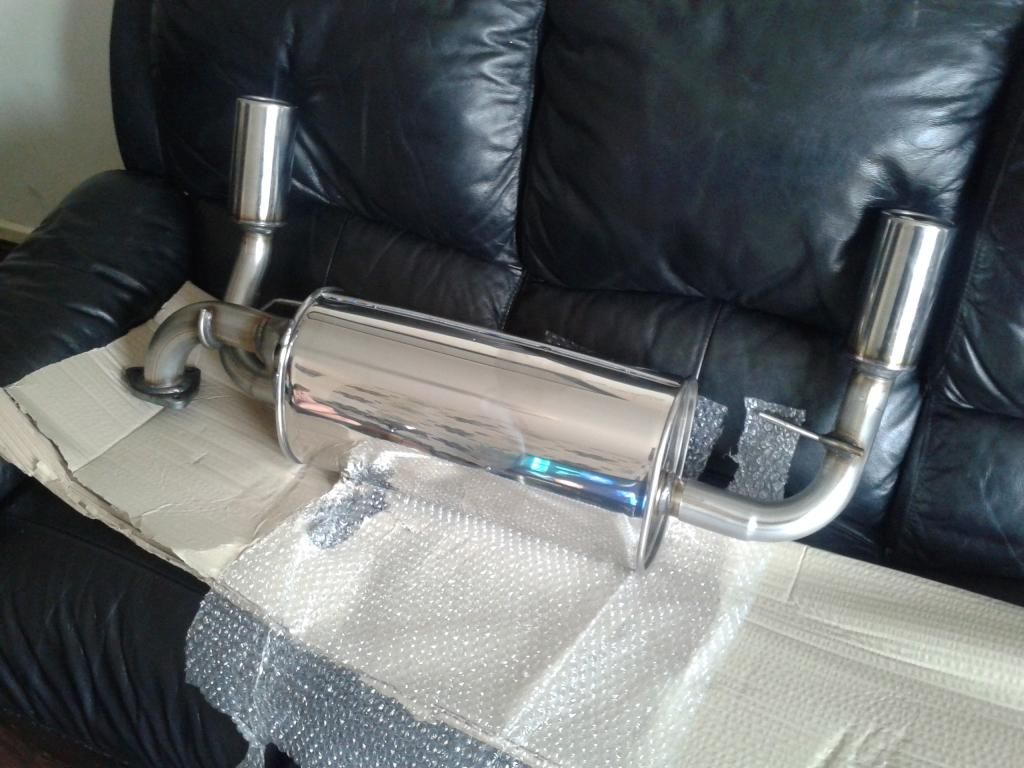
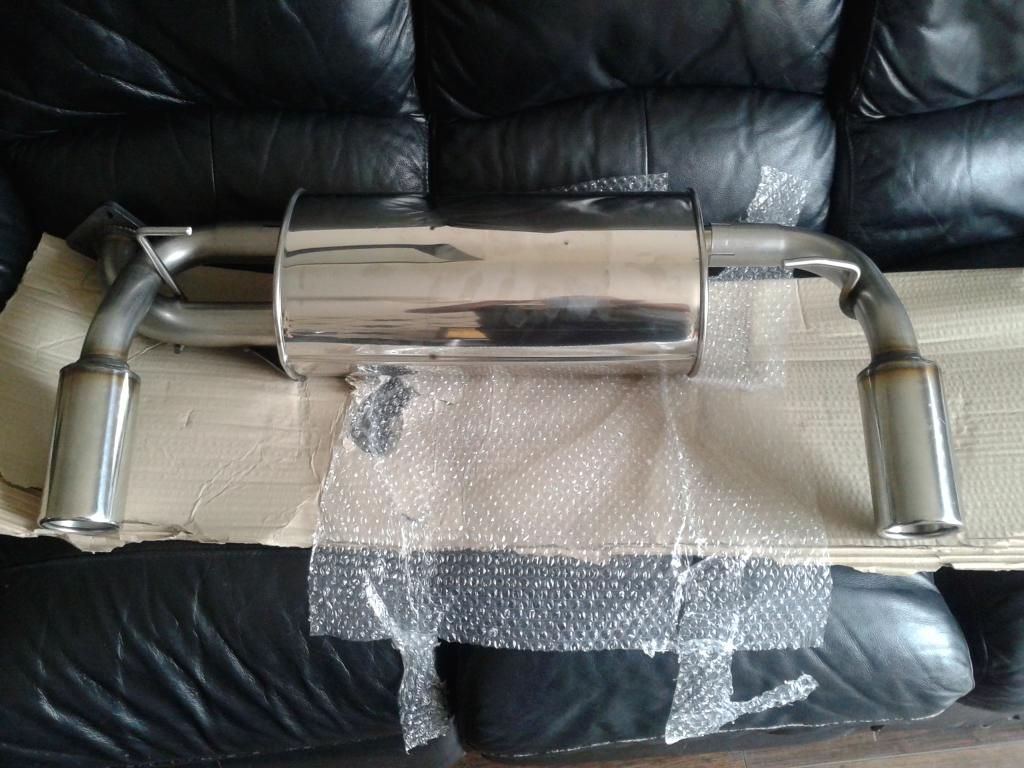
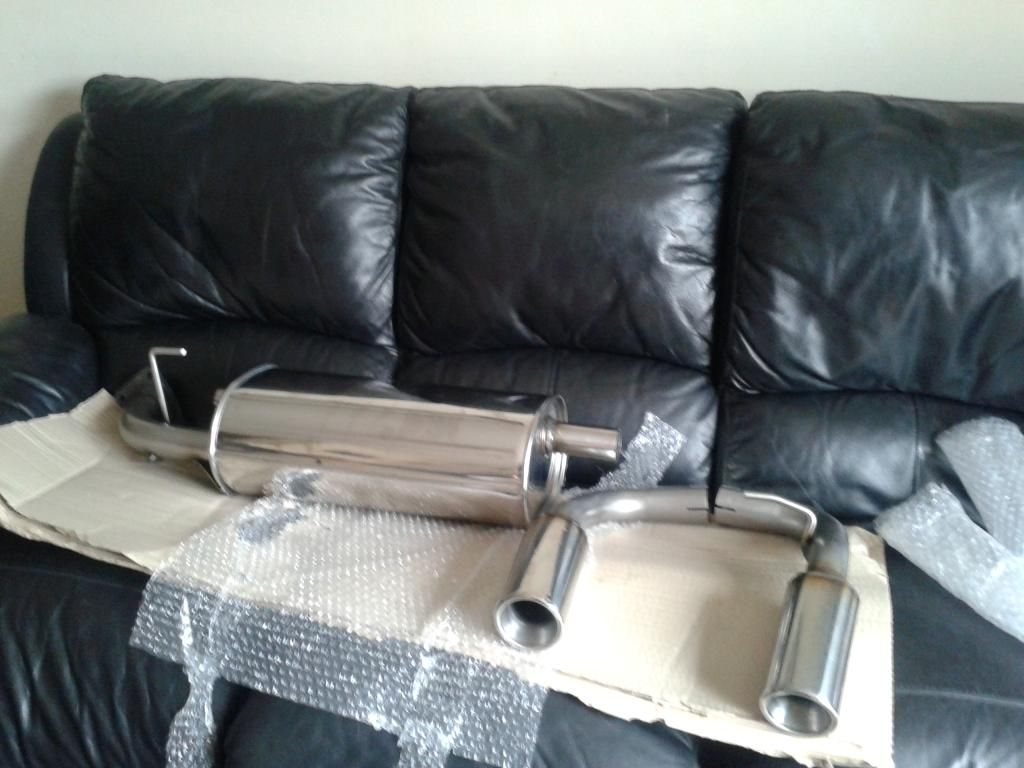
Cybox stainless steel exhaust
What I didn't realise is that the box and tailpipes are not welded together ,not quite sure why but m guessing it's to aid lining them up during fitment ,instead they slide on to silencer and get clamped into place once fully aligned , personally I think it's a good idea.
Anyway hoping to get it fitted on the weekend and see how it fits and sounds and I'll report back hopefully with a sound clip or youtube video.
In the mean time here's a few pictures of it


Please Log in or Create an account to join the conversation.
- David Aiketgate
-
 Offline
- David
-

- mgf mk2 freestyle mpi 16" wheels, in Anthracite.
- Posts: 20331
- Thanks: 4437
Replied by David Aiketgate on topic Cybox stainless steel exhaust
Posted 10 years 2 months ago #149230David
:shrug:
Please Log in or Create an account to join the conversation.
- talkingcars
-
 Offline
- Moderator
-

- Posts: 6876
- Thanks: 1296
Home to black Alfa Romeo 159 3.2 V6 Q4 ,green MGF VVC and red MG Maestro T16.
MG - the friendly marque.
Please Log in or Create an account to join the conversation.
Robin ![]()
Please Log in or Create an account to join the conversation.
Is there a "how to" guide on removing the backbox ?? Ive done a search but nuthin has come up . . .
Please Log in or Create an account to join the conversation.
http://www.the-t-bar.com/forum/22-cjjs-guides/380-exhaust-backbox-how-to-change
They can be difficult to remove and there's a great thread of Whiz's tribulations on removing his but I can't put my finger on it just at the moment. Probably best to read Clive's first anyway as it may put you off!
Best advice is to use cat saver nuts when you reassemble it to allow easier removal in future.
Good luck!
Robin ![]()
Please Log in or Create an account to join the conversation.
One other thing, when I did mine I found it easier to take the back box and cat off together, then separate the cat and back box.
Robin ![]()
Please Log in or Create an account to join the conversation.
- John and Sue
-
 Offline
- Master MGer
-

- 06 TF 135. One of the last from Longbridge.
- Posts: 4732
- Thanks: 1138
cairnsys wrote: Found Whiz's story. It's a great read :yesnod:
One other thing, when I did mine I found it easier to take the back box and cat off together, then separate the cat and back box.
I was part of the Great Whiz Exhaust Story.....
Several hours of my life I'll never get back....
It will be all right in the end. If it isn't all right yet, then it is not yet the end..
Please Log in or Create an account to join the conversation.
It dont seem to bad 3 flange bolts , silencer strap and 2 hangers to slide off
Guessing ill find out shortly
Please Log in or Create an account to join the conversation.
"Elsie" now has a complete new system except for the manifold.
Please Log in or Create an account to join the conversation.
- John and Sue
-
 Offline
- Master MGer
-

- 06 TF 135. One of the last from Longbridge.
- Posts: 4732
- Thanks: 1138
CR41G wrote: Thanks for the link very helpfull !!
It dont seem to bad 3 flange bolts , silencer strap and 2 hangers to slide off
Guessing ill find out shortly
Angle grinder at the ready! :yesnod:
It will be all right in the end. If it isn't all right yet, then it is not yet the end..
Please Log in or Create an account to join the conversation.
What an arse hole that was !!!
The bolts holding the backbox to the cat wasn't actually bolts any more rather just lumps of rust ..if it wasn't for actually knowing it was bolted I would have never had guessed!!
Had to grind down both sides of all 3 bolts and it still wouldn't split due to the rust fusing it all together , had to use a cutting disc and using the gasket as a guide cut through the middle of the whole thing to separate the two.
Off side hanger bolts where soaked in plus gas but just sheared off as soon as the ratchet was turned so made life easier so at this point old tatty rotted out backbox was out (weighs a ton)
I didn't remove rear bumper ,cat or heat shields at any point during the removal or fitment.
Any way I then tried to drift out what was left of the bolts on the cat . . . Didn't work so I centre punched them and drilled pilot holes with a 2.5mm bit gradually getting bigger until all of the bolt had finally been removed from the holes.
Finally it was all ready to fit the new backbox !!!
Thank god it was so easy to fit , I used exhaust sealer on the cat and stuck the new gasket to it ,slid the backbox on to the near side hanger and propped the off side up on an axel stand , and bolted up the box to the cat .
The off side hanger was welded to the removable tailpipe so run some exhaust sealer round the backbox port , slid on the pipe set the finisher where I thought it looked good in the bumper and tightened up the clamp.
Near side tail pipe again run some exhaust sealer round the backbox port and simply just slid it on got it looking level with the off side and tightened up the clamp .... Done!!
Fitting of new box took around 20 - 30 mins mainly gettin tail pipes where I wanted them to be,removal of old box took around 3 and a half hours!!
All done on my drive with the car on axel stands and to be fair the cars rear tyres where only around a cm off the deck and I found it quite easy to work on even with the grinder .
Pictures to follow
Please Log in or Create an account to join the conversation.

