Clutch - How to change.
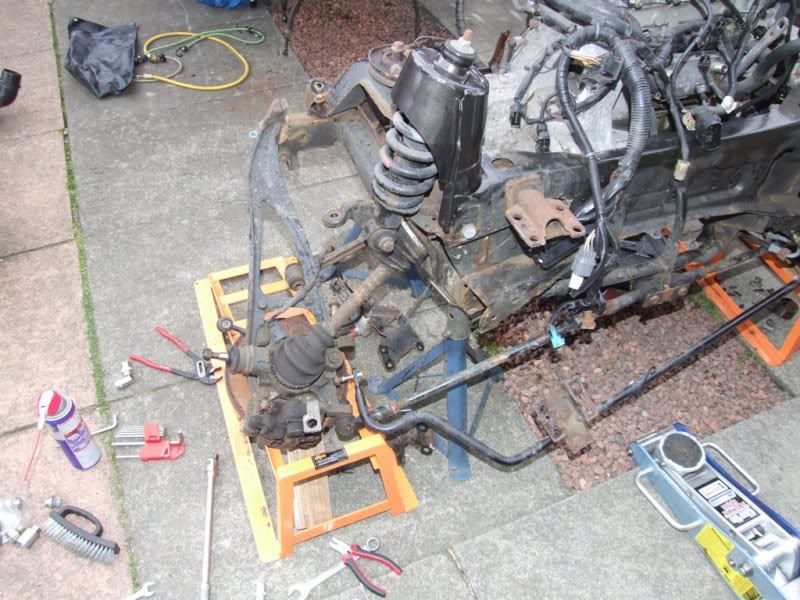
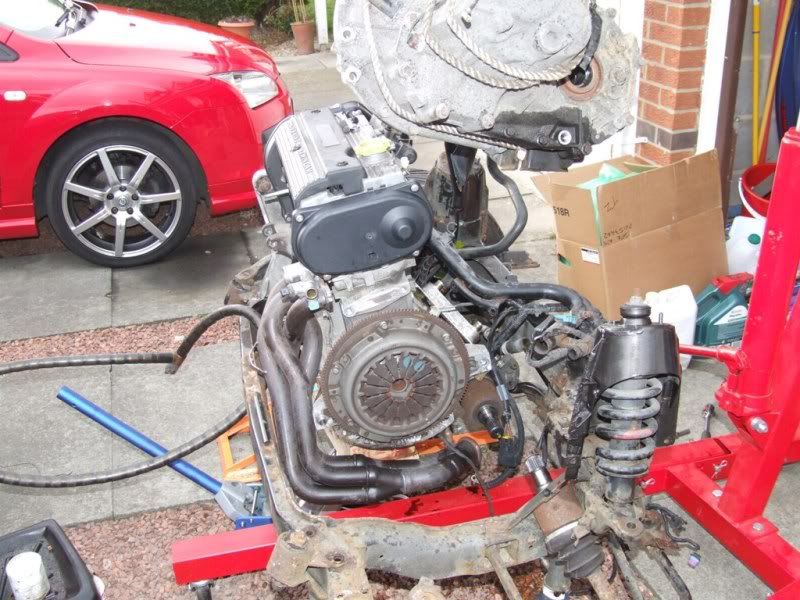
Bear in mind that this was done with my subframe removed.
I would probably remove the engine/subframe whenever changing the clutch, but you can do it in situ and there are how tos on this, which basically involve moving the gearbox in situ to give yourself room. It is a very fiddly and frustrating process by all accounts.
If you wish to remove the engine, then there is a how to on that here http://www.the-t-bar.org/showthread.php?t=84
Also, I would recommend fitting a modified clutch release lever while you are at it (to be added)
So, assuming you have removed the engine, the first thing you need to do is remove the starter motor
Remove the connections and the 2 15mm bolts holding the starter motor to the bell housing
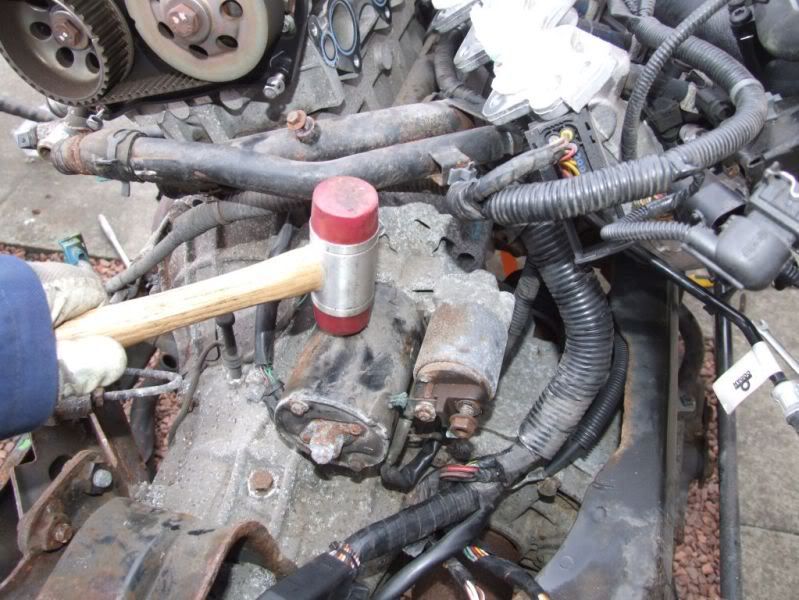
The starter motor is a tight fit so may not come out straight away. You may need to tap around the starter body with a hide faced mallet to loosen it.
To remove the gearbox, you also need to slide the drive shafts out of the gearbox. This means that the gearbox oil will go everywhere. So, next, you need to drain the gearbox.
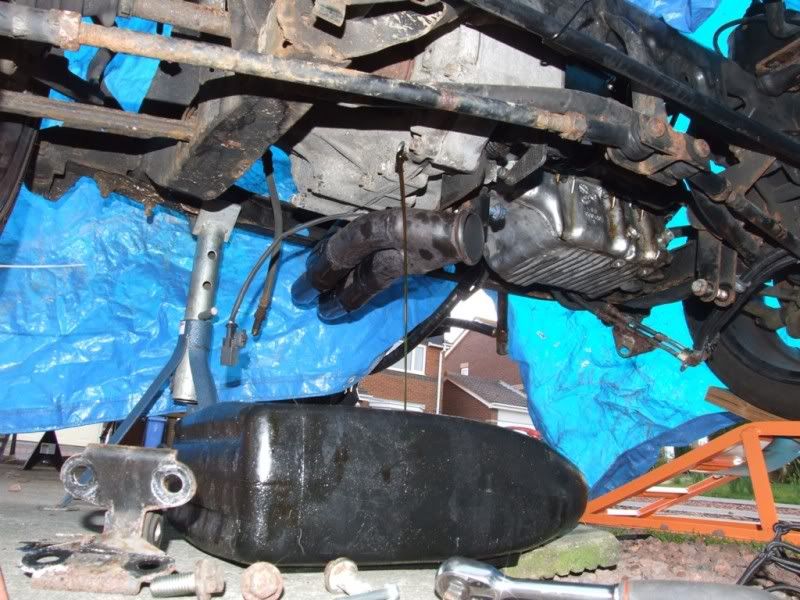
Place a suitable container under the gearbox drain plug (the lowest plug) and remove the plug.
The plug looks like you need a specialist square key to remove it. It just so happens that a 3/8 drive from a socket fits perfectly.
The next thing you have to do is release the hub to give enough movement so that you can release the nearside driveshaft.
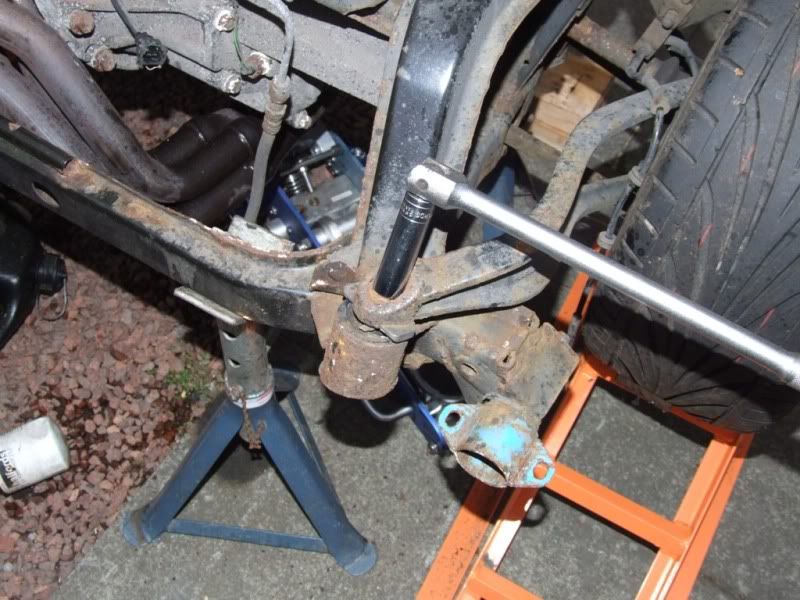
First remove the bolt holding the suspension arm to the compliance bush.
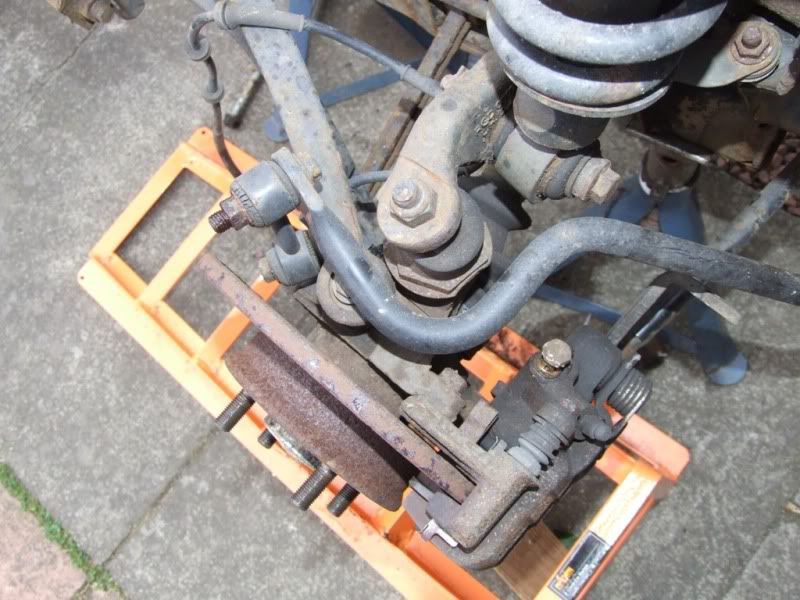
Remove the wheel and support the hub so that it doesn't hang when releasing the next components which could put stress on the hub and remaining bushes.
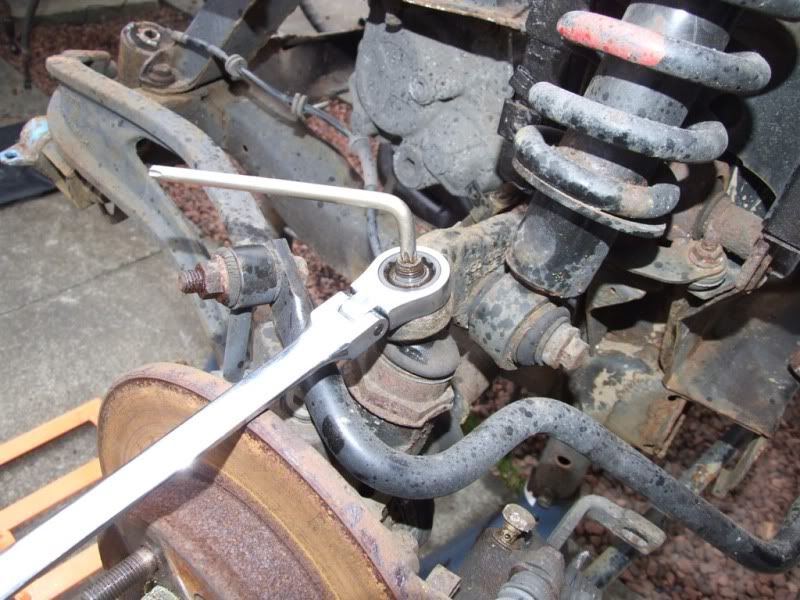
Next, using a torx key and a ring spanner, remove the upper nut from the suspension upper ball joint, and release the joint by tapping the top of the bolt. Be careful not to damage the threads or deform the bolt. It may be worth putting the nut on before hammering to protect the threads.
You will also need to remove the bolt and release the anti-roll bar.
Next, insert a pry bar or large flat bladed screwdriver between the driveshaft and the gearbox. Carfully lever the driveshaft away from the gearbox, taking care not to damage the aluminium gearbox or the driveshaft seal.
If you apply enough pressure, the driveshaft will "pop" out of its retainer and allow you to tilt the hub away from the subframe, allowing the driveshaft to retract from the gearbox.
"Pop" the offside driveshaft out of its retainer ready for the removal of the gearbox. Remember to tie the driveshaft up or support it so that it doesn't fall when removing the gearbox.
Next remove the pin that connects the slave cylinder to the release arm and remove the bolts that hold the bracket to the gearbox.
This probably isn't 100% necessary, but it gives better access to bolts and to the clutch release arm if you intend to change that.
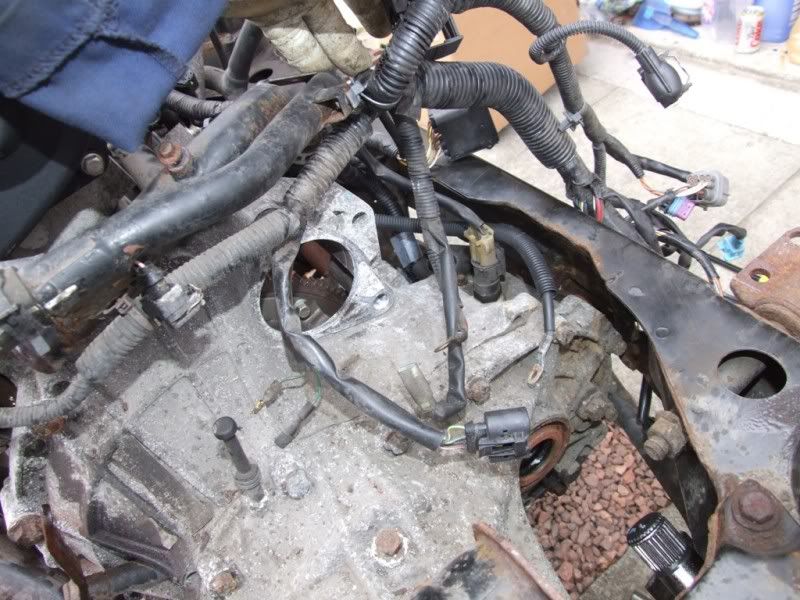
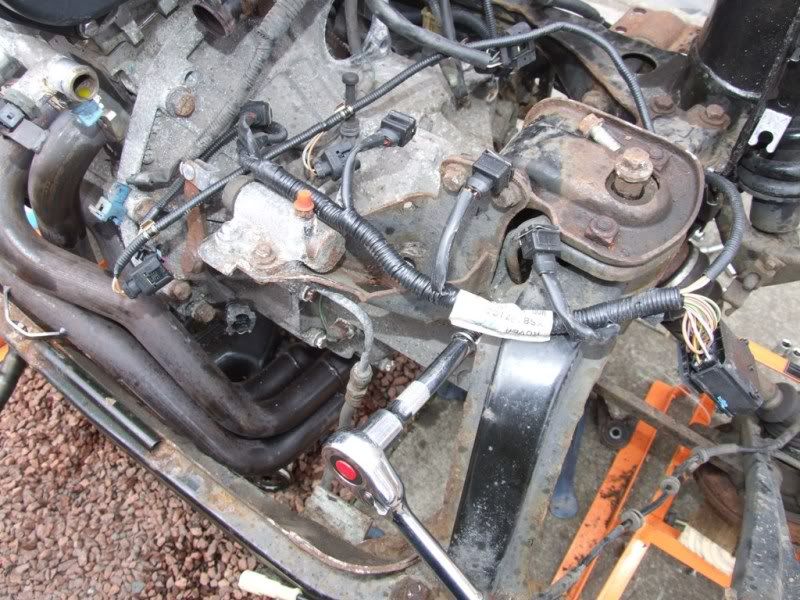
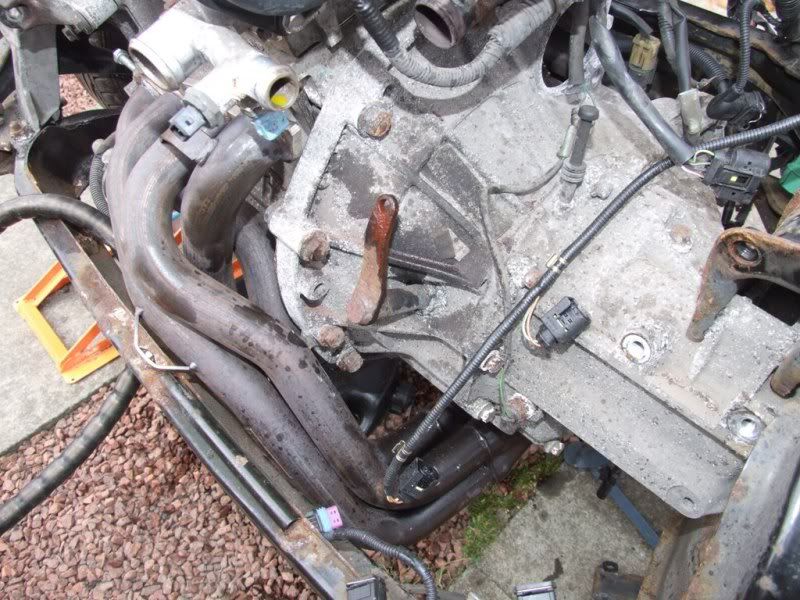
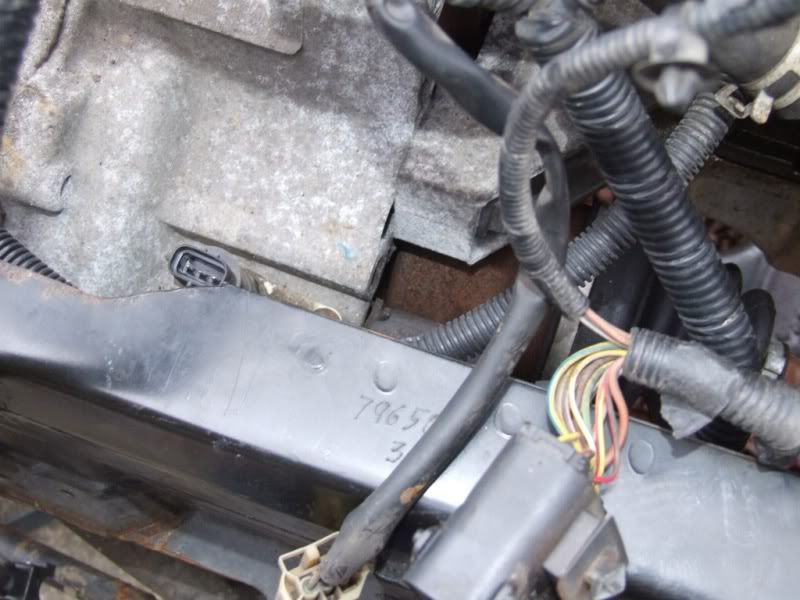
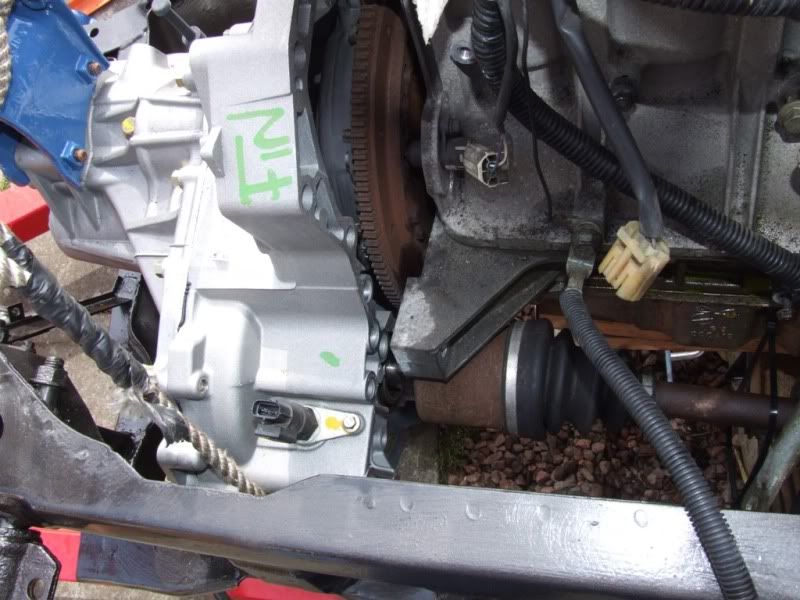
Disconnect the reverse gear switch (shown in above diagram, just above where the exhaust disappears under the gearbox) and the speed sensor from the gearbox (shown below).
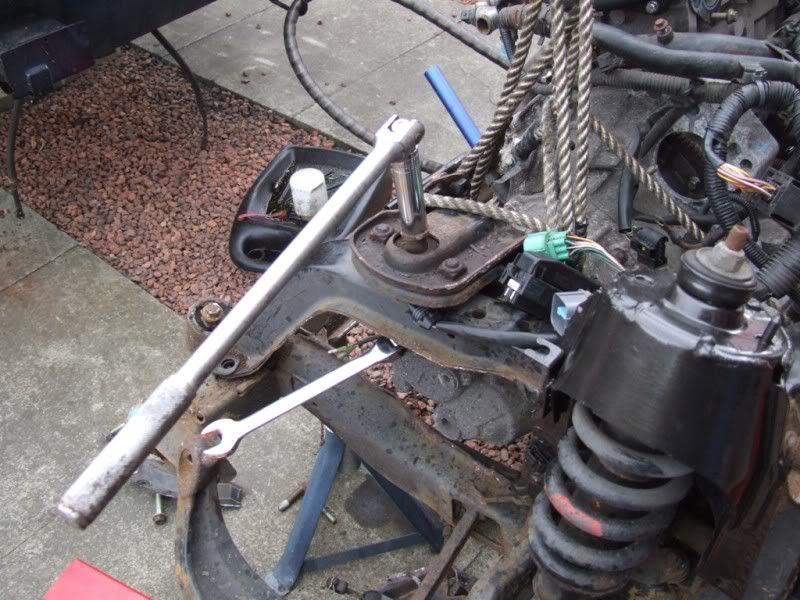
Now remove the 2 bolts at each end holding the black gearbox support cross member in place.
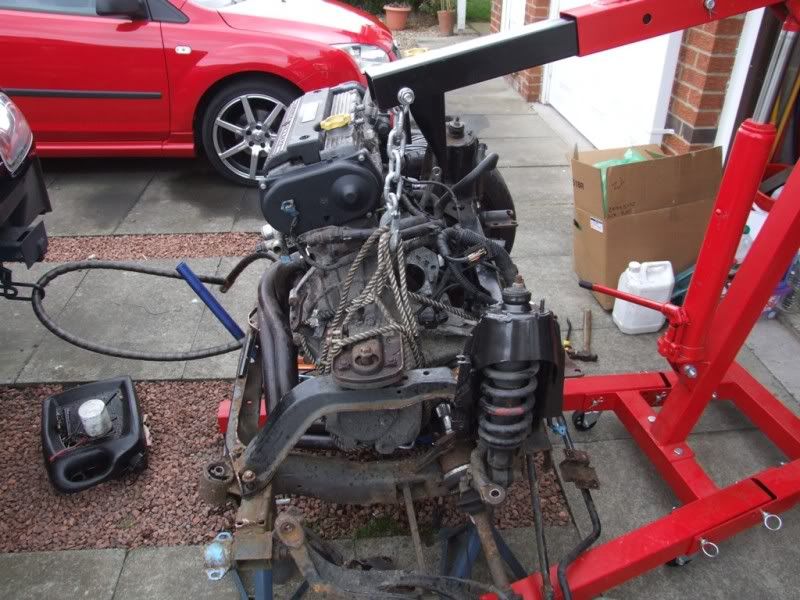
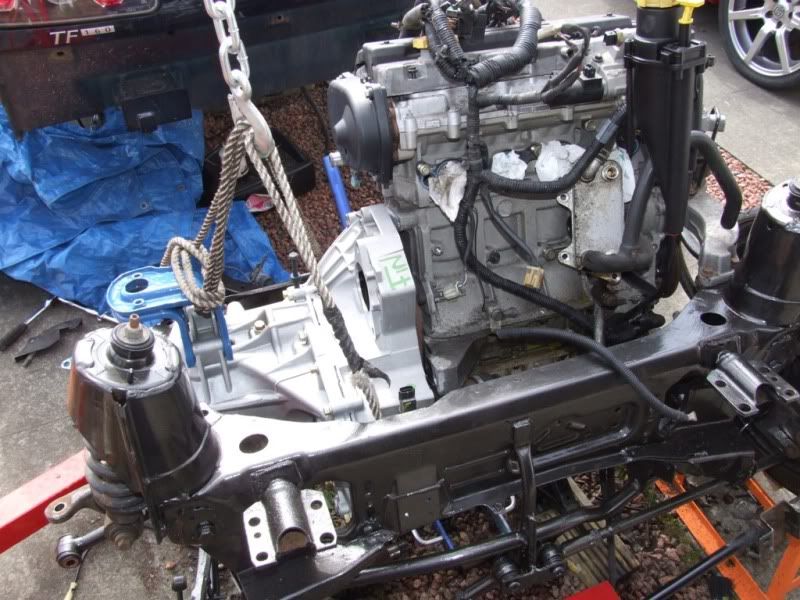
You now need to support the engine as once the gearbox mount is removed the engine/gearbox will drop on that side. Use a jack or axle stand with a wooden block on to spread the load over the aluminium sump. You will also need to secure the gearbox. I used a rope and my engine crane to take the weight. You will have to use what you can, but make sure it is secure and will not fall, especially on you.
Once you have the engine and gearbox supported, disconnect the bolts holding the gearbox bell housing to the engine and sump.
I also found it best to remove the coolant pipes that stretch across the top of the bell housing.
This is held in place by a couple of bolts and an interference fit over the water pump.
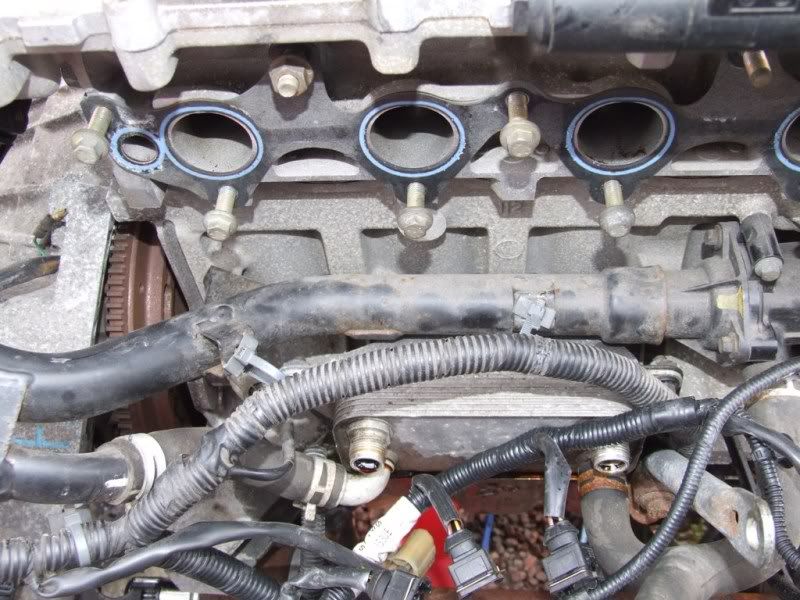
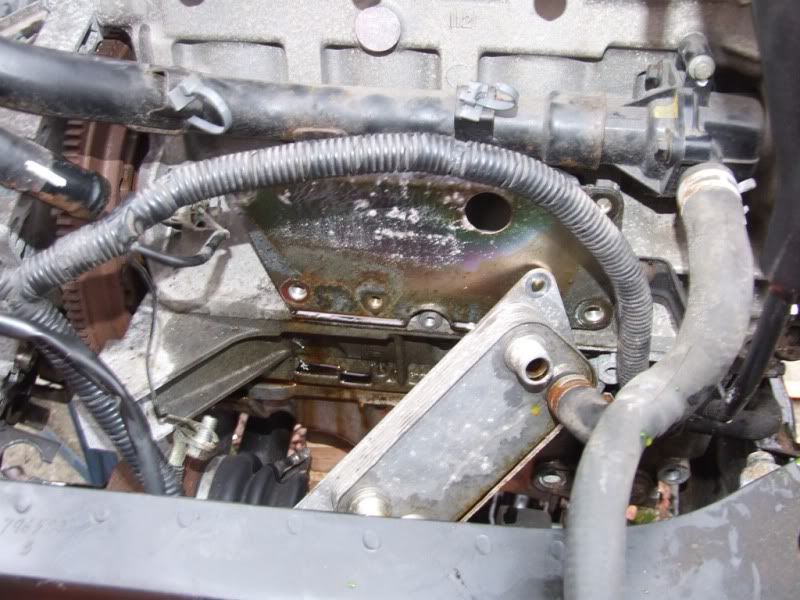
Unfortunately, to do this on the TF160 you need to remove the oil cooler to get at the bolts for the coolant pipe. You don't need to do this on the TF135 or the 1.6 model as they do not have oil coolers.
Once you have removed the 2 bolts securing the coolant pipe, and any rubber pipes attached to the metal pipes, you can pull and gently twist the pipe away from the water pump.
You can now lift the gearbox clear with the cross member still in place, or remove the mount and cross member. Remember that the weight of the gearbox needs to be supported at this point as the mount is the only thing supporting it.
With the weight of the gearbox taken up by the engine hoist, you now need to move the gearbox away from the engine. This may be difficult as the gearbox is held in place by 2 locating dowels, years of corrosion and the gearbox main shaft which is still located on the splines in the clutch.
Use a hide faced mallet to tap around the gearbox to try to break its hold on the engine, while trying to move it away from the engine. You could also try carefully levering them apart, but remember that you are dealing with aluminium and it is easy to damage.
Once the locating dowels are free, you can gently rotate the gearbox while withdrawing it from the engine. You will have to withdraw it until the mainshaft splines are clear of the clutch and the offside driveshaft is clear of the diff.
Now lift the gearbox free of the engine and place in a safe place.
Last Edit:14 years 2 months ago
by cjj
Last edit: 14 years 2 months ago by David Aiketgate.
The following user(s) said Thank You: Kramer7
Please Log in or Create an account to join the conversation.
You may need to jack the engine up slightly to gain clearance, but be carefull not to stress any other components or engine mounts.
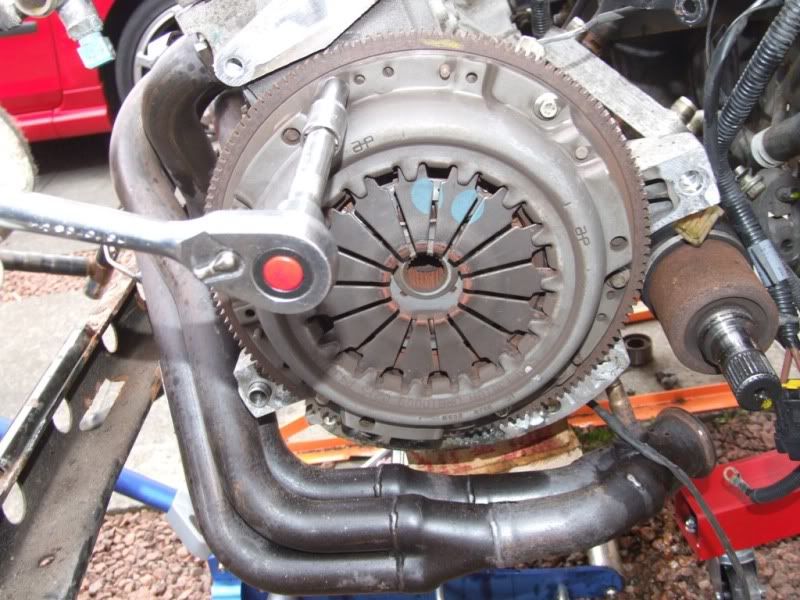
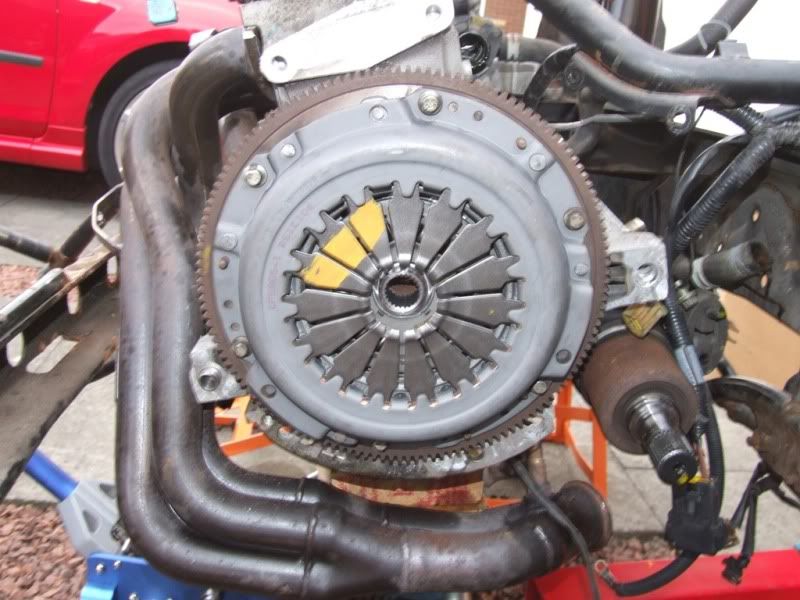
You can now see the clutch cover or basket. This is the spring loaded component that forces the clutch plate against the flywheel.
To remove the cover, loosen the securing bolts a little at a time in sequence. That means loosen one bolt a little, then loosen the one opposite a little, working in a pentagram style pattern until all bolts are removed and the plate can be removed. The clutch plate will fall out at this point. This sequence is important to prevent warping of the clutch components and is the same sequence that you will use to fit the plate.
This leaves the flywheel. This is the face that the clutch plate grips. Check for excessive wear or scoring. The face should be fairly flat with no obvious lip or ridges. If it is worn you may be able to get it skimmed or you may need to replace it.
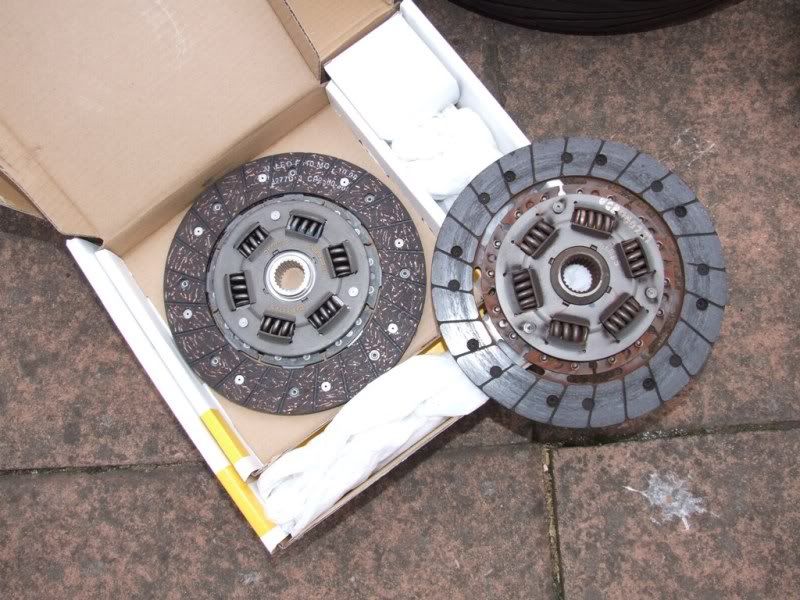
In my case, the clutch plate didn't seem to have much wear compared to the newer one. Clean the flywheel and clutch plate with a degreasing compound prior to refitting.
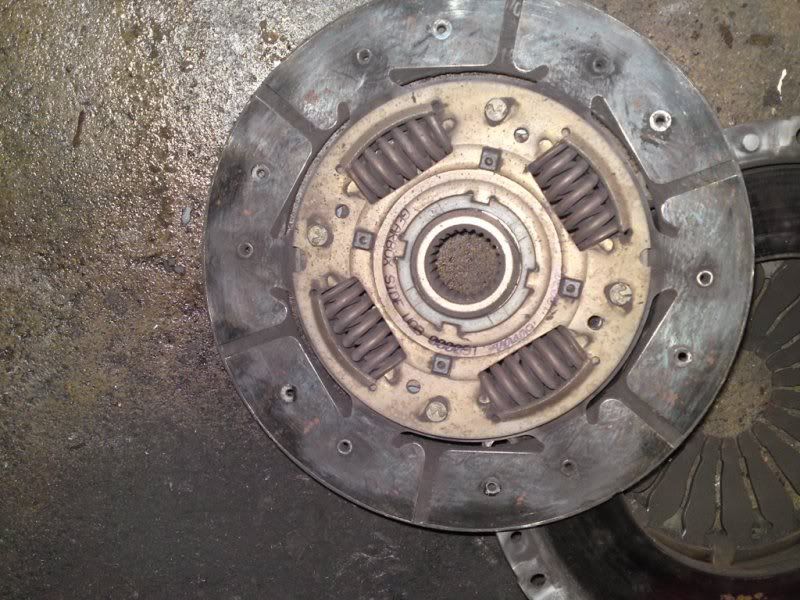
I have changed clutches in far worse condition. The following pics show a clutch plate that has no friction material left on one side.
Comparing against the new one.
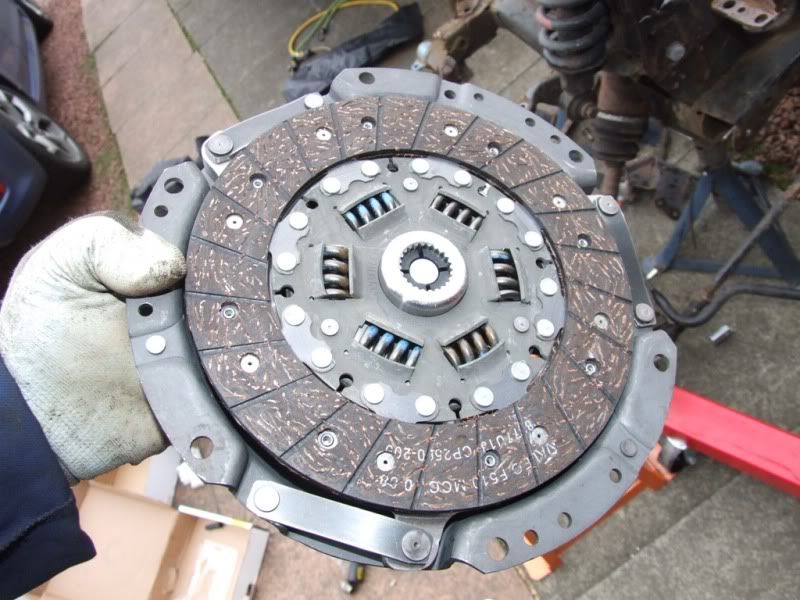
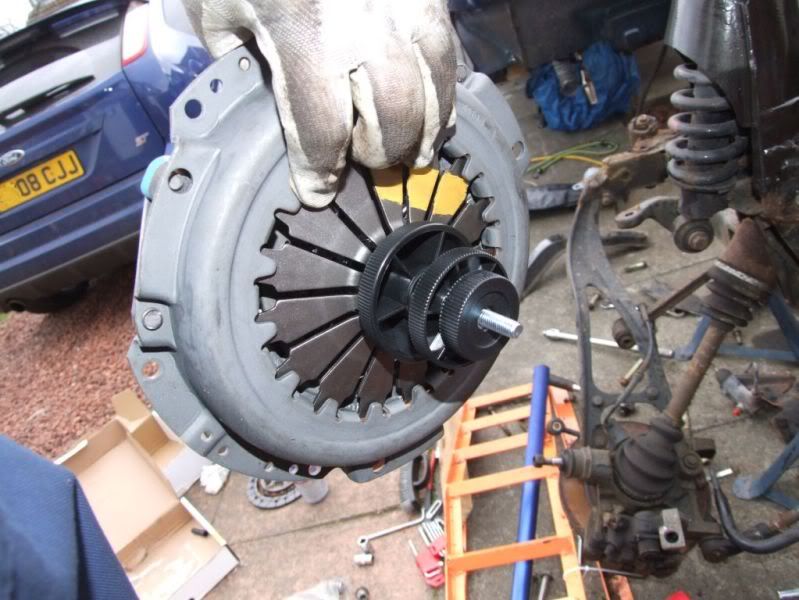
Place the new clutch plate in the clutch cover. I fitted a new clutch cover as well and would recommend this as they do wear and also lose their effectiveness after a while.
Place the clutch alignment tool through the clutch cover and into the clutch plate. For those of you new to this, this ensures correct alignment of the cover and plate. If they are not aligned then you will find it nigh on impossible to get the gearbox splined shaft to fit into place.
Position the clutch unit and refit the bolts in the same sequence as you removed them, tightening a little at a time, and ultimately torque them to 25Nm. Remove the alignment tool.
I have used a section of broom handle in the past to align the clutch, but it is worth getting the proper tool as your wife/mother/partner will start giving you grief as the broom gets shorter.
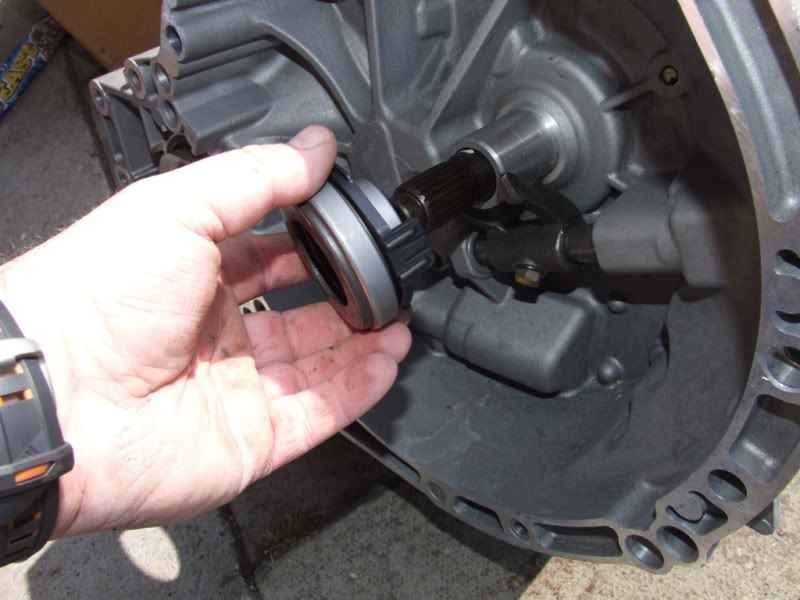
If you have bought a clutch kit, you will get a new release bearing with it. This, as the name suggests, is a bearing that slides on the gearbox input shaft and is moved by the clutch release arm. Again, replacing this bearing makes sense as they wear and can cause noise and/or fail completely.
Simply unclip the release arm from the old bearing, slide it off the shaft, slide the new bearing on the shaft, ensuring it is the correct way round, and clip onto the release arm.
You are now ready to refit the gearbox.
While taking the weight of the gearbox you need to roughly align the gearbox splined shaft with the centre of the clutch. You also need the engine and gearbox to be on the same level.
Now carefully move the gearbox towards the engine. If there is a lot of resistance the slines on the shaft are not aligned with the splines in the clutch. You will need to carefully rotate the gearbox until the splines line up. Do not try forcing the splined shaft in as you could damage the new clutch.
Once the gearbox shaft is aligned, move the gearbox towards the engine, ensuring that the locating dowels are aligned with their corresponding holes.
You will also need to feed the offside drive shaft into the diff. Once the gearbox is on the engine you need to make sure that the driveshaft is fully home until it clicks in place and cannot be pulled back out.
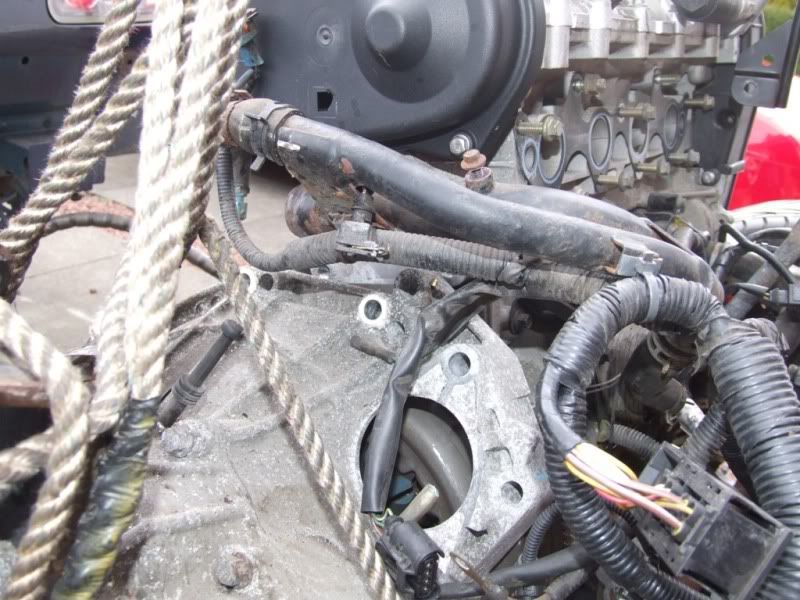
You can see one of the two locating dowels in the following picture just above the drive shaft.
You can now refit the bell housing bolts and tighten them in sequence to pull the engine and gearbox together. Again, this should go fairly easily. Do not use the bolts to force them together as you could damage the clutch.
You can now refit the gearbox mount and support beam which will allow the subframe to bear the weight of the gearbox and engine once more.
Now refit the coolant pipes, oil cooler, slave cylinder and any other items that you have removes or disconnected, and remember to torque all bolts as specified in the manual.
Refit the nearside drive shaft, ensuring it is pushed fully into place and refit the suspension components that you disconnected. Suspension components should be torqued to the correct values while taking the weight of the engine, so you will have to do this once the engine and subframe are fitted to the car and it is off the axle stands.
Don't forget to refill the gearbox with 2.2 litres of MTF-94 or Castrol SMX-S or similar
http://www.the-t-bar.org/showthread.php?t=57
You should now have a new, fully functioning clutch.
Last Edit:5 years 4 months ago
by cjj
Last edit: 5 years 4 months ago by talkingcars.
Please Log in or Create an account to join the conversation.
Great Job Well Done.
I managed to change my MGTF LE500 clutch in place sfter one of the spings broke loose and jammed the whole thing up. I agree, you should change all three main parts together, Rimmers sell a kit at a reasonable price. I had to change it in place as I had a lack of space and equipment but would recommend doing it your way any day.
I managed to change my MGTF LE500 clutch in place sfter one of the spings broke loose and jammed the whole thing up. I agree, you should change all three main parts together, Rimmers sell a kit at a reasonable price. I had to change it in place as I had a lack of space and equipment but would recommend doing it your way any day.
by James
Please Log in or Create an account to join the conversation.
Time to create page: 0.433 seconds


