Track Rod End TRE replacement How To
I have had a vague steering feeling on the TF lately, it has felt light at speed and very jittery on heavy braking.
I did start doubting the tyres and tyre pressures, but they were fine. It's funny because whenever someone says they are having handling problems and they have decent tyres the advice I always give is to check tracking, bushes etc. You would have thought I would take my own advice. :dunno:
Anyway, after putting up with it for a while I decided to check the front end out. Put it up on ramps and got Anne to rock the steering wheel to and fro. While she did this I put my hand around the left and the right track rod end in turn. You could feel a clunk and some play as the steering changed direction. You shouldn't be able to feel any clunkiness or play.
I took a video of the play when I had the wheel off. You can't really see much as when I move the hub with one hand the camera was moving too. You should be able to hear the clunking though.
Click on the pic below and turn your speakers up.

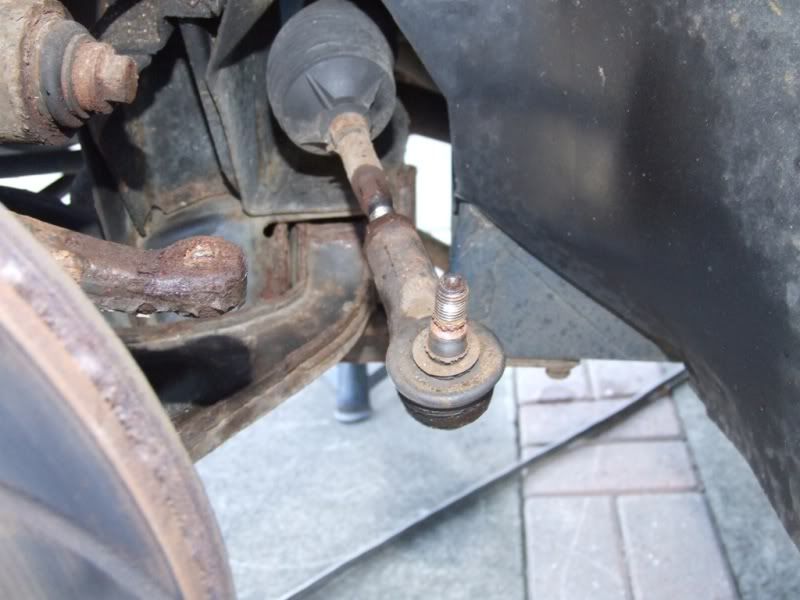
The joint you can see, roughly in the centre of the next pic, is the track rod end and is the moving joint between the steering rack and the hub.
If the wear in the TRE (Track Rod End) becomes excessive the wheel can turn slightly independantly of what you do with the steering.
This can lead to the vague feeling, tramlining, poor road holding, light front at speed and unstable handling under braking. Potholes can seem to steer the car as well.
So, we have established that the TRE is worn and needs to be replaced.
First job is to take the old one off.
Put the front of the car up on axle stands and remove the wheels. This should give enough access to the TRE.
You will need to soak the threads with release oil. Don not use WD40. Use something like PlusGas which is a proper penetrating oil. This is designed to soak into the rusted threads and help ease the removal process. WD40 doesn't do this as it for water dispersal and evaporates.
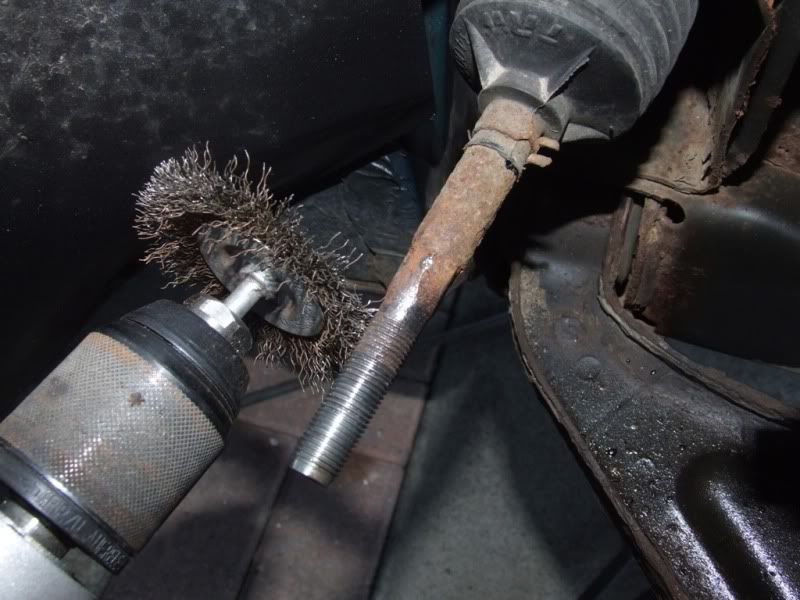
Use a wire brush to remove as much rust and crud from the exposed threads as you can. This will help in the removal and adjustment of the TRE.
After cleaning, add a bit more release oil to lubricate the threads.
Each of the 3 components have a squared off area or nut to take a spanner.
The TRE is a 22mm spanner, the lock nut is a 19mm and the steering rod itself is 12mm. It is important to keep the steering rod from turning as you undo the others as this will increase/decrease your tracking.
Loosen the locking nut and TRE while the TRE is still fitted to the hub as it is easier.
Mine was on pretty damn tight so I had to apply a little heat to loosen the locknut. Only do this if you are happy using this sort of equipment and watch you don't set light to yourself or a part of the car.
Once you have loosened the locking nut and TRE you need to look at disconnecting the TRE from the hub.
Hammer a deep 15mm socket onto the TRE nut
and using a ratchet
remove the nut.
The TRE will most probably not come off at this point as the threaded shaft has a taper which locks into the hub when the nut was tightened.
What you need is a TRE/Ball splitter. They are easy to come by/borrow/buy and are only around £15 for the one I use.
The tool body is forced under the arm on the hub, and the moving arm of the tool rests over the TRE threaded bolt.
Then, when you tighten the bolt on the tool
it pushes the TRE out of the tapered housing in the hub.
The arm is now free of the hub.
Before we remove anything else, it is essential to measure the length of the assembly so that you can set it up when the new TRE is fitted.
Some people count the number of turns that it takes to remove the TRE. This is one method but often fails as TREs have different thread cuts etc, but it will get you a rough idea. I prefer to measure the distance from the centre of the TRE to the other end of the steering rod.
Now just twist off the TRE with a spanner while holding the rod with the 12mm spanner
I also removed the locking nut
cleaned up the threads some more with the wire brush (you could use a die if you have one)
Applied lots of Copper grease to the thread and worked the locking nut back and forth to clean the threads too.
This will all help the poor git who has to adjust them once completed.
Apply plenty of copper grease to the threads and fit the new TRE.
Wind the new TRE on to the steering rod and set it up using the measurements you took earlier.
Once set up, put the threaded bolt part of the TRE though the opening in the hub
add a new nyloc nut (a new one should come with the new TRE) and torque to 30Nm.
Now tighten the locknut onto the TRE
You have now replaced your TRE.
Do the same to the otherside, if you wish to, and refit the wheels.
Lower the car to the ground and you have now hopefully sorted your steering problem.
The car will not handle properly yet until the car has the tracking and alignment set up properly.
You now need to take the car to a suitable garage to have the car 4 wheel laser aligned. It doesn't matter how carefully you measure the TRE, you will never get it accurate enough and it is important that you have it set up properly.
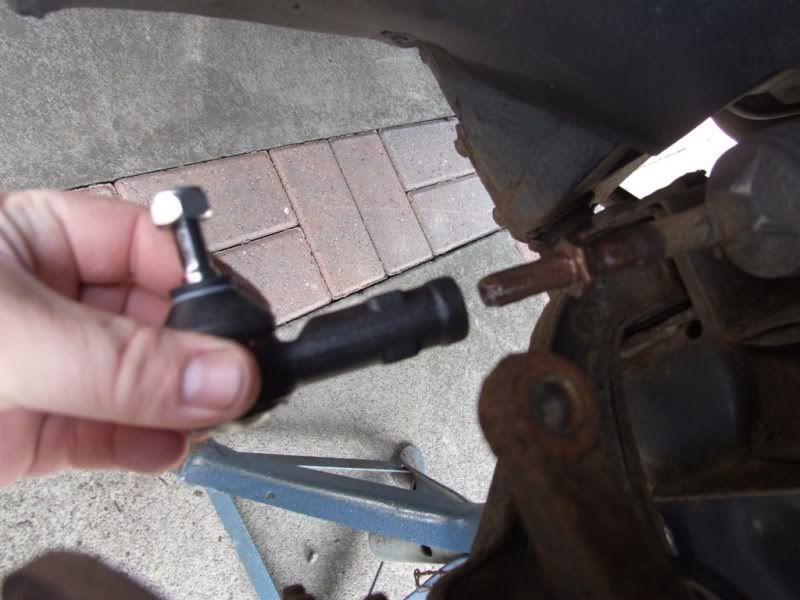
This is an old and new TRE
and this shows the wear on one of mine.
I did start doubting the tyres and tyre pressures, but they were fine. It's funny because whenever someone says they are having handling problems and they have decent tyres the advice I always give is to check tracking, bushes etc. You would have thought I would take my own advice. :dunno:
Anyway, after putting up with it for a while I decided to check the front end out. Put it up on ramps and got Anne to rock the steering wheel to and fro. While she did this I put my hand around the left and the right track rod end in turn. You could feel a clunk and some play as the steering changed direction. You shouldn't be able to feel any clunkiness or play.
I took a video of the play when I had the wheel off. You can't really see much as when I move the hub with one hand the camera was moving too. You should be able to hear the clunking though.
Click on the pic below and turn your speakers up.

The joint you can see, roughly in the centre of the next pic, is the track rod end and is the moving joint between the steering rack and the hub.
If the wear in the TRE (Track Rod End) becomes excessive the wheel can turn slightly independantly of what you do with the steering.
This can lead to the vague feeling, tramlining, poor road holding, light front at speed and unstable handling under braking. Potholes can seem to steer the car as well.
So, we have established that the TRE is worn and needs to be replaced.
First job is to take the old one off.
Put the front of the car up on axle stands and remove the wheels. This should give enough access to the TRE.
You will need to soak the threads with release oil. Don not use WD40. Use something like PlusGas which is a proper penetrating oil. This is designed to soak into the rusted threads and help ease the removal process. WD40 doesn't do this as it for water dispersal and evaporates.
Use a wire brush to remove as much rust and crud from the exposed threads as you can. This will help in the removal and adjustment of the TRE.
After cleaning, add a bit more release oil to lubricate the threads.
Each of the 3 components have a squared off area or nut to take a spanner.
The TRE is a 22mm spanner, the lock nut is a 19mm and the steering rod itself is 12mm. It is important to keep the steering rod from turning as you undo the others as this will increase/decrease your tracking.
Loosen the locking nut and TRE while the TRE is still fitted to the hub as it is easier.
Mine was on pretty damn tight so I had to apply a little heat to loosen the locknut. Only do this if you are happy using this sort of equipment and watch you don't set light to yourself or a part of the car.
Once you have loosened the locking nut and TRE you need to look at disconnecting the TRE from the hub.
Hammer a deep 15mm socket onto the TRE nut
and using a ratchet
remove the nut.
The TRE will most probably not come off at this point as the threaded shaft has a taper which locks into the hub when the nut was tightened.
What you need is a TRE/Ball splitter. They are easy to come by/borrow/buy and are only around £15 for the one I use.
The tool body is forced under the arm on the hub, and the moving arm of the tool rests over the TRE threaded bolt.
Then, when you tighten the bolt on the tool
it pushes the TRE out of the tapered housing in the hub.
The arm is now free of the hub.
Before we remove anything else, it is essential to measure the length of the assembly so that you can set it up when the new TRE is fitted.
Some people count the number of turns that it takes to remove the TRE. This is one method but often fails as TREs have different thread cuts etc, but it will get you a rough idea. I prefer to measure the distance from the centre of the TRE to the other end of the steering rod.
Now just twist off the TRE with a spanner while holding the rod with the 12mm spanner
I also removed the locking nut
cleaned up the threads some more with the wire brush (you could use a die if you have one)
Applied lots of Copper grease to the thread and worked the locking nut back and forth to clean the threads too.
This will all help the poor git who has to adjust them once completed.
Apply plenty of copper grease to the threads and fit the new TRE.
Wind the new TRE on to the steering rod and set it up using the measurements you took earlier.
Once set up, put the threaded bolt part of the TRE though the opening in the hub
add a new nyloc nut (a new one should come with the new TRE) and torque to 30Nm.
Now tighten the locknut onto the TRE
You have now replaced your TRE.
Do the same to the otherside, if you wish to, and refit the wheels.
Lower the car to the ground and you have now hopefully sorted your steering problem.
The car will not handle properly yet until the car has the tracking and alignment set up properly.
You now need to take the car to a suitable garage to have the car 4 wheel laser aligned. It doesn't matter how carefully you measure the TRE, you will never get it accurate enough and it is important that you have it set up properly.
This is an old and new TRE
and this shows the wear on one of mine.
by cjj
Please Log in or Create an account to join the conversation.
- David Aiketgate
-
 Offline
- David
-

- mgf mk2 freestyle mpi 16" wheels, in Anthracite.
- Posts: 20354
- Thanks: 4453
Replied by David Aiketgate on topic Re: Track Rod End TRE replacement How To
Posted 13 years 8 months ago #23136
TRE-ffic HOW TO, Clive.(see what I did there?):woohoo:
You can see the joint moving in the video too!
You can see the joint moving in the video too!
David
:shrug:
Please Log in or Create an account to join the conversation.
Replied by JonathanS on topic Track Rod End TRE replacement How To
Posted 3 years 10 months ago #195076
So, I've literally been trying for days to get the locking nut loose. Perhaps a silly question but should it move clockwise or anti clockwise to loosen?
Also, when applying heat how long does it need to be heated up for?
Also, when applying heat how long does it need to be heated up for?
by JonathanS
Please Log in or Create an account to join the conversation.
I have never removed a TRE but my suggestion would be to look at the thread of your new TRE and see if it is clockwise or anticlockwise thread to tighten. Your locknut will have the same thread.Then hopefully if clockwise thread to tighten then lefty loosey and righty tighty theme applies
Never heated anything before but should just come down to fire safety.
Good luck
Never heated anything before but should just come down to fire safety.
Good luck
by Sims
Please Log in or Create an account to join the conversation.
- talkingcars
-
 Offline
- Moderator
-

- Posts: 6876
- Thanks: 1296
Replied by talkingcars on topic Track Rod End TRE replacement How To
Posted 3 years 10 months ago #195114
They are clockwise thread.
I cut mine off with my trusted angle grinder.
I cut mine off with my trusted angle grinder.
Home to black Alfa Romeo 159 3.2 V6 Q4 ,green MGF VVC and red MG Maestro T16.
MG - the friendly marque.
by talkingcars
Please Log in or Create an account to join the conversation.
Time to create page: 0.523 seconds


