Engine/rear subframe. - How to remove
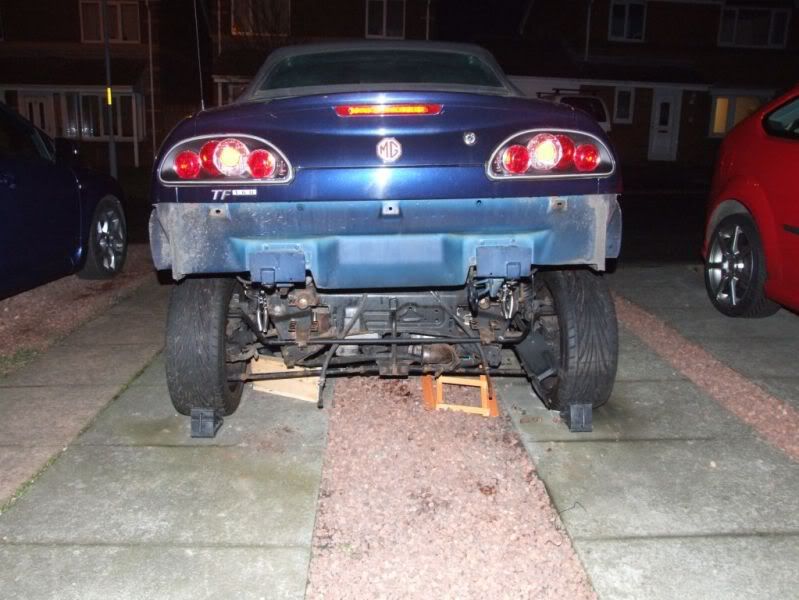
First thing I did was remove the rear bumper: http://www.the-t-bar.org/showthread.php?t=49
Once this was done I could remove the exhaust finshers, backbox and cat. This shows some of the steps: http://www.the-t-bar.org/showthread.php?t=83
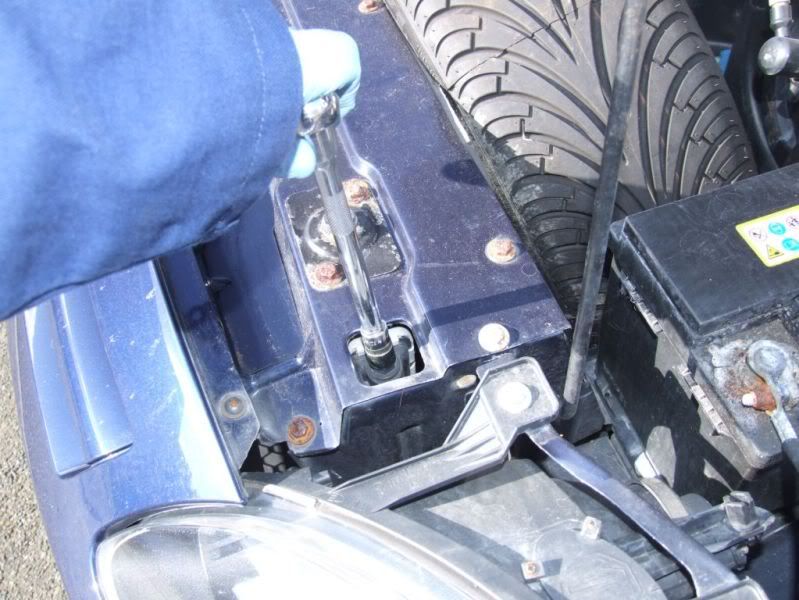
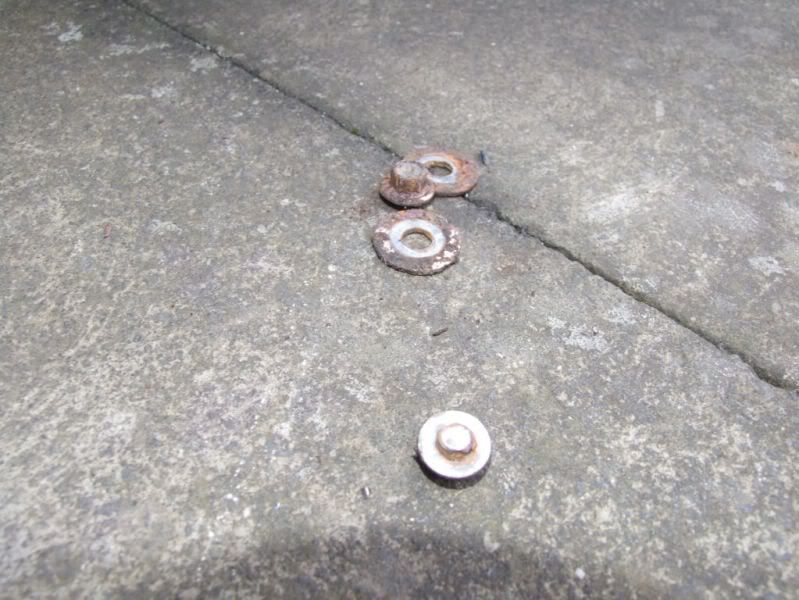
Once the exhaust was out I could get access to the heat shield under the boot. The 10mm bolts were well rusted and I ended up having to drill one of the bolts out.
http://www.the-t-bar.org/showthread.php?t=49
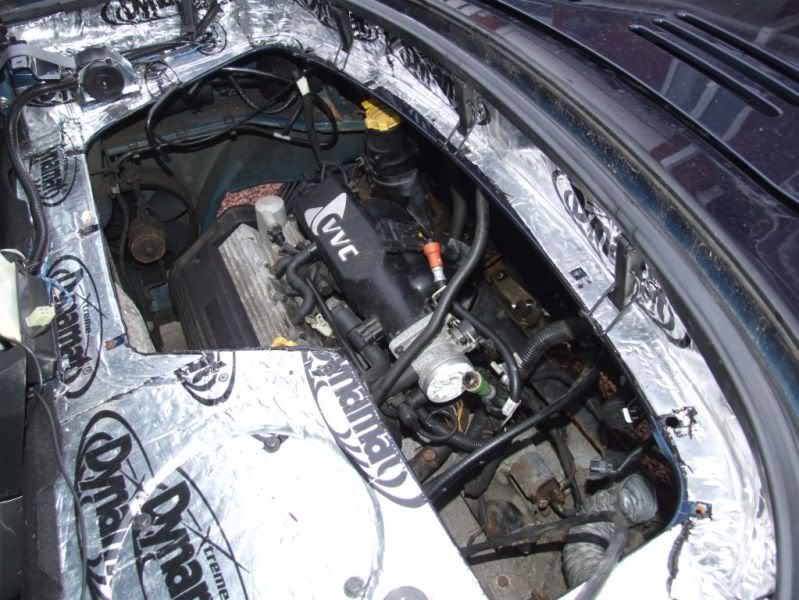
The next step was to disconnect as many physical connections between the engine/subframe and the body. This was just done by looking around and seeing what connections there are.
This was the order I did it in, but I don't really think the order is important.
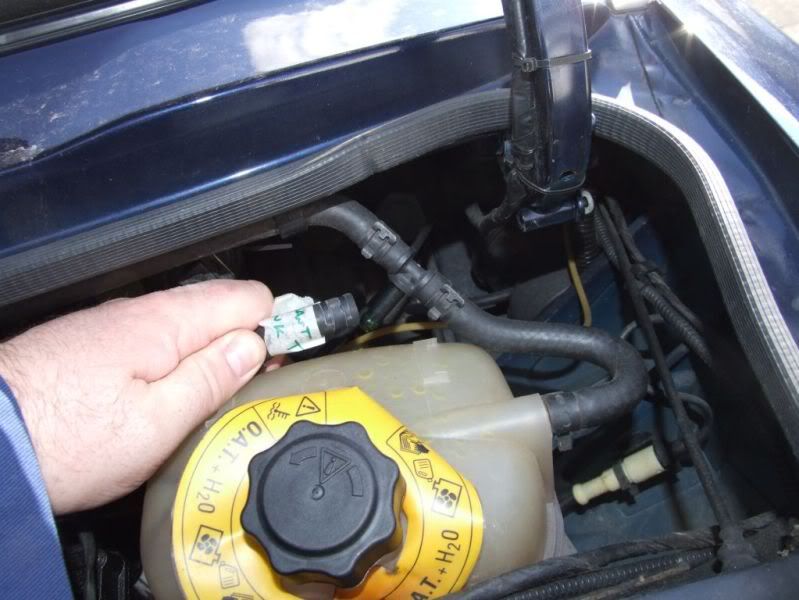
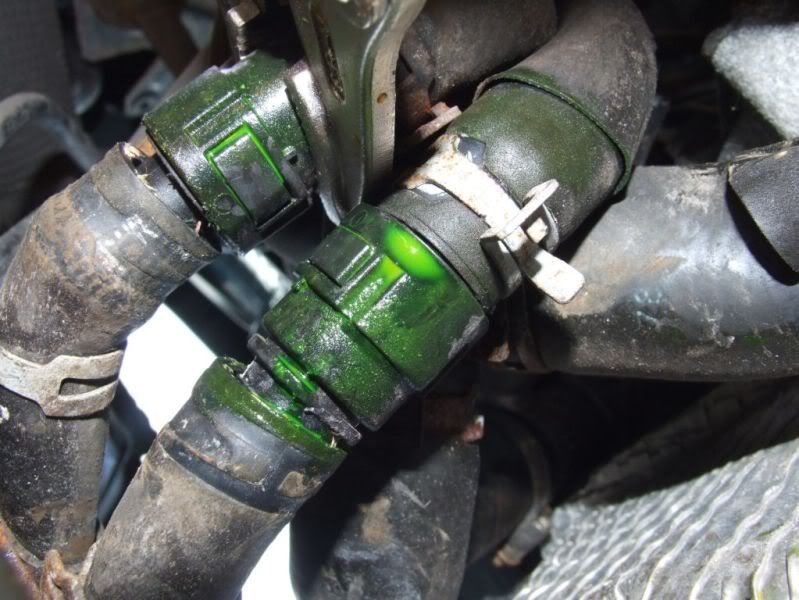
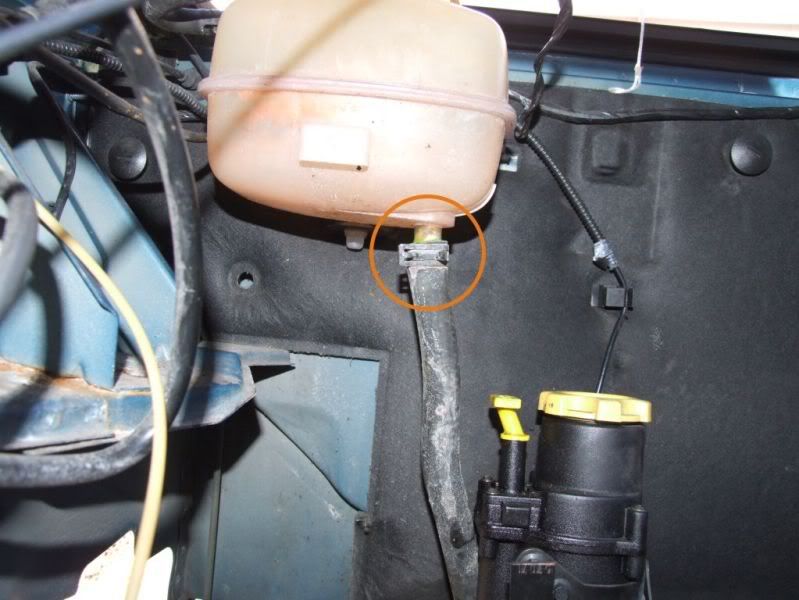
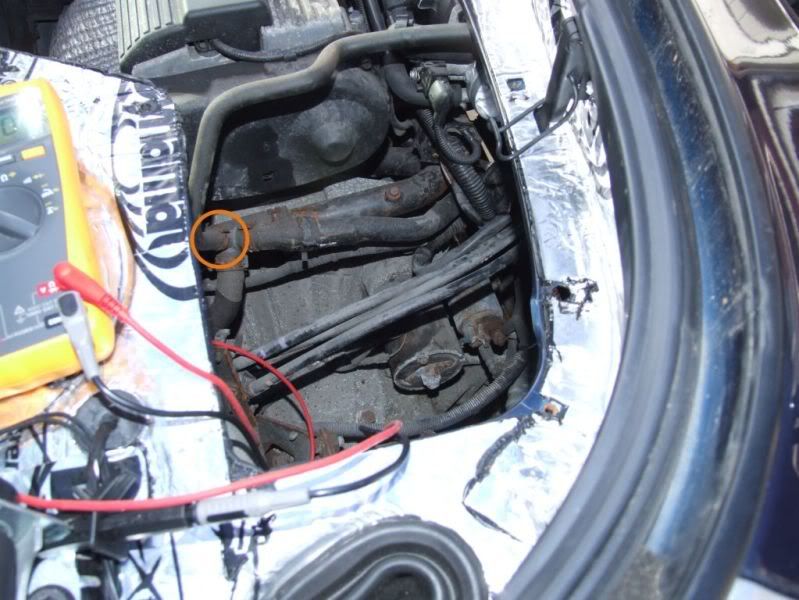
I disconnected the coolant pipe that connects to the expansion tank, via the T-piece. It might be an idea to label these connections if you aren't sure where they go.
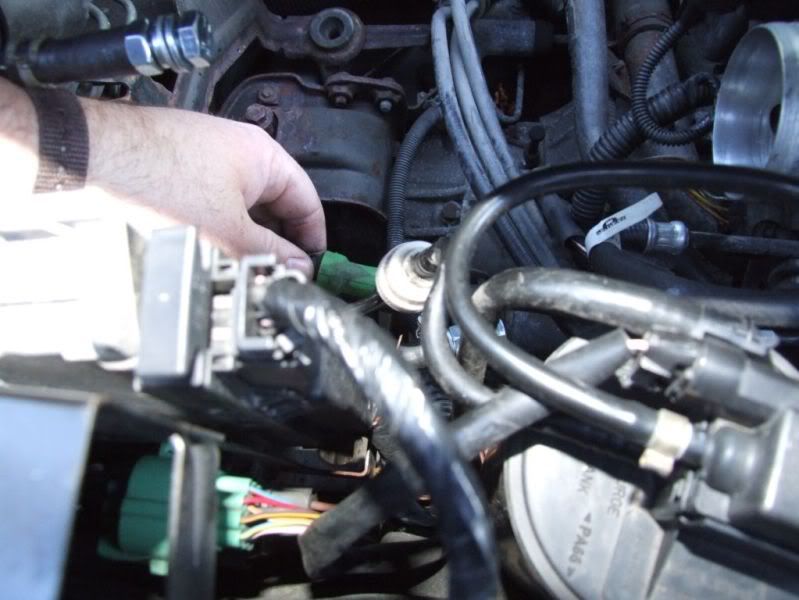
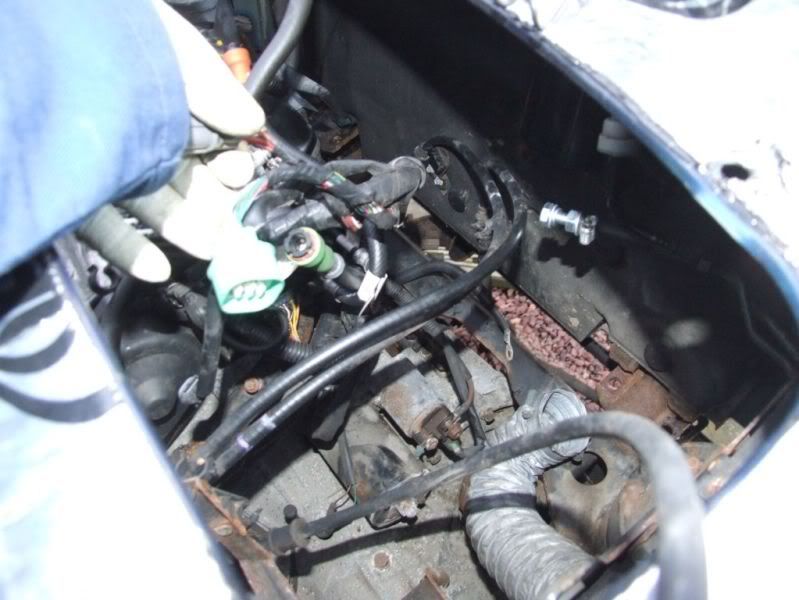
The fuel connections were next. These simply come apart by pressing in the black ring at the end of the connector and pulling it away from the pipe. Be careful to ensure that the ignition is not turned on as the line will be pressurised. You will lose a bit of petrol anyway, so be prepared.
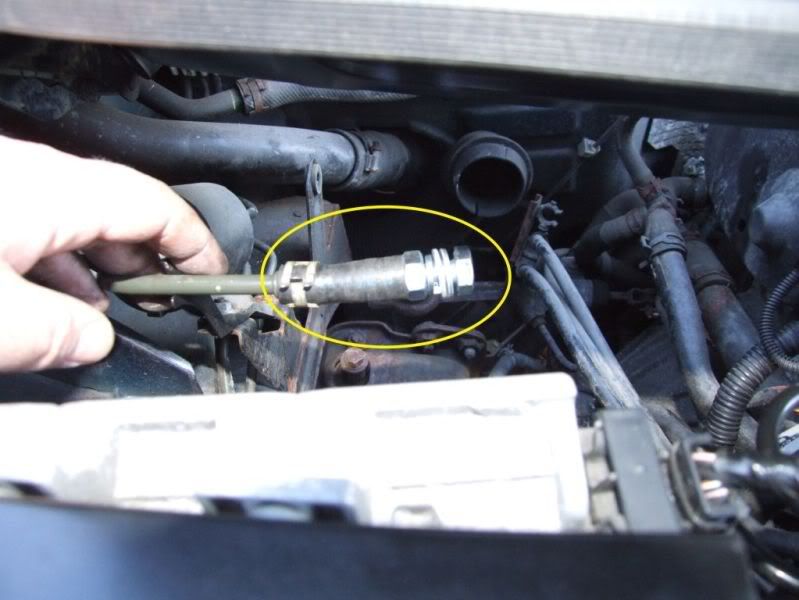
There is also the fuel return line below the feed. It is a green connector, but works in the same way as the red feed connector.
You will lose a lot of fuel from this one, so have a way of blanking it off. I had some spare tube of the right size, some bolts and some double sided sticky tape.
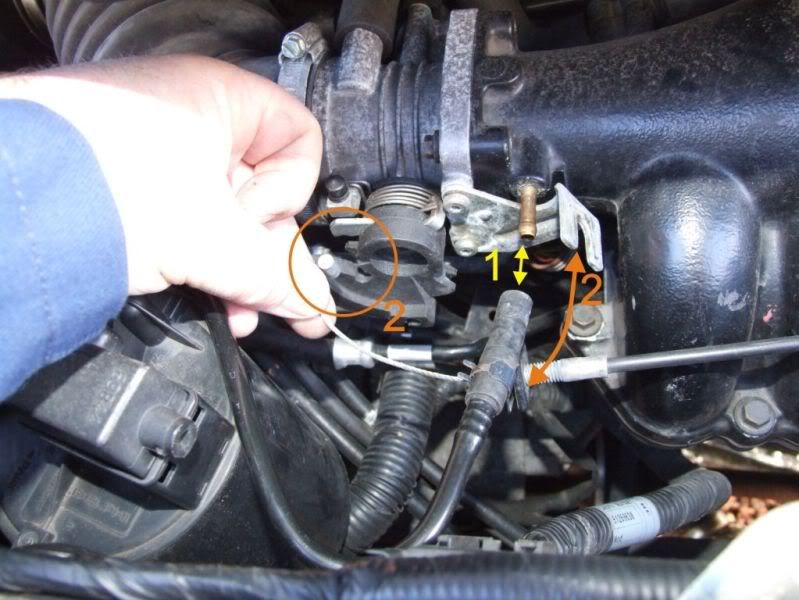
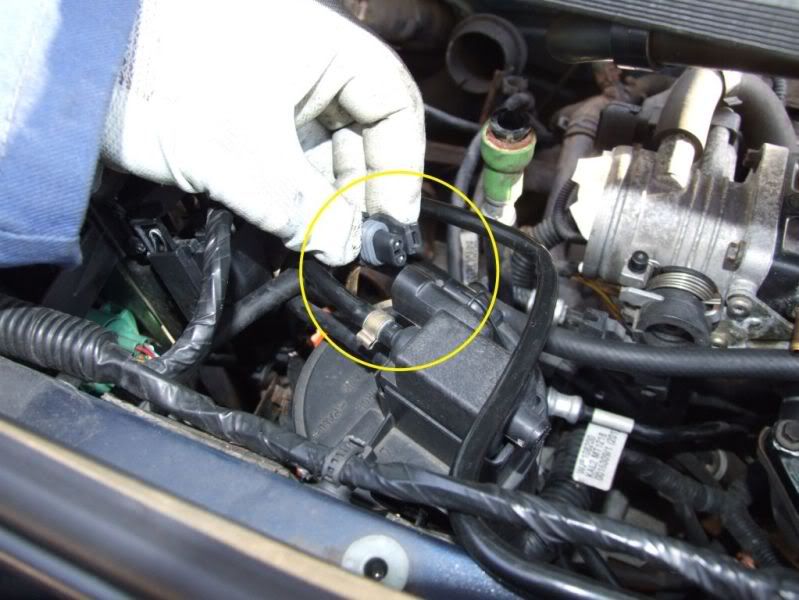
The throttle cable and vacuum pipe to the evap canister were next. The vacuum pipe simply pulls off (1). If you unclip the adjuster from the bracket and open the throttle body fully by hand you can unloop and then unclip the cable (2).
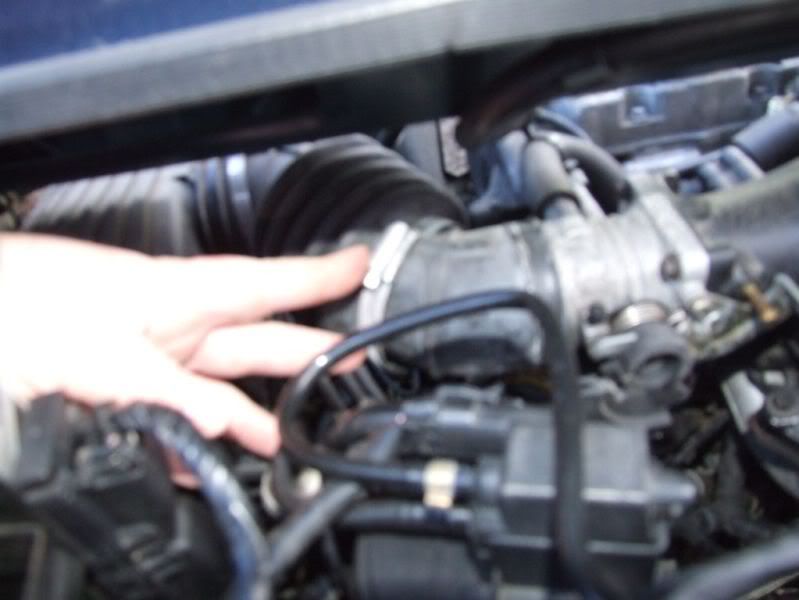
I then disconnected the tube from the airbox to the throttle body. I also removed the airbox to give a bit more room.
Oooh, blurry.
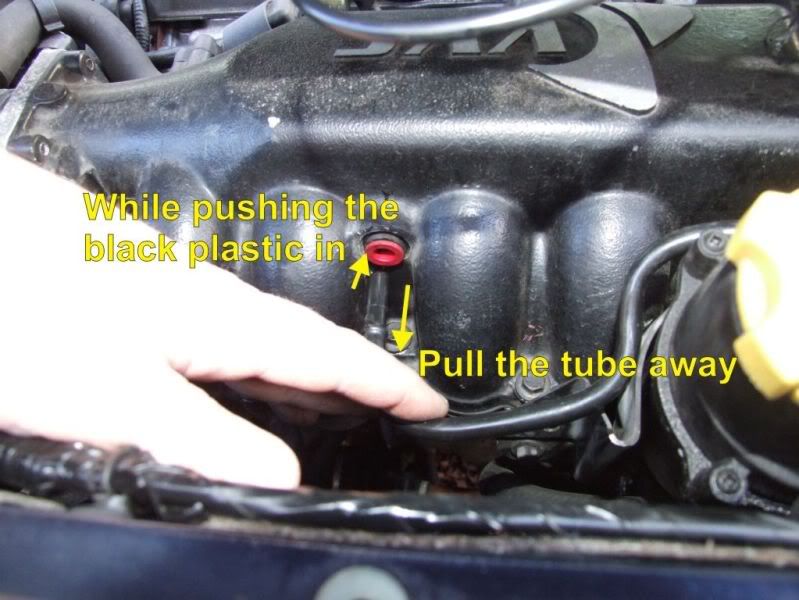
The vacuum tube that supplies the brakes was removed from the inlet manifold next. Press in the red plastic ring while pulling the tube (it says black on the pic, oops).
Another vacuum connection that needs to be disconnected is the supply to the Emmisions valve on the offside exhaust.
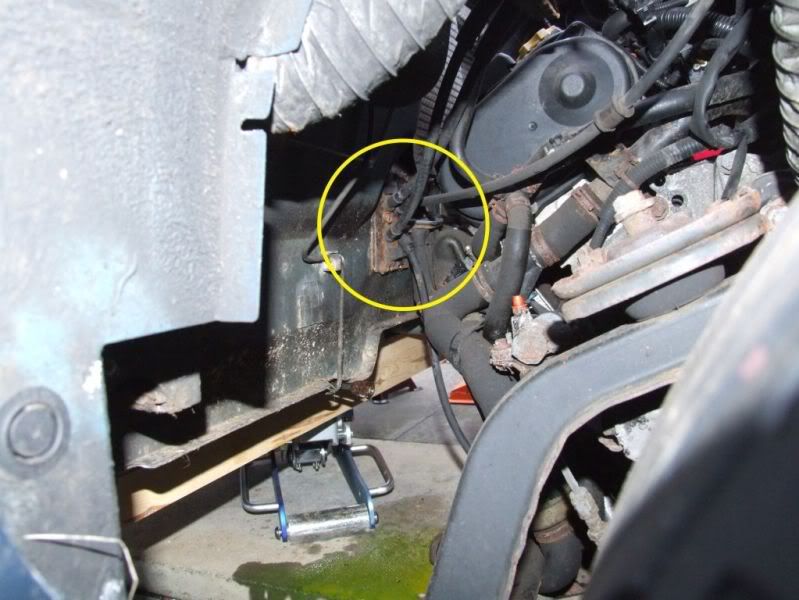
Before removing the engine we also need to drain the coolant.
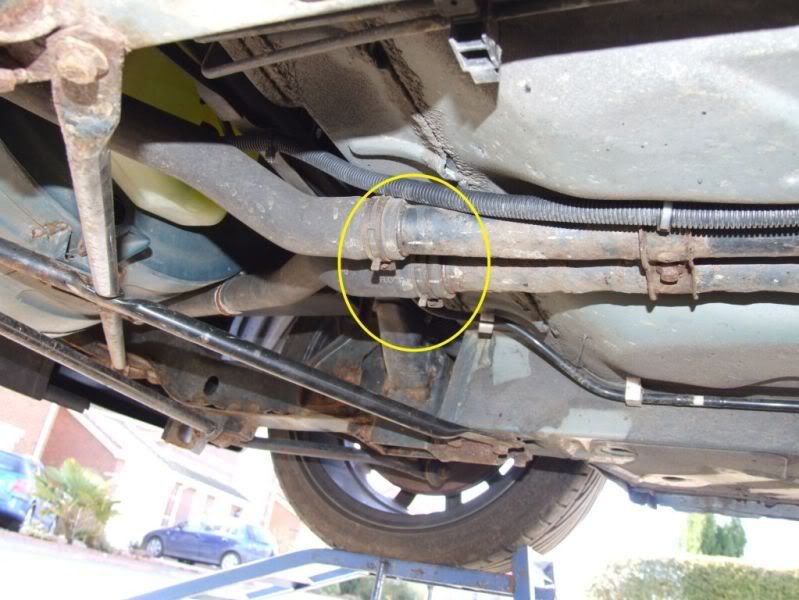
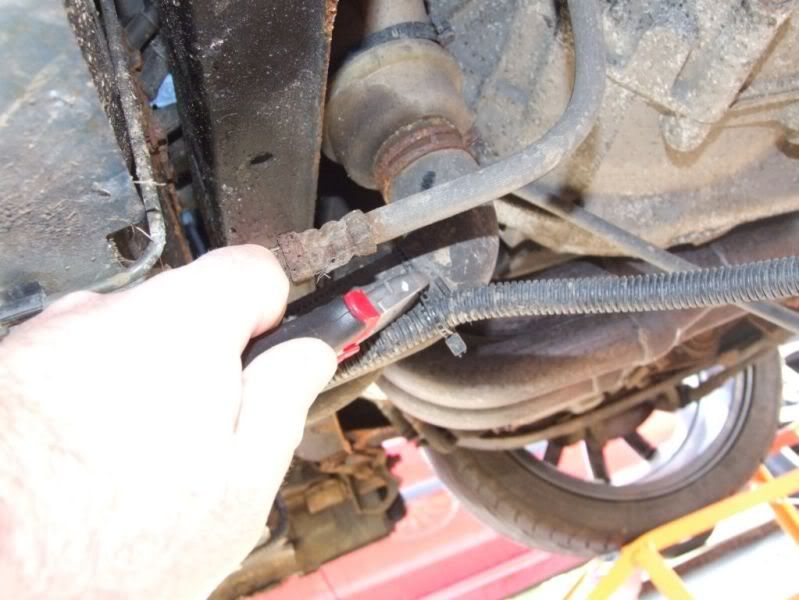
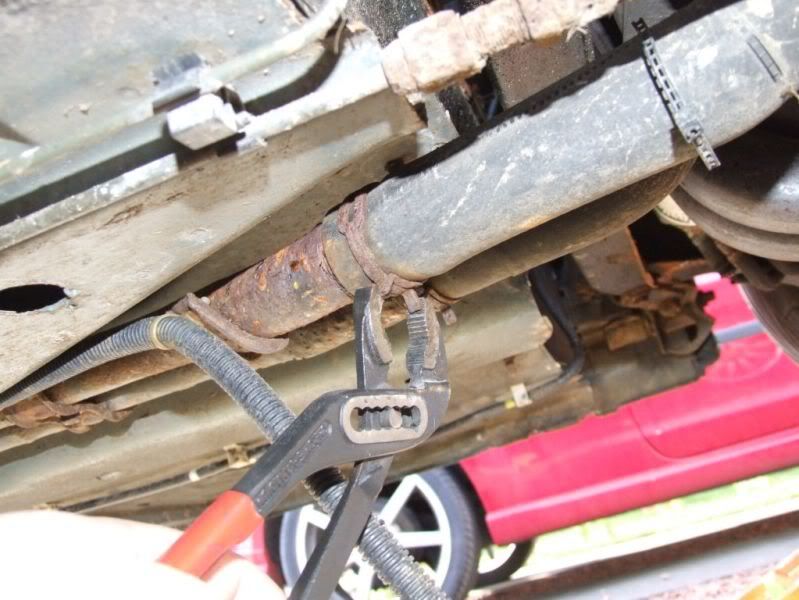
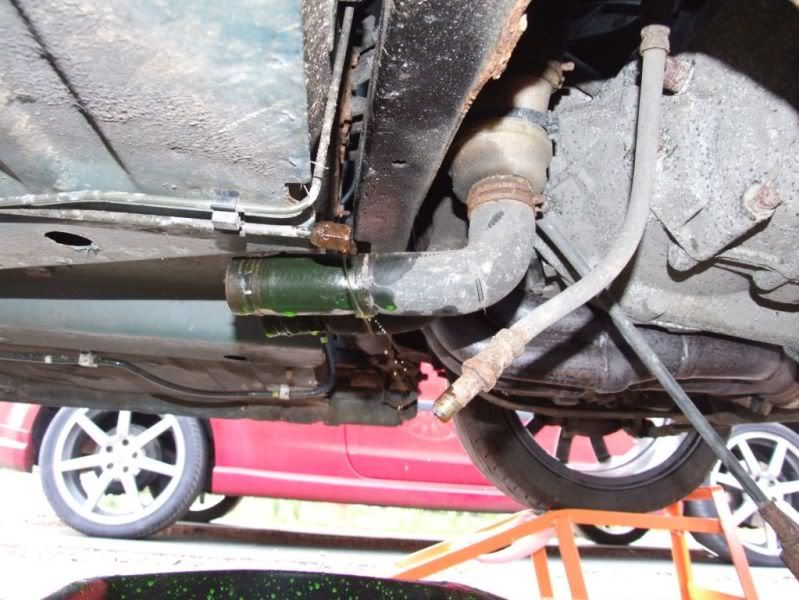
The best place to do this is at the front end of the underfloor coolant pipes. Remove the clips by pressing the ends together and sliding them along the pipe away from the connection. The rubber hose will be stuck on the metal pipe after years of sitting in place. I loosened them by gripping them with mole grips, or similar, and turning until the seal is broken.
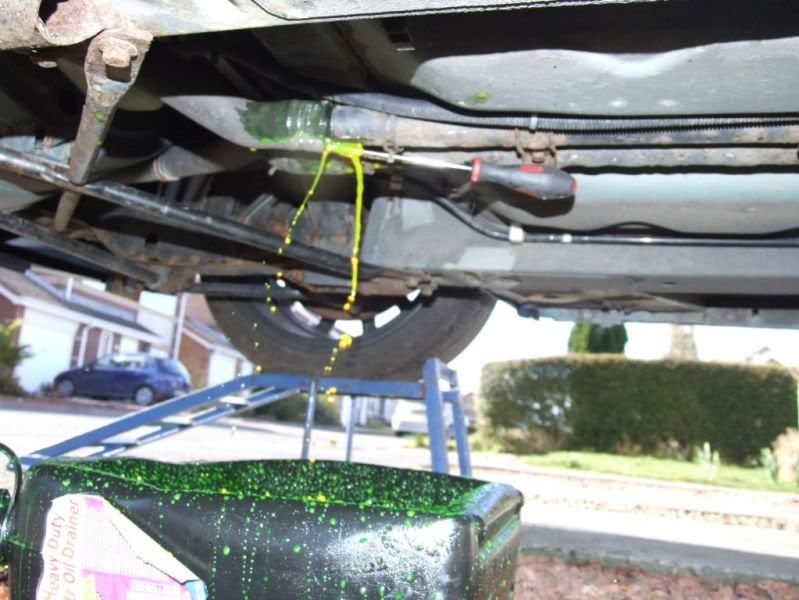
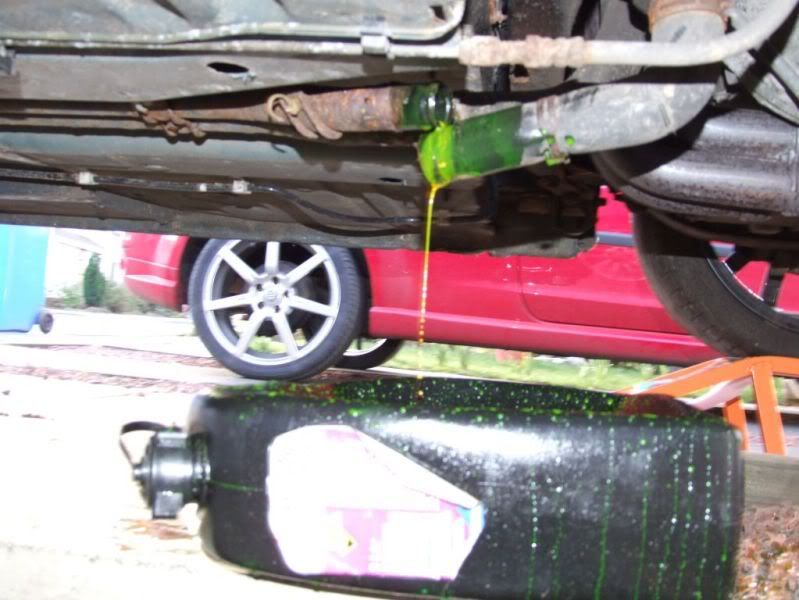
Rather than pulling the hose straight off and getting soaked I slid a screwdriver down the inside of the hose to create a small bleed.
Looks like I hit an artery though.
Now just leave that to drain. Check once in a while to make sure that the container doesn't overflow.
Be careful as it is easy to get the coolant in your eyes. Obviously I didn't, being the professional that I is. I said I didn't, right. And it stings, er, or so I heard somewhere.
You can aid the draining by opening the bleed points.
There is one at the top nearside of the radiator. Be very careful when opening this one as it is only plastic and often shears off. If it does shear off then one of the ways to remove the remaining threaded portion is to heat up a screwdriver end to F hot and melt it into the plastic bolt, let it cool and screw it out.
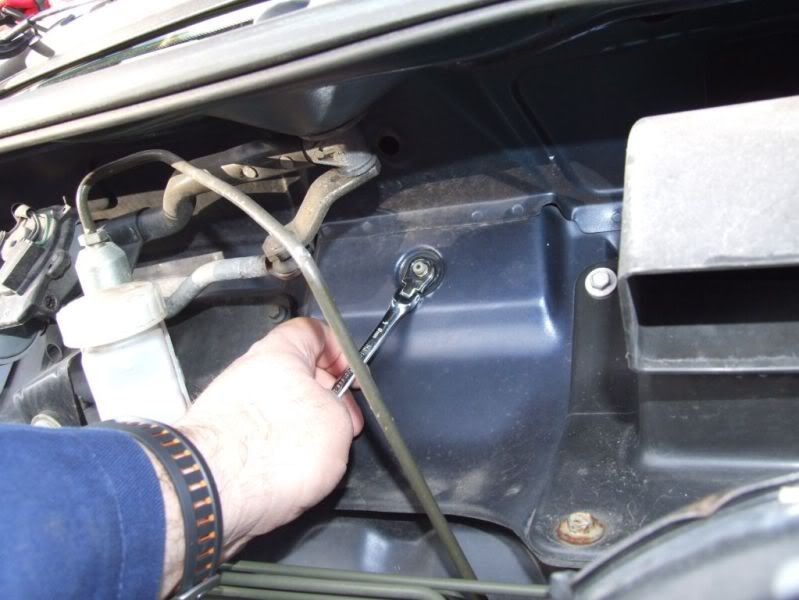
While you are under the bonnet, remove the plastic cover on the bulkhead and you will see another bleed point for the heater matrix. Make sure that you have the heater set to hot to allow the coolant to drain.
And one in the engine compartment, above the starter motor.
While the coolant is draining I decided to disconnect the rear brakes.
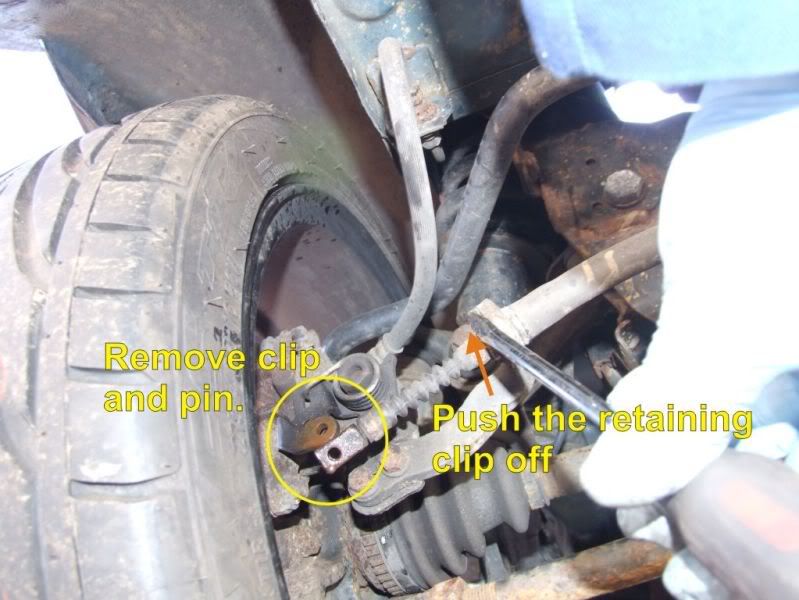
To disconnect the handbrake cables from the rear brakes you need to remove the R clip from the pin and then remove it. The pin holds the cable end to the brake. It has been on there a while and will not give up easily. Soak in plenty of easing oil (be careful not to get on brakes) and apply pressure from behind to foce it out. I put a large nut over the head and put molegrips over it. I didn't take a picture, but I can explain in detail if ever anyone needs me to.
The cable is held into a bracket by a large square clip. This can be levered, or forced off with a screwdriver. The cable can then be removed and left to hang loose.
Next comes the hydraulic hoses.
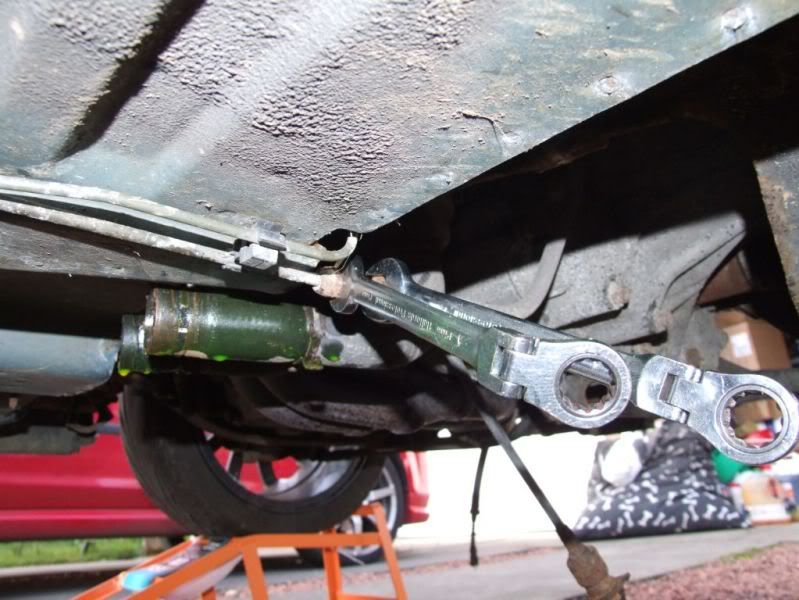
I started by clamping the hoses to minimise brake fluid loss, and then undid and removed the banjo bolts.
Once the hoses are removed replace the bolts to keep the dirt out of the brake system and tie the hoses out of harms way.
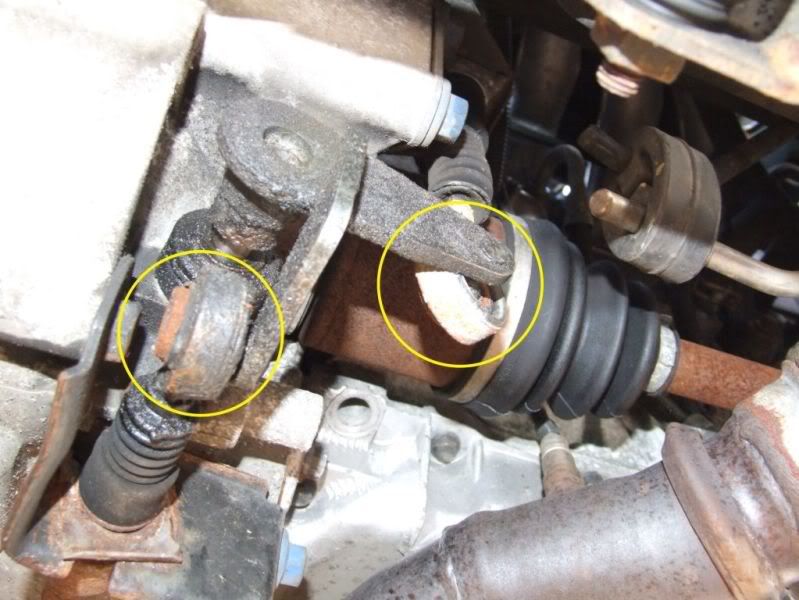
While we are under the car, the gear linkages need to be disconnected.
There are 2 of them. One is connected to a cable that comes from under the car, and the other comes from over the top of the engine and around the back.
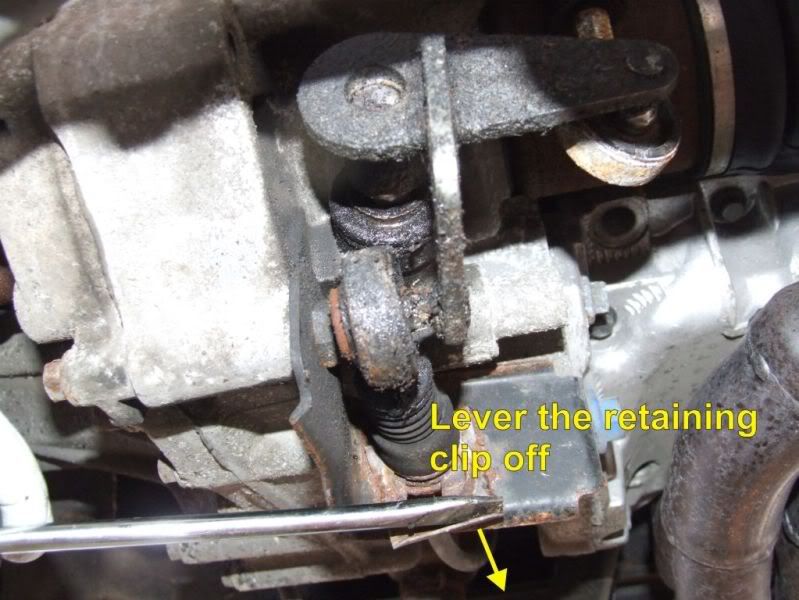
The cables are held in place by large square clips. These can be forced off with a chisel or screwdriver by knocking them downwards.
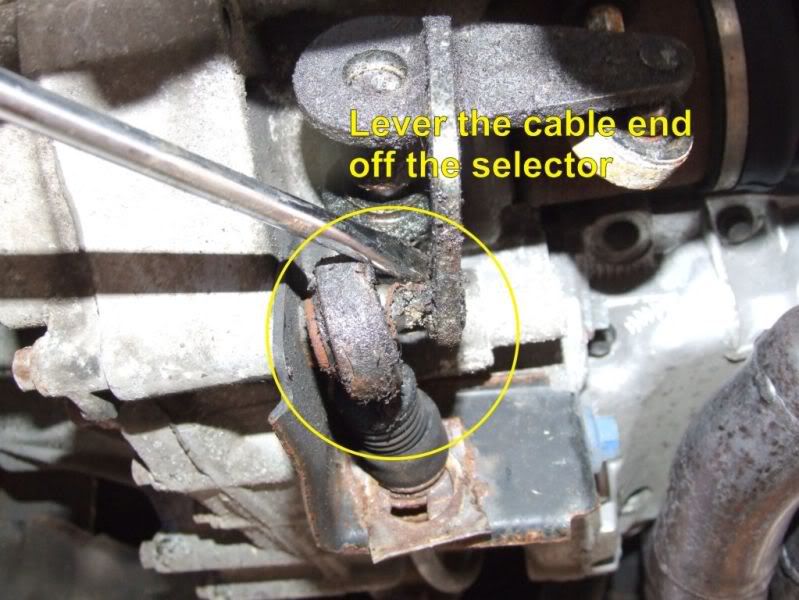
The connectors can just be levered off with a screwdriver. It might take 2 though, one each side of the linkage.
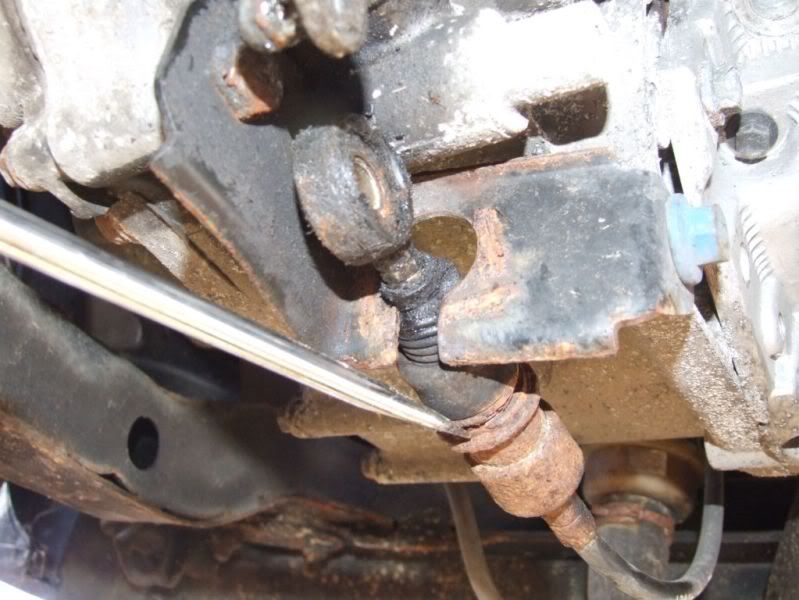
Once the connectors are removed the cables can be slid back (might need gentle persuation) until the narrow point of the cable lines up with the cutout. The cable can then be removed.
The cables now hang loose. Keep an eye on them when dropping the subframe, or tie them out of the way so that they don't get crushed.
Next we will tackle some of the electrical connections.
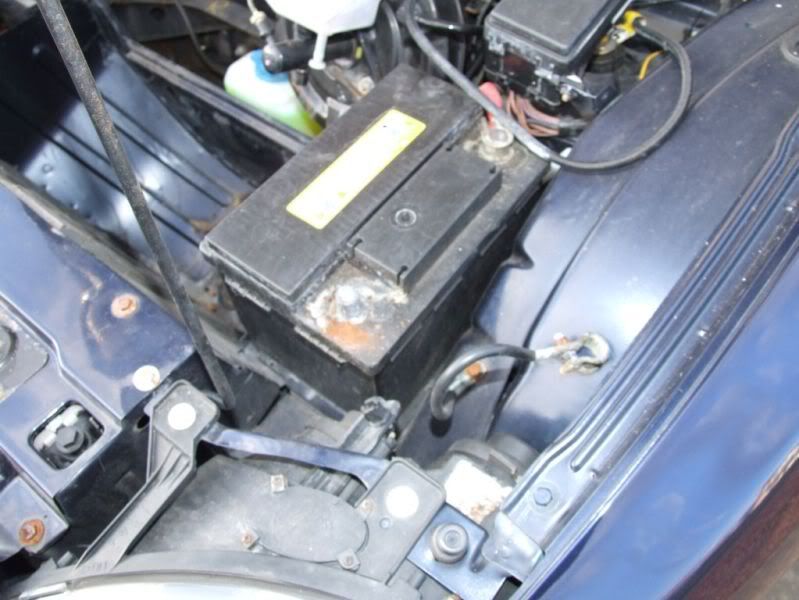
First thing to do would be to disconnect the battery. Make sure you have unlocked the doors and know your radio code etc.
I just disconnect the negative lead, but if you want to disconnect the pos then feel free, but NEVER disconnect the pos without disconnecting the neg first.
Ooh, think those lugs need a bit of Vaseline on them. That's the only reason I have it, honest.
Once that is done, we can start disconnecting.
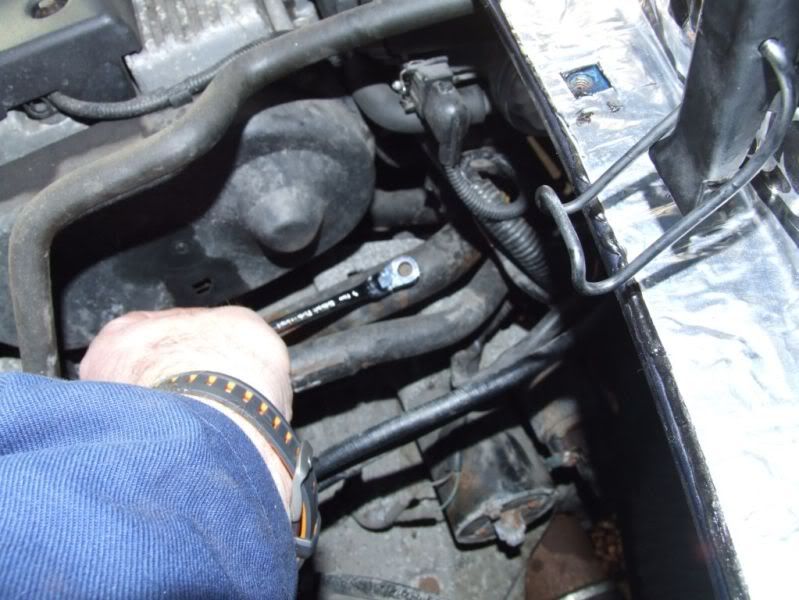
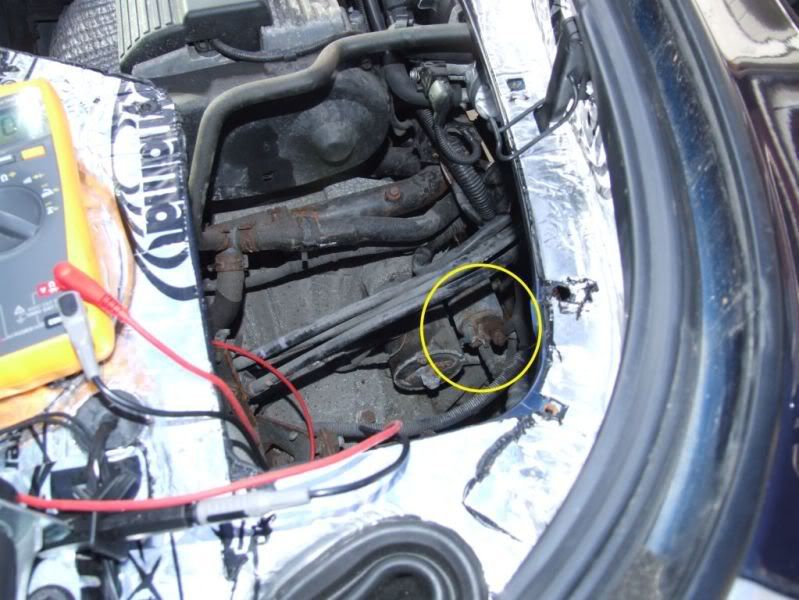
First comes the starter motor. It is just below where the airbox used to be.
The meter is there as I have a habit of checking that all electrical connections are dead before working on them. I know I disconnected the battery, but it is an electrician thing.
Please Log in or Create an account to join the conversation.
Once disconnected, you can remove the clip holding the main cable from the battery and pull it down from the engine compartment out of the way. I also wrapped the connector up so that it cannot short against the chassis if you reconnect the battery later.
Next, unclip the 80Amp fuse holder from the rear of the engine compartment (MGFs might not have this).
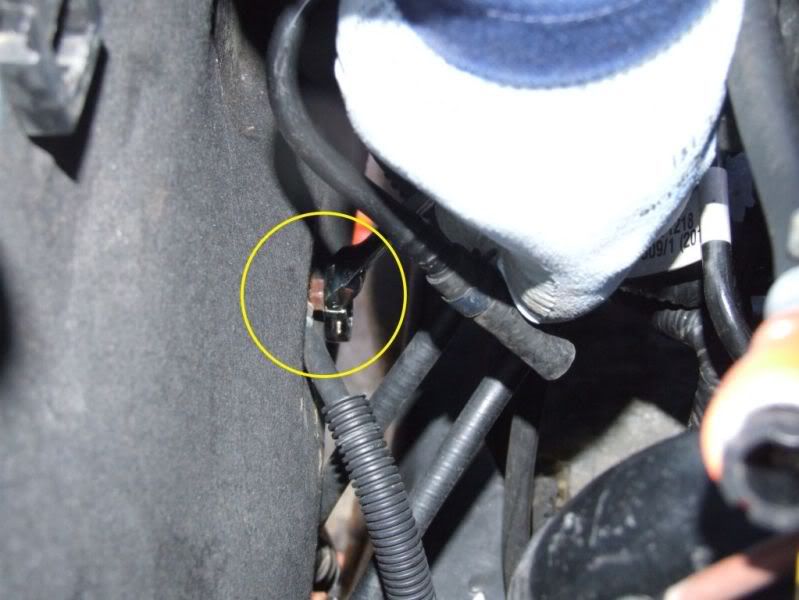
There is also the engine to chassis connection which is connected to the chassis just under where the fuse was.
Before turning our attention to the magic box that is the ECU, there is a connection at the top of the evap cannister. Just pull the connector until it releases.
Now to the ECU
The two main multiplugs need to be removed from the ECU itself. Never do this with the battery connected as you could damage the ECU.
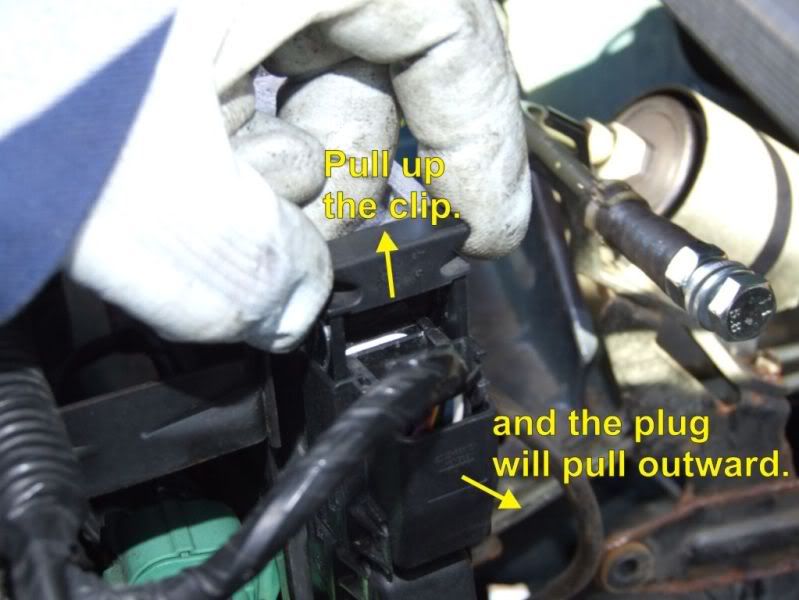
First pull up the retaining clip on the top connector (The bottom connector clip needs to be pulled down). The main connector will now unplug. Do the same for the larger lower plug.
There are also 2 main connectors behind the bracket that holds the ECU in place. You can just see them in the shot above.
You will need to remove the bracket to get access (unles you have the hands of a child).
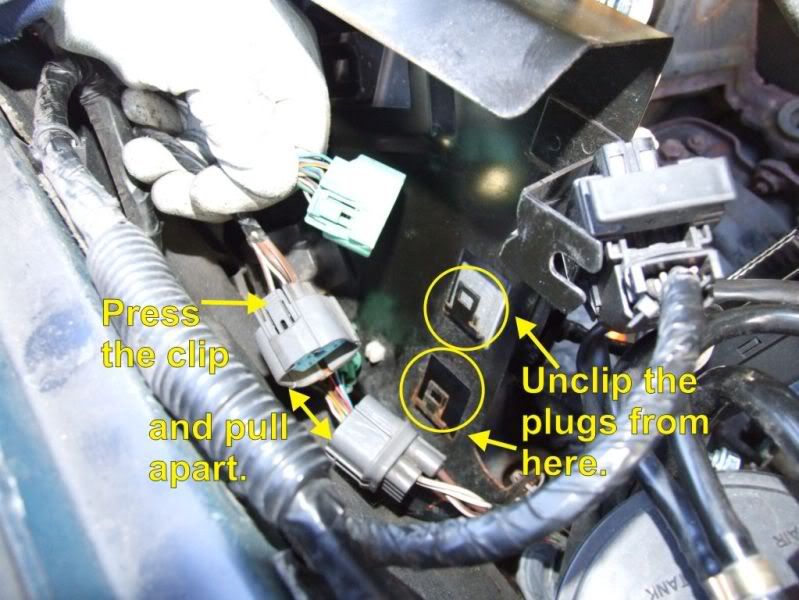
Once the bracket is removed, unclip the connecors from the bracket and pull them apart while pressing the clip that locks them together.
Well, the weather wasn't too bad today (Monday 9/3/09) so I did a few more jobs.
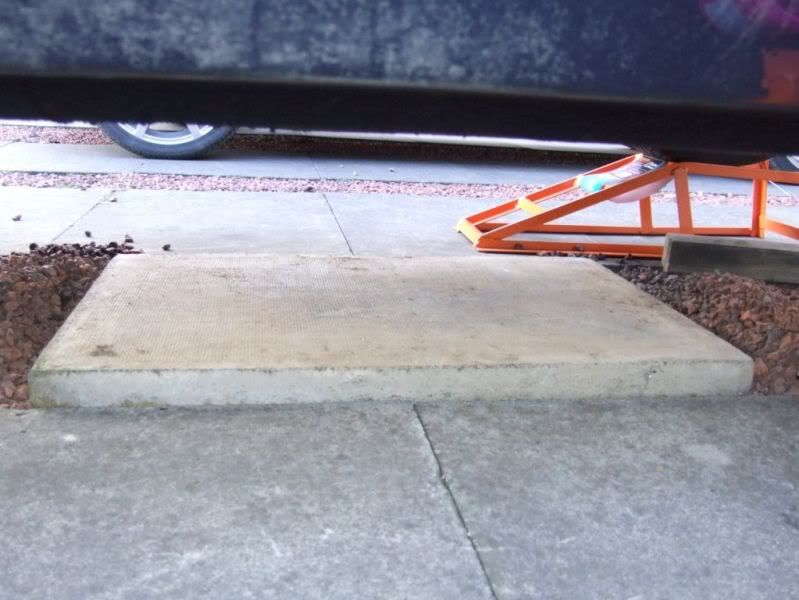
First off I installed a new paving stone.
A strange addition to this how to, but it's worth mentioning to people with these modern drives. You need the stability. Using jacks and axle stands on stones etc is not recommended.
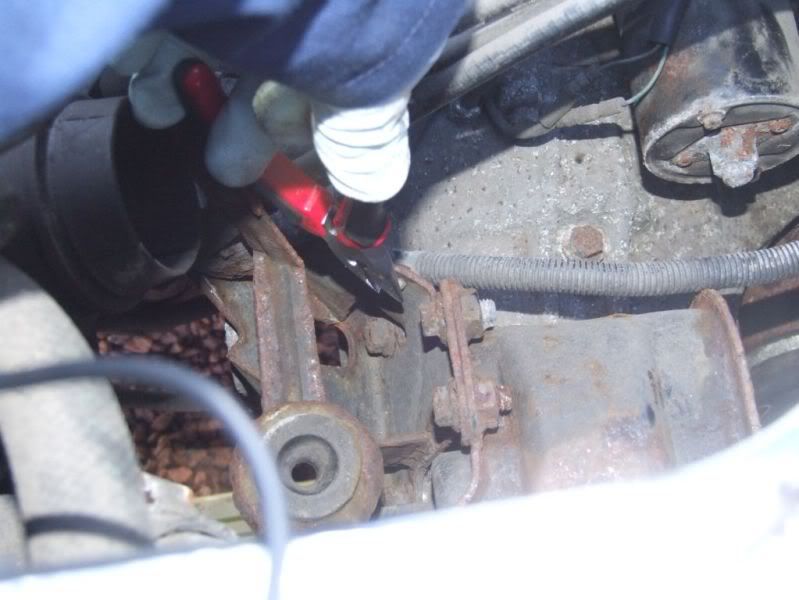
Snip the tie wraps that secure the starter motor cable to the coolant pipe brackets
Unclip the rear coolant hoses from the pipes
and remove them. A fair bit of coolant will come out.
That leaves the clutch slave cylinder supply. I was going to disconnect at the slave cylinder after clamping the hose, but I realised that the fittings on the chassis stuck out quite a way and would probably foul the subframe when it is dropped.
I decided to disconnect at the chassis and allow the fluid to drain. Will just have to bleed it when reconnected.
So, now that all of the connections have been disconnected, we can start on the woodwork lessons.
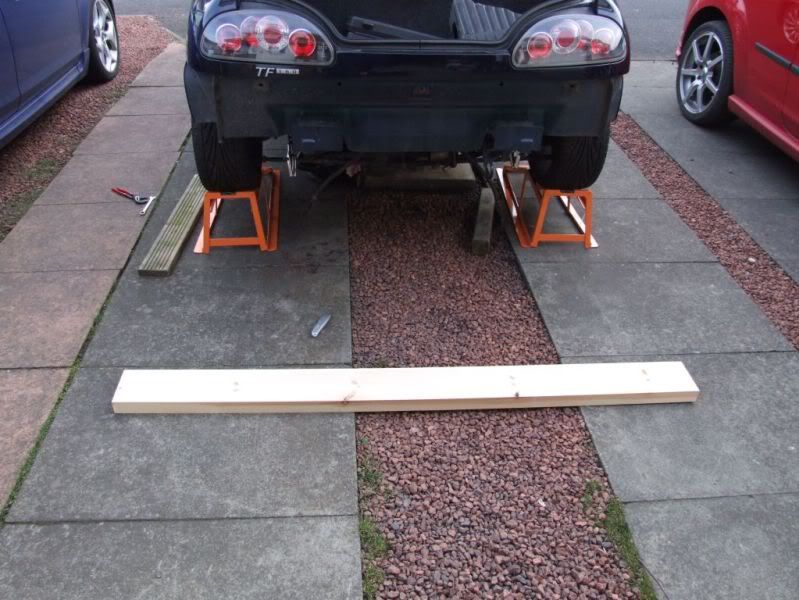
I bought 2 substantial lengths of timber
and cut one just short of the width of the car body.
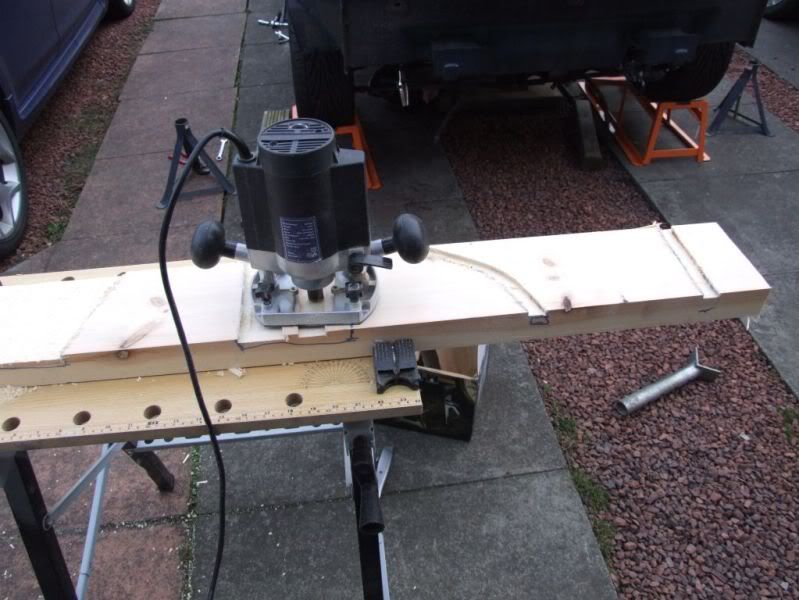
I then offered the timber up to the underside of the car and marked any changes in level and any obstructions such as pipes, sills etc. Then it was time to get the router out.
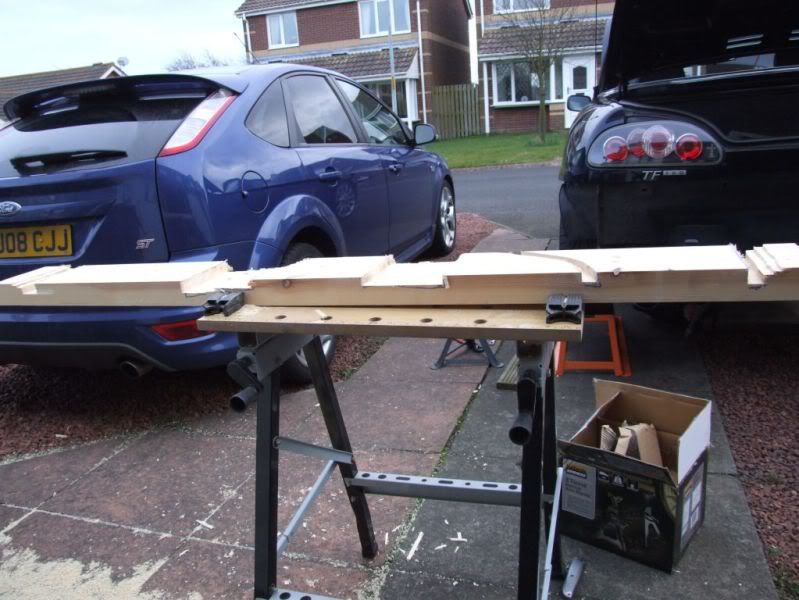
After a couple of trial fits and adjustments the timber was ready.
I then screwed the second length of timber to the first and cut it to length.
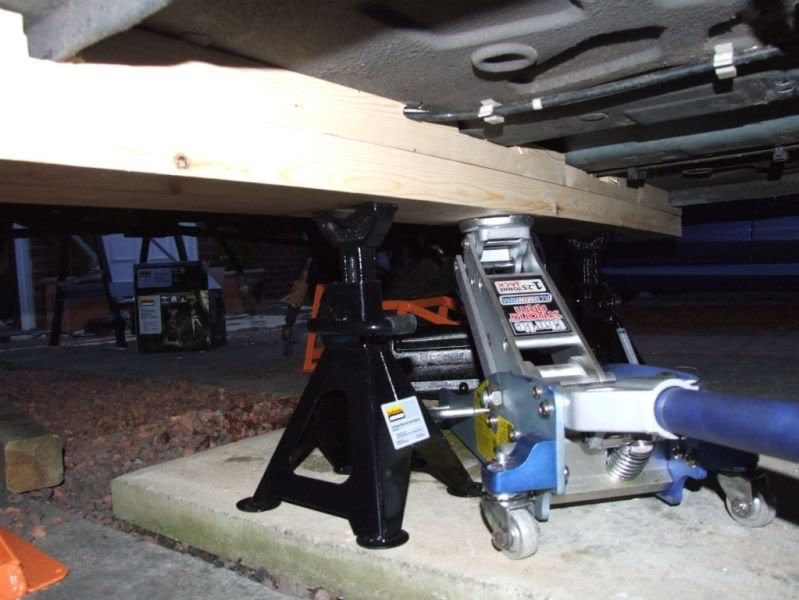
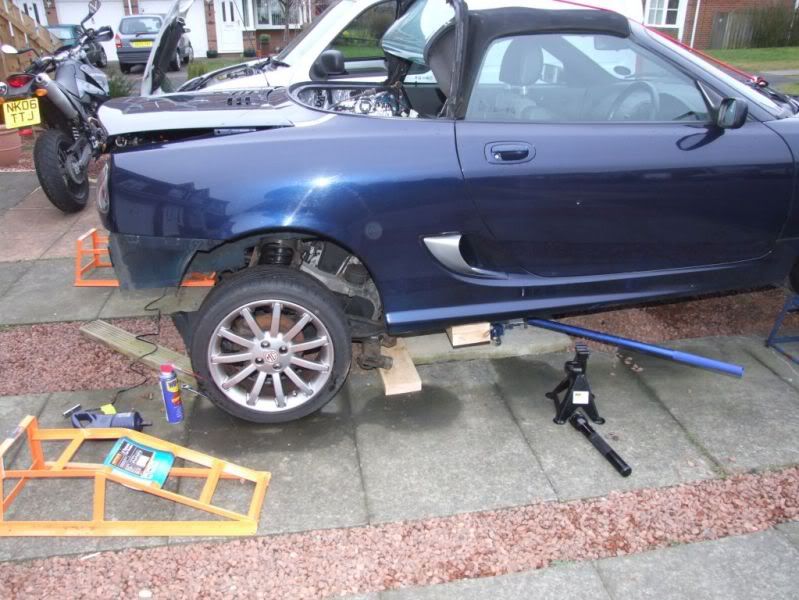
It was then fitted underneath to check that there was no fouling and supported with axle stands.
This is where I will be jacking the rear of the car up to give enough clearance to remove the engine and subframe.
Please Log in or Create an account to join the conversation.
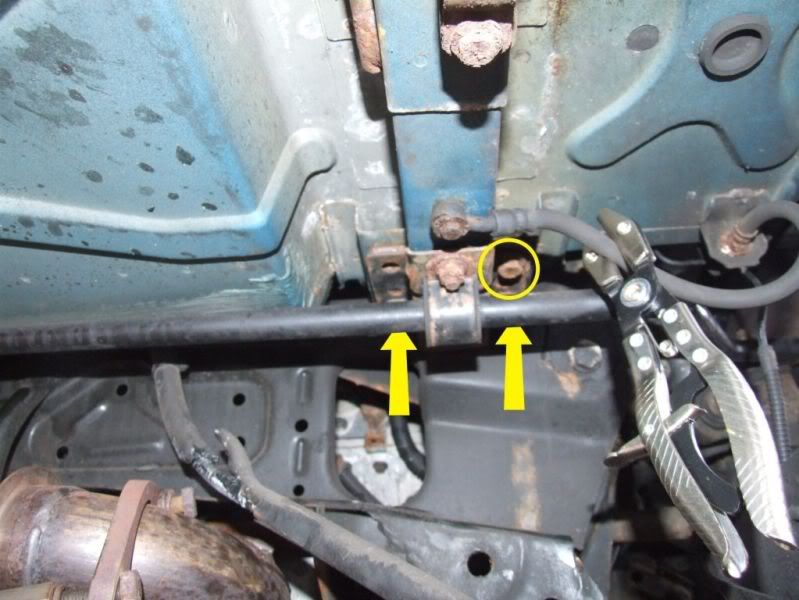
At the rear of the car there are 3 13mm bolts either side
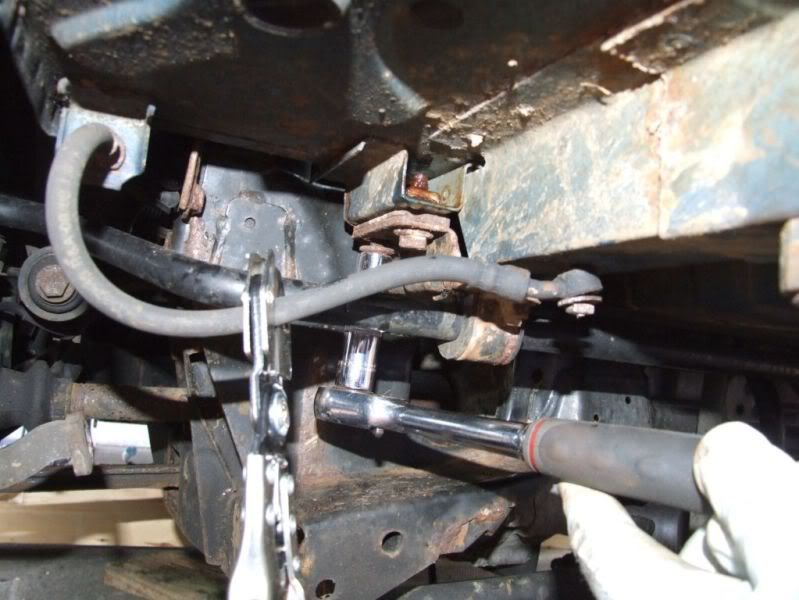
This picture gives a better view of the bolts.
Once the bolts are removed from both sides the anti roll bar will sag down.
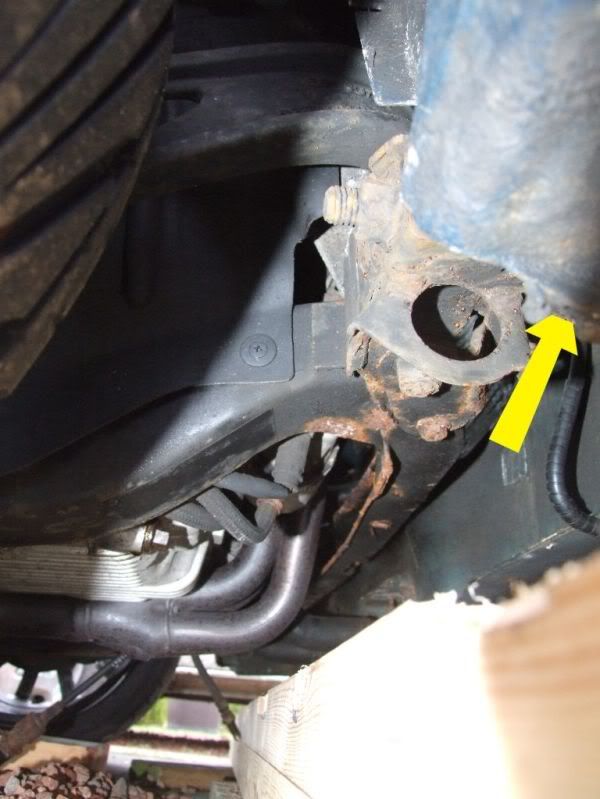
There are also 4 10mm bolts at the front of the subframe, 2 each side. You can't see them in this picture as the sill is in the way, but it gives you an idea of location.
Unfortunately, the offside 2 looked like this when removed. So they are either the worlds shortest bolts, or they have sheared off. I think I will have a bit of drilling to do.
Once the bolts were removed I raised the car slightly
While raising the car I checked for any connections that I previously missed.
And moved any disconnected connections that might get caught up when raising the car.
I did find some connections that were still connected. These were the ABS sensor cables, one each side.
And the coolent hoses for the heater that enter through the rear of the bulkhead.
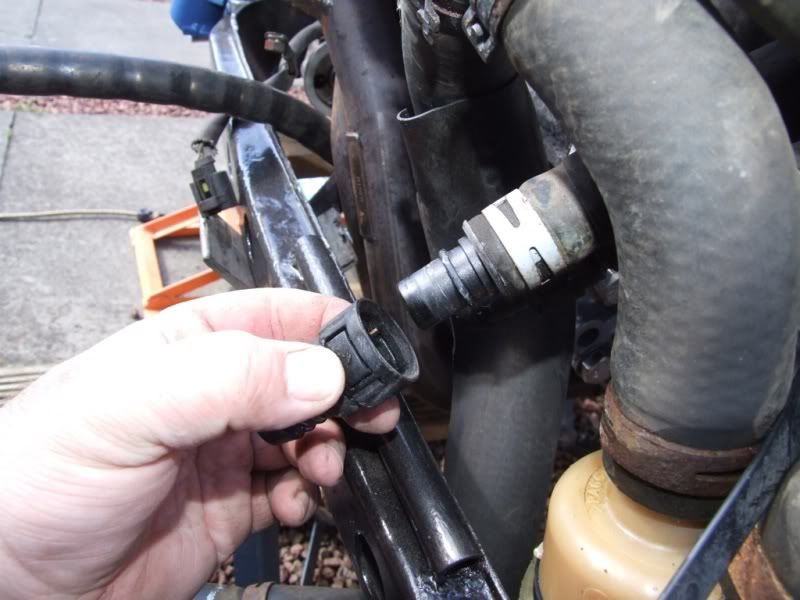
I struggled with the hoses and eventually undid the clips and pulled the hoses off.
I later found out that these are quick release connections. You just need to push the buttons in and twist and the connections release.
And then I ran out of light.
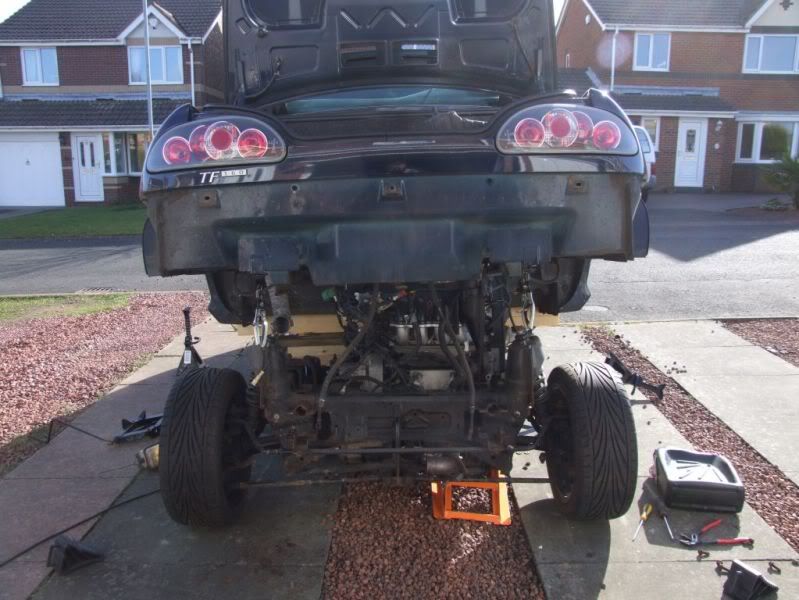
My latest project is the TF monster truck.
Please Log in or Create an account to join the conversation.
and one just above the gearbox.
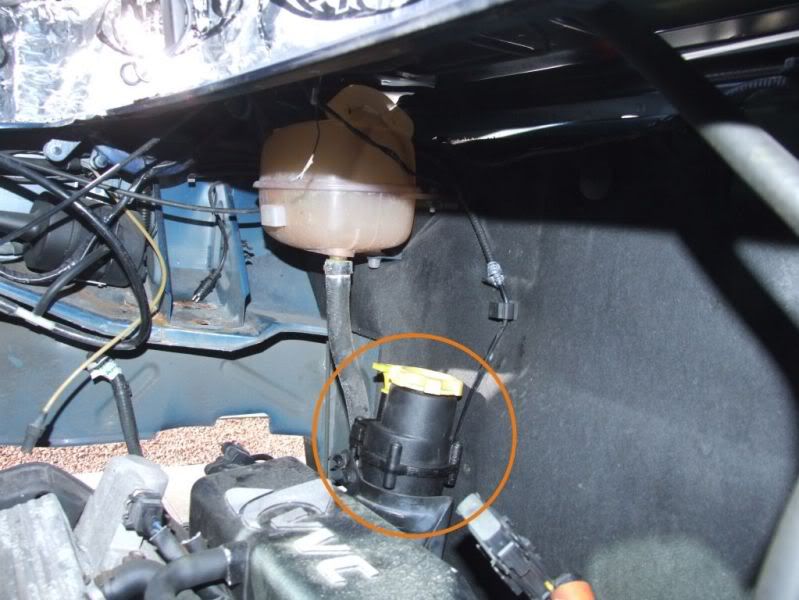
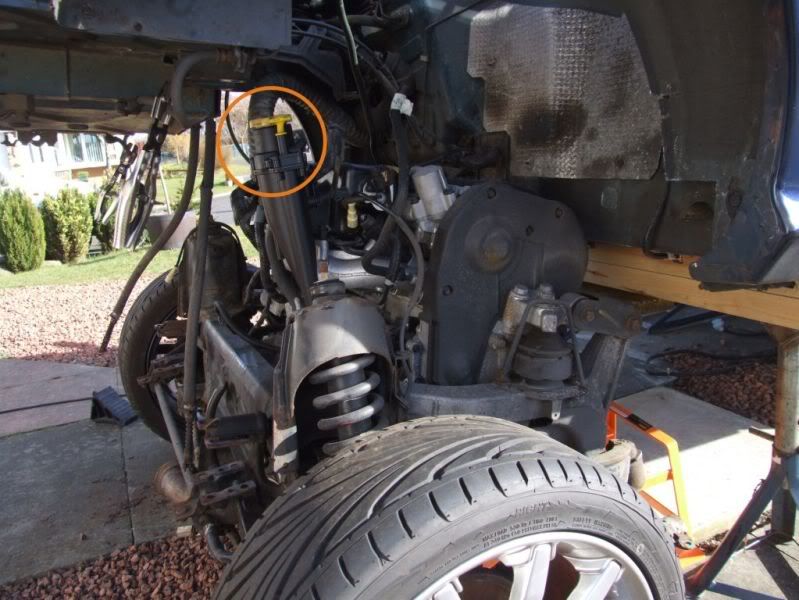
While raising the bodywork I kept an eye on any fittings snagging. The only thing that came close was the dipstick/filler unit, which is the highest point of the engine. As the bodywork came up the filler cap started touching the boot bulkhead. I angled the engine forward a little to give clearance.
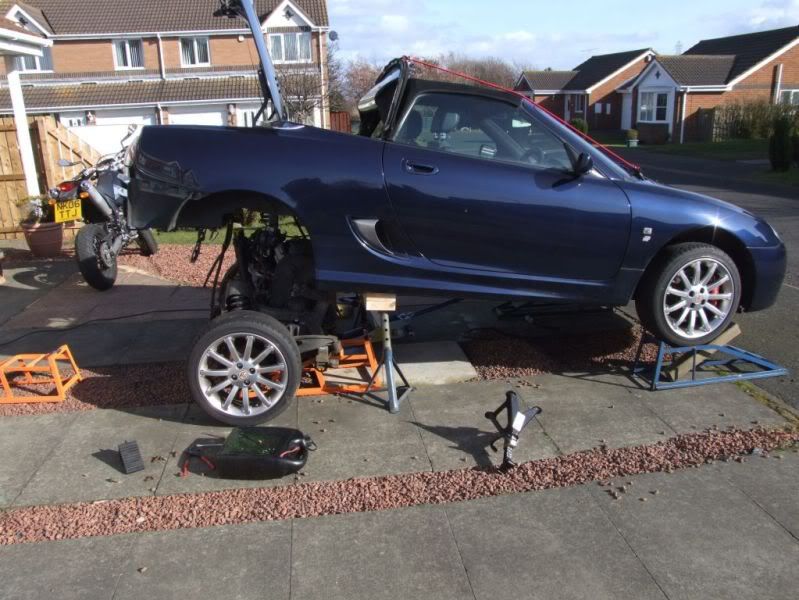
I then raised the body up until there was enough clearance for the subframe/engine.
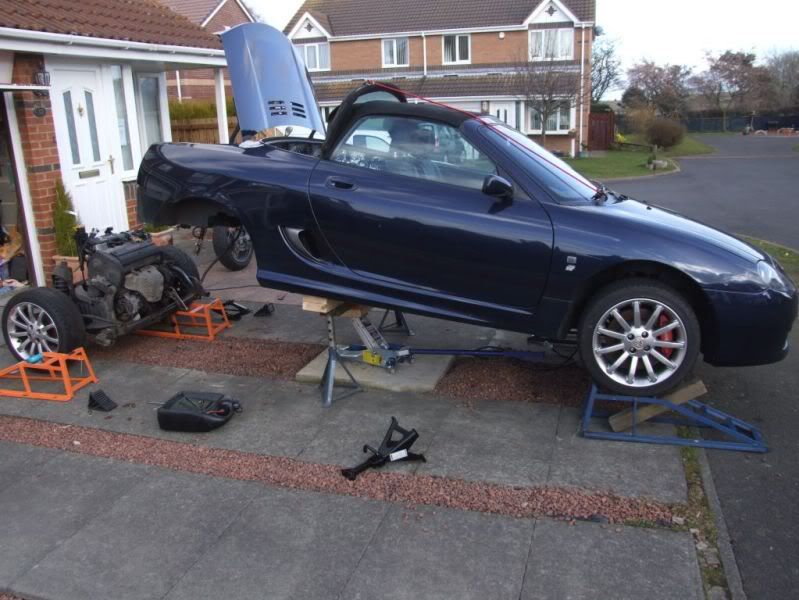
I like this picture as it reminds me of the Citroen advert or a transformer, mid transform.
And a view from the side
As said previously, the highest point is the filler/dipstick, so as long as this clears the bodywork, the rest will follow.
Just as a note, the subframe is front heavy. I got round this by using my other set of ramps to take the weight. I then used them as runners, or rails, by jacking the front of the subframe up, inserting a ramp as far as I could and then rolling the wheels backward. WHen the subframe got close to the end of the ramps flat bit, I then jacked the subframe up an inch, pushed the ramp under again and repeated this until the whole lot was clear of the bodywork.
And eventually, the subframe was clear. This is where the subframe will stay while I am working on it.
I then lowered the bodywork back to level and made it secure so that I could work on it.
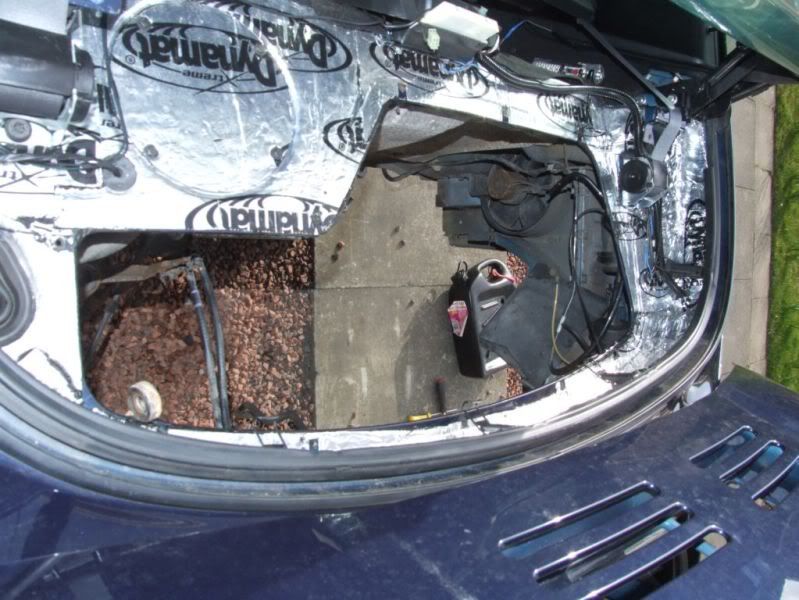
Engine bay looks a bit bare now.
Well, that's this job finished. I have removed the engine/subframe without major damage and/or killing myself/anybody else on the driveway. It can be done without professional garage time and cranes etc.
Good luck.
Please Log in or Create an account to join the conversation.
- georgefreeman918
-
 Offline
- Apprentice MGer
-

- Posts: 13
- Thanks: 10
Replied by georgefreeman918 on topic Engine/rear subframe. - How to remove
Posted 7 years 10 months ago #176590I am handy with a spanner but have never done something on this scale, would you recommend? Also is there a guide for putting it all back together?
Please Log in or Create an account to join the conversation.
- talkingcars
-
 Offline
- Moderator
-

- Posts: 6883
- Thanks: 1297
Replied by talkingcars on topic Engine/rear subframe. - How to remove
Posted 7 years 10 months ago #176607
Home to black Alfa Romeo 159 3.2 V6 Q4 ,green MGF VVC and red MG Maestro T16.
MG - the friendly marque.
Please Log in or Create an account to join the conversation.
Replied by Borypops on topic Engine/rear subframe. - How to remove
Posted 6 years 11 months ago #183737It’s going to take me a long time on my own,(my last project a triumph gt6 my 2 took me 25 years)as I am now 72 I need to do it in my garage can you tell me what head clearance can I get by with. Any help will be appreciated.
Please Log in or Create an account to join the conversation.
- talkingcars
-
 Offline
- Moderator
-

- Posts: 6883
- Thanks: 1297
Replied by talkingcars on topic Engine/rear subframe. - How to remove
Posted 6 years 11 months ago #183741It'll be worth starting your own thread to maximise responses.
James
Home to black Alfa Romeo 159 3.2 V6 Q4 ,green MGF VVC and red MG Maestro T16.
MG - the friendly marque.
Please Log in or Create an account to join the conversation.
Replied by Kenwal50 on topic Engine/rear subframe. - How to remove
Posted 4 years 7 months ago #193535Please Log in or Create an account to join the conversation.
- Splintercat
-
 Offline
- Novice MGer
-

- Posts: 5
- Thanks: 0
Replied by Splintercat on topic How to remove the engine/rear subframe.
Posted 3 years 9 months ago #195439Please Log in or Create an account to join the conversation.
- Splintercat
-
 Offline
- Novice MGer
-

- Posts: 5
- Thanks: 0
Replied by Splintercat on topic How to remove the engine/rear subframe.
Posted 3 years 9 months ago #195453Please Log in or Create an account to join the conversation.
Replied by CharlieC on topic How to remove the engine/rear subframe.
Posted 3 years 2 months ago #197495Please Log in or Create an account to join the conversation.

