
Fitting an LE500 bumper to a TF


If anybody out there told you that an LE500 bumper fits straight on to a TF, then they lie like a cheap watch.
The idea was to update the front of the TF with the shapelier LE bumper, and would be an easy fit, or so I thought.
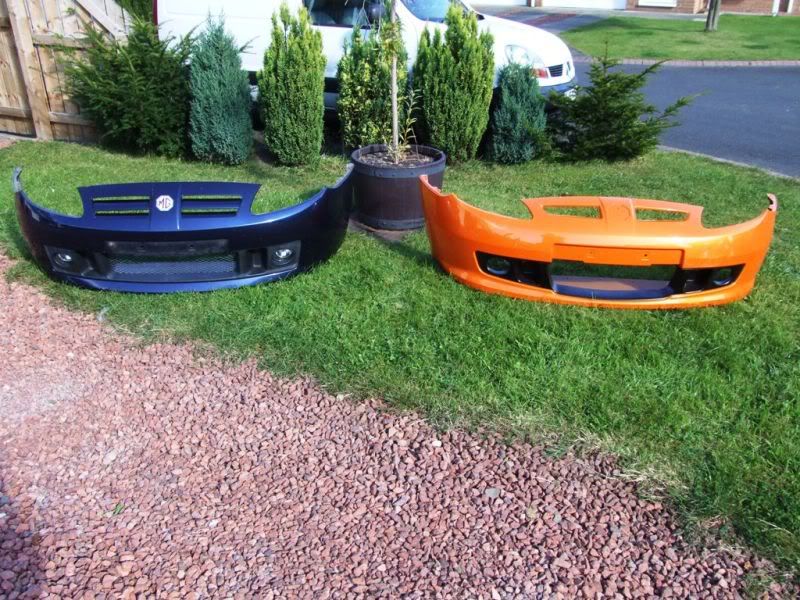
While I like the TF front, the rectangular black bit always looked a bit out of place.
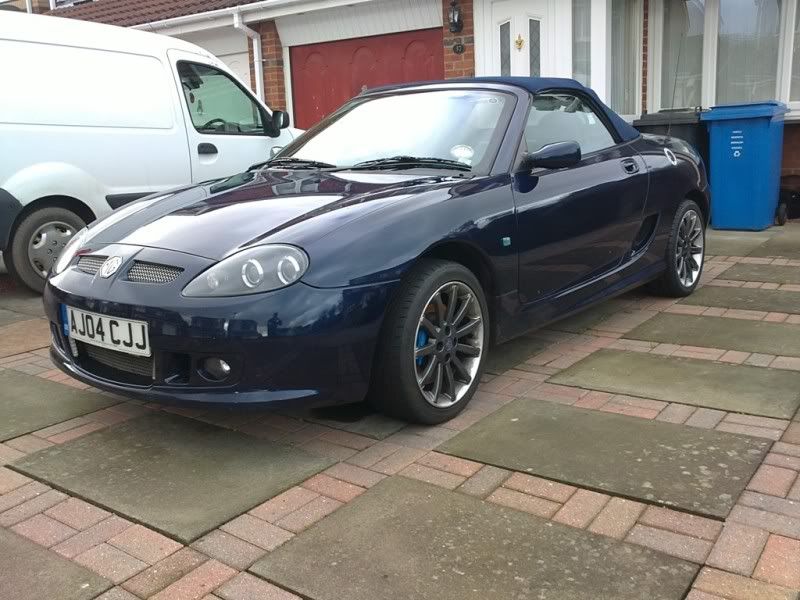
So I bought the LE500 bumper which has a bit more shape to it. You can see the difference here.
The good news is that the screws along the top of the slam panel are the same, and the fastenings to the wings are the same.
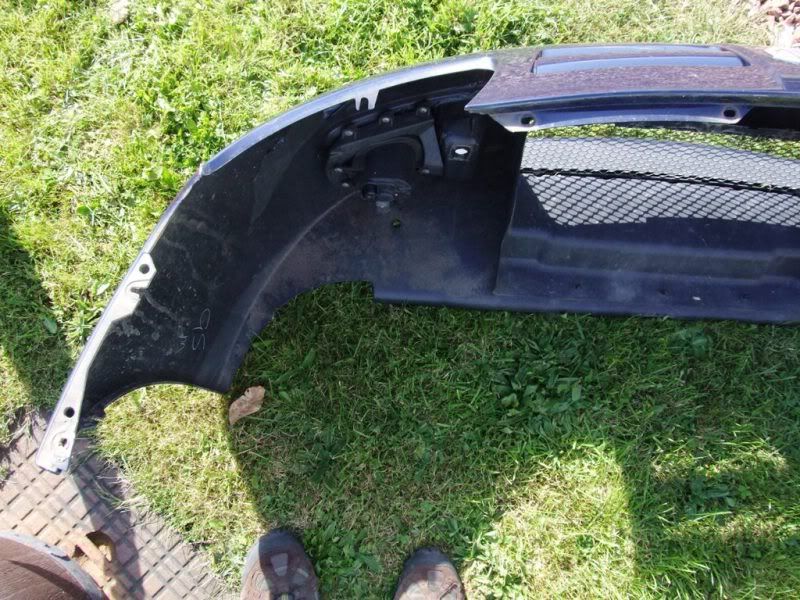
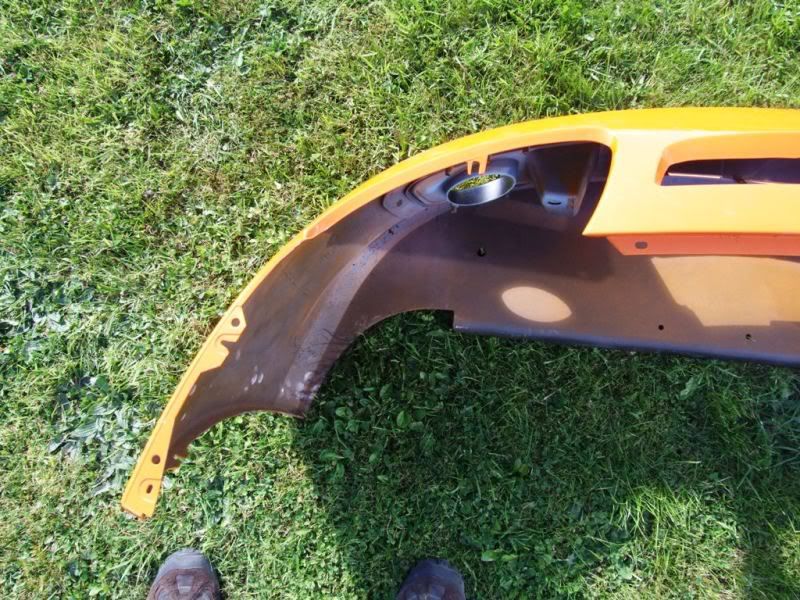
The adaptor that secures the fog light to the bumper has six screws. The top six screws on each bracket are different spacing to the bottom 3, so the unit will only go on the correct way up.
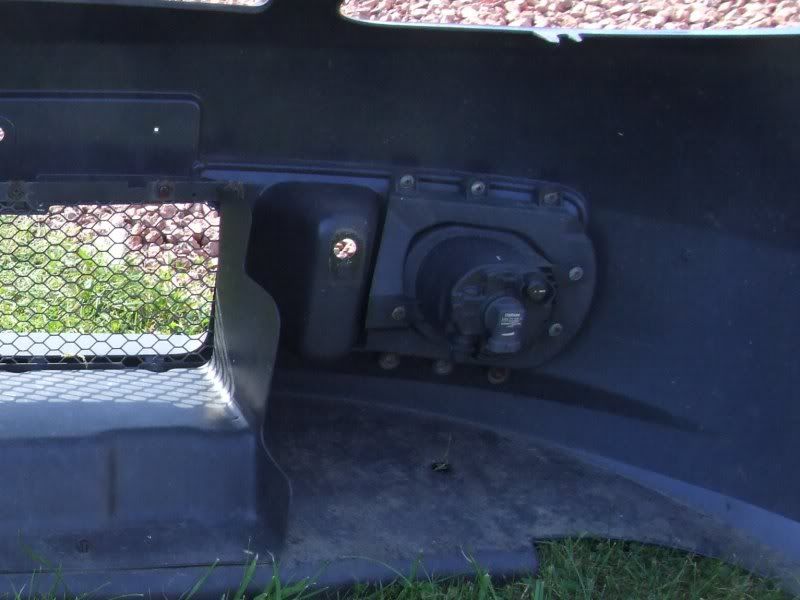
Unfortunately, the bad news is that the rest of the fittings are different
The grill and air dam securing points are different. They need some "modifying" to fit.
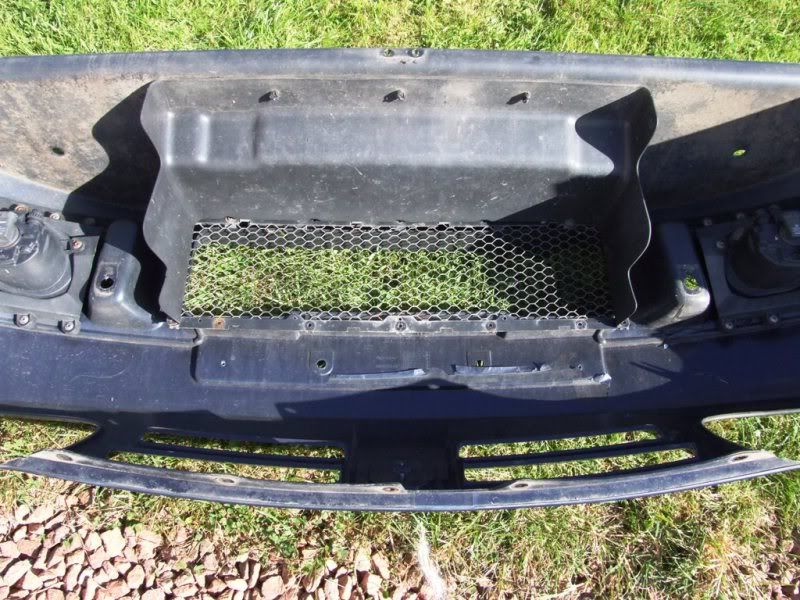
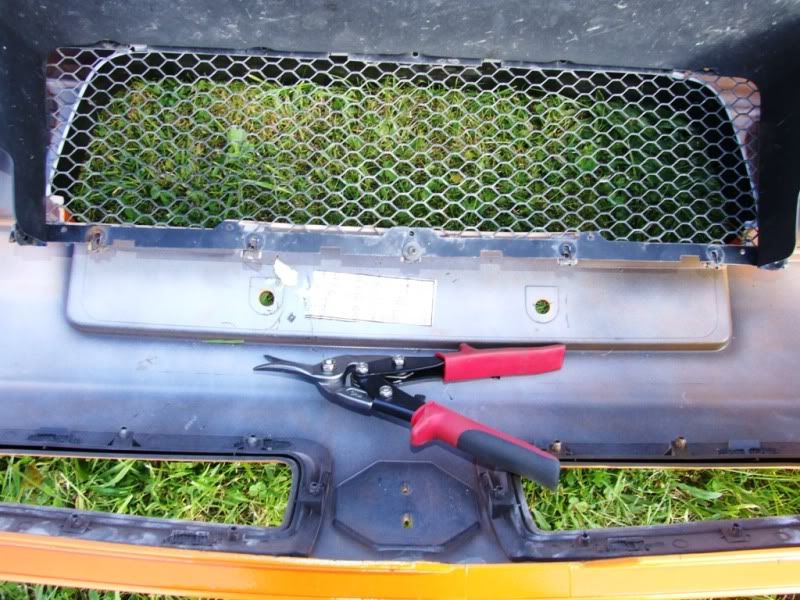
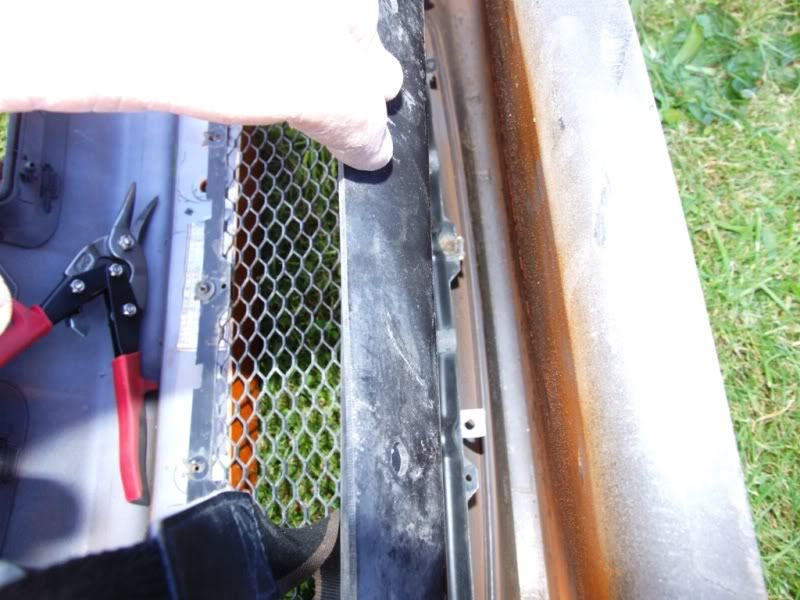
But the biggest problem that I found is that the holes in the front of the bumper where the 2 splined bolts secure the bumper to the armature didn't line up.
On the old bumper, the holes lined up with the second hole up (you can see it has a nut welded on the back). The LE500 bumper holes line up with the very bottom hole, which has no nut.
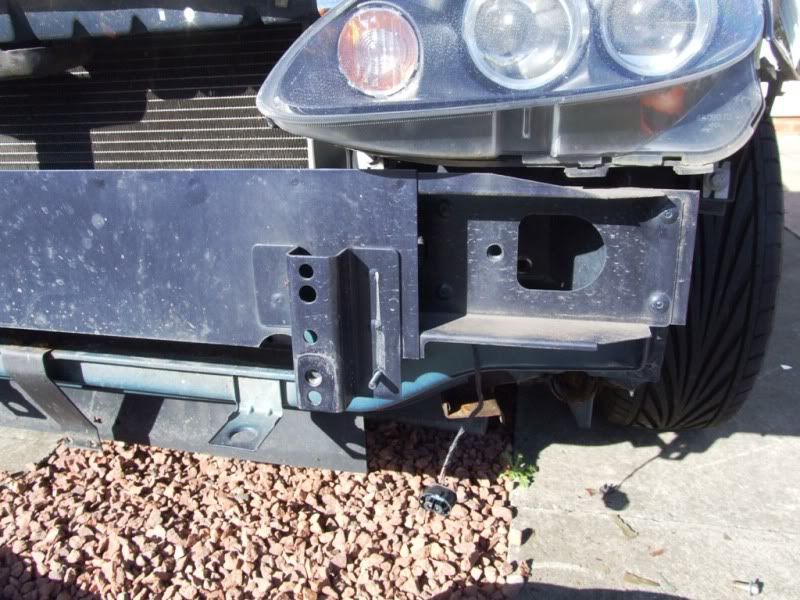
So, off came the armature, opened up the bottom hole with a drill
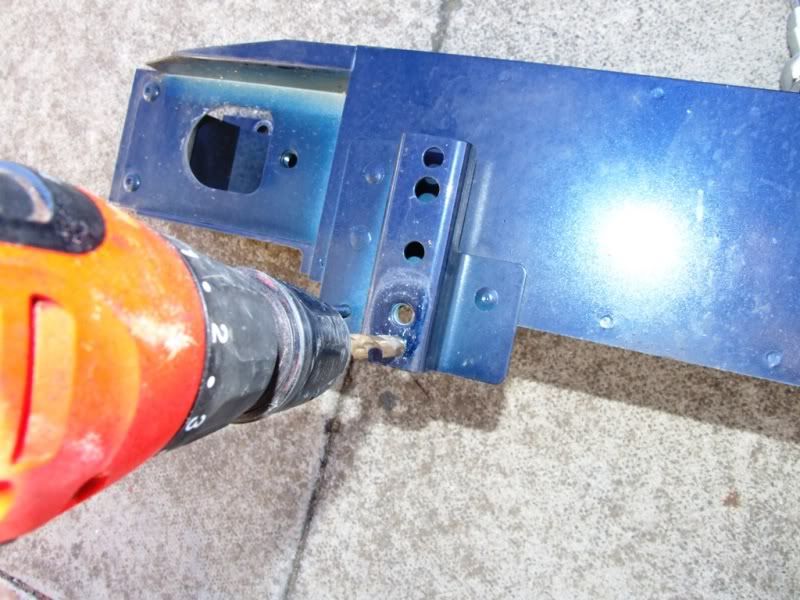
Found suitable nuts
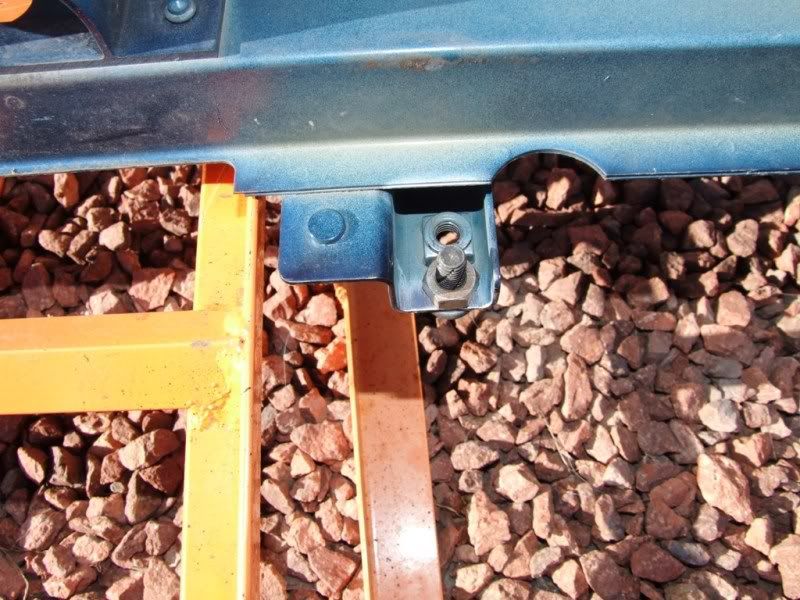
and out came the welder
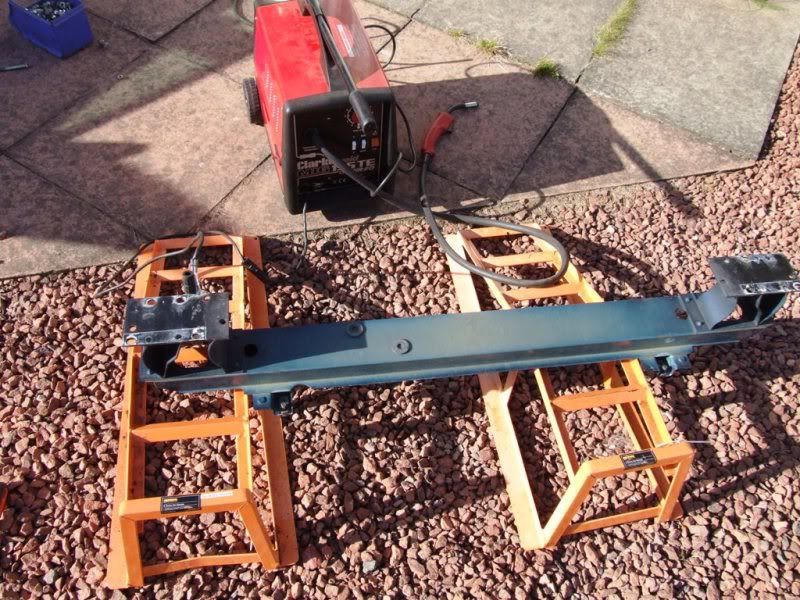
then a coating of Hammerite to stop the old rust
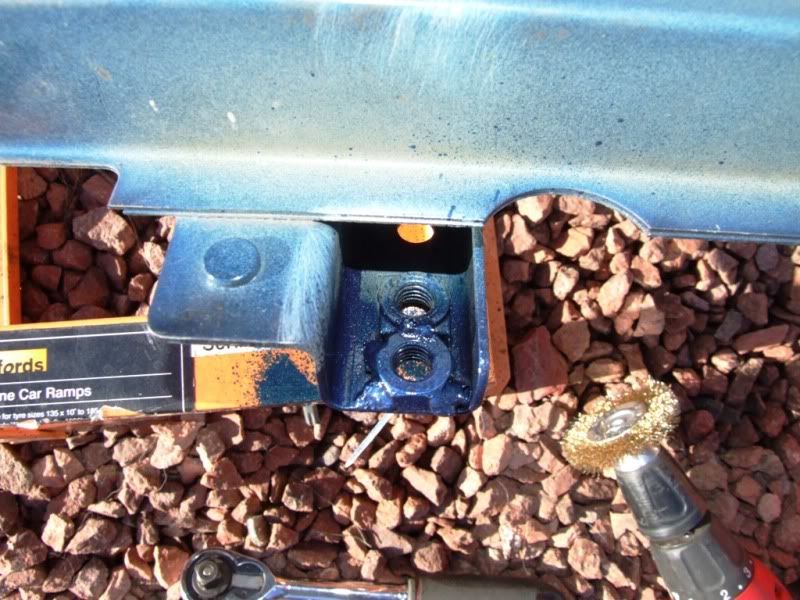
and back on with the armature
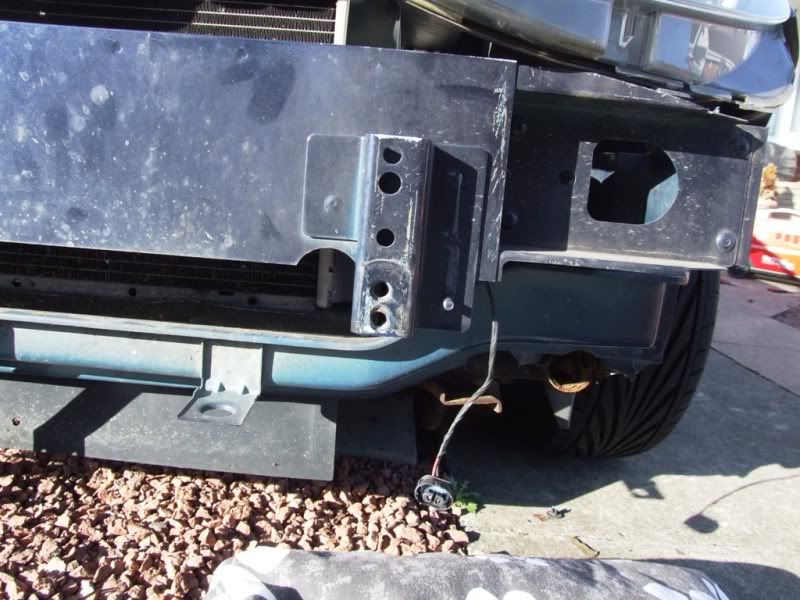
The bumper now fits.
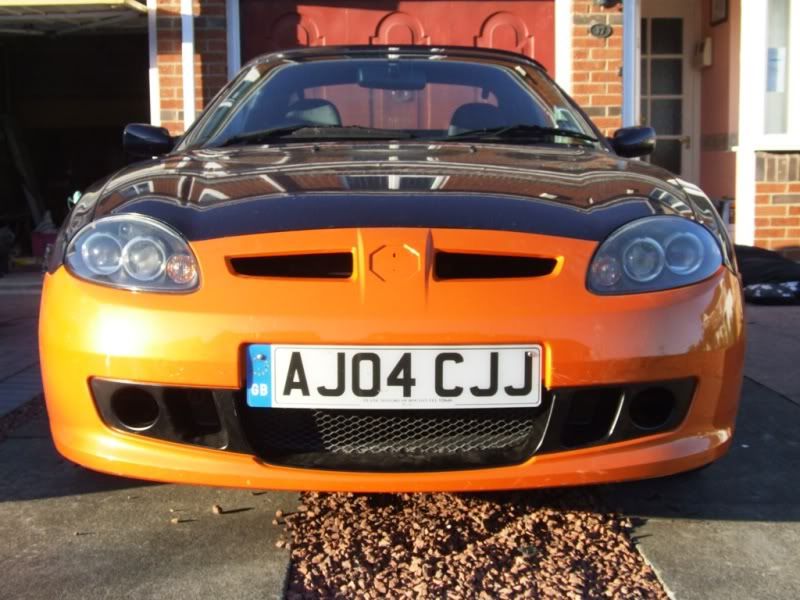

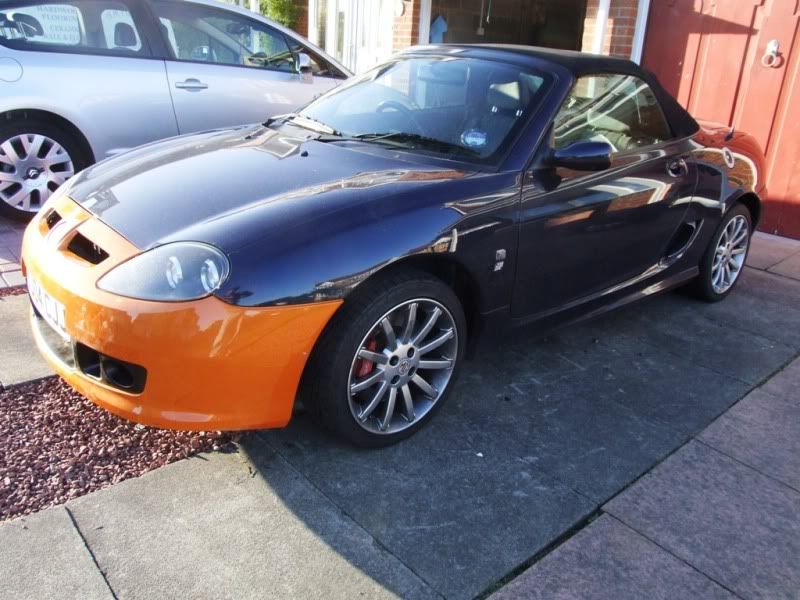
Got to admit, when I took it for spraying, I was tempted to go with the orange, but I resisted and went with the Royal Blue and an LE500 MG badge.
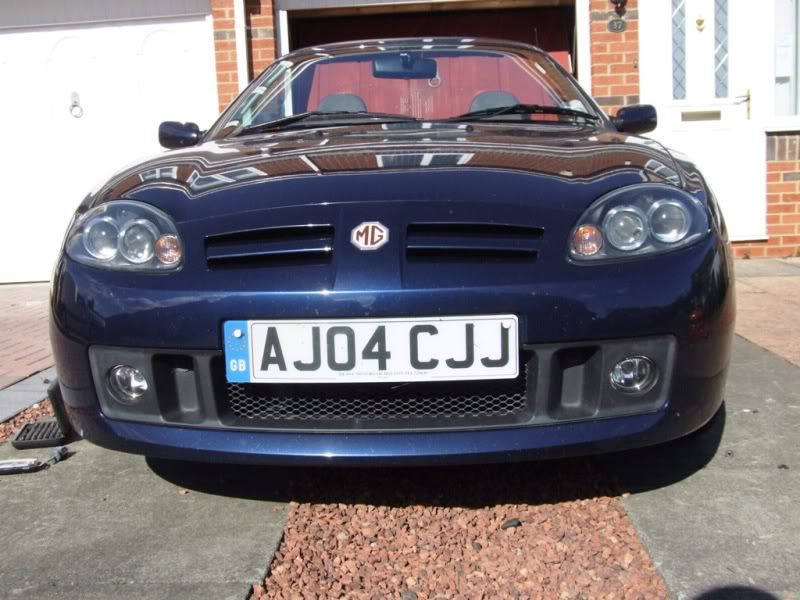
The finished article
The idea was to update the front of the TF with the shapelier LE bumper, and would be an easy fit, or so I thought.
While I like the TF front, the rectangular black bit always looked a bit out of place.
So I bought the LE500 bumper which has a bit more shape to it. You can see the difference here.
The good news is that the screws along the top of the slam panel are the same, and the fastenings to the wings are the same.
The adaptor that secures the fog light to the bumper has six screws. The top six screws on each bracket are different spacing to the bottom 3, so the unit will only go on the correct way up.
Unfortunately, the bad news is that the rest of the fittings are different
The grill and air dam securing points are different. They need some "modifying" to fit.
But the biggest problem that I found is that the holes in the front of the bumper where the 2 splined bolts secure the bumper to the armature didn't line up.
On the old bumper, the holes lined up with the second hole up (you can see it has a nut welded on the back). The LE500 bumper holes line up with the very bottom hole, which has no nut.
So, off came the armature, opened up the bottom hole with a drill
Found suitable nuts
and out came the welder
then a coating of Hammerite to stop the old rust
and back on with the armature
The bumper now fits.
Got to admit, when I took it for spraying, I was tempted to go with the orange, but I resisted and went with the Royal Blue and an LE500 MG badge.
The finished article
Last Edit:12 years 6 months ago
by cjj
Last edit: 12 years 6 months ago by cjj.
Please Log in or Create an account to join the conversation.






- GT MG SPARES LTD
-
 Offline
- Qualified MGer
-

Registered
- Posts: 643
- Thanks: 256
Replied by GT MG SPARES LTD on topic Fitting an LE500 bumper to a TF
Posted 12 years 6 months ago #136398
Yes after dismantling a LE 500 there are lots of small slightly different to the oe mg rover parts,it still suprises me that so called mgf specialists on ebay still sell 2002 to 2006 MGTF parts as LE500.
Sources tell me the burnt orange bumpers had problems with the paint peeling and the LE500 bumpers called back or wasnt supposed to be fitted made there way out of longbridge and on to ebay
Sources tell me the burnt orange bumpers had problems with the paint peeling and the LE500 bumpers called back or wasnt supposed to be fitted made there way out of longbridge and on to ebay
Last Edit:12 years 6 months ago
by GT MG SPARES LTD
Last edit: 12 years 6 months ago by GT MG SPARES LTD.
Please Log in or Create an account to join the conversation.
- hawkster050671
-
 Offline
- Novice MGer
-

Registered
- Posts: 7
- Thanks: 0
Replied by hawkster050671 on topic Fitting an LE500 bumper to a TF
Posted 12 years 6 months ago #136413
Hi good job looks great, just thinking would you want to sell the fog lamp brackets from the old bumper?
Please Log in or Create an account to join the conversation.

Looks the business roughly how much does the paint job cost just to give me an idea as I would like to get the back end passenger side of mine sprayed but have no idea of respray prices 
Work to live don't live to work.
by John Pell
Please Log in or Create an account to join the conversation.
No idea mate, I had the whole car re sprayed at the same time.
by cjj
Please Log in or Create an account to join the conversation.
Hello all
Amazing How to, as all of yours, cjj

I love that bumper and got one from ´Bitz (used, and as previously stated the paint has almost totally peeled off by itself) to do the conversion.
I also got the 2 bolts from Rimmer´s ALR6871, but I now know I will need a couple of nuts to go with them in the "new" holes.
As the threads can be so difficult to match in the continent, where I live, can anyone give me a better reference on those nuts to get them online?
Thanks so much,
Pedro
Amazing How to, as all of yours, cjj
I love that bumper and got one from ´Bitz (used, and as previously stated the paint has almost totally peeled off by itself) to do the conversion.
I also got the 2 bolts from Rimmer´s ALR6871, but I now know I will need a couple of nuts to go with them in the "new" holes.
As the threads can be so difficult to match in the continent, where I live, can anyone give me a better reference on those nuts to get them online?
Thanks so much,
Pedro
by Red110
Please Log in or Create an account to join the conversation.
I went a different route and put rivet nuts in the holes in the armature bar
Something like these https://www.amazon.co.uk/TA-VIGOR-M10-Stainless-Automotive-Furniture/dp/B0CJJKVHQM?th=1 , don't have a welder, so that was the easiest route , You'll need the insertion tool though
I went with this one, it comes with a good selection of Rivet Nuts too https://www.amazon.co.uk/VonHaus-Rivet-Gun-Riveter-Assorted/dp/B09GW6FY2L
LE500 Bumper, and TF headlights fitted to an MGF
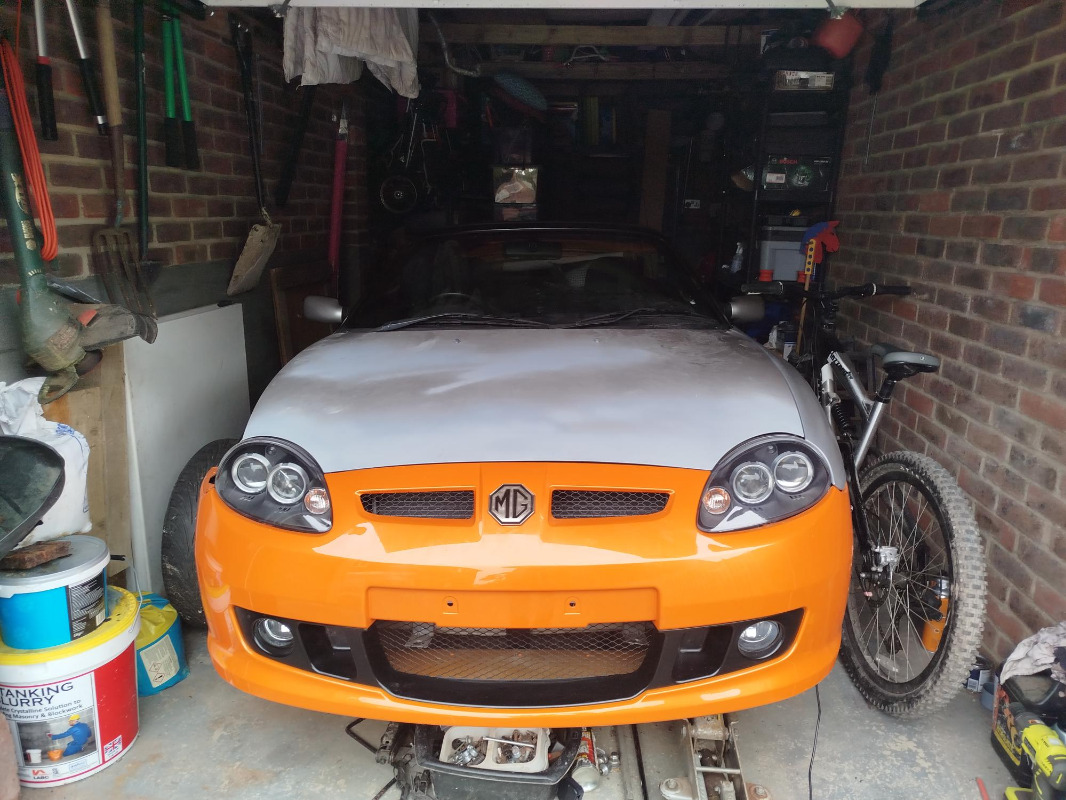
Something like these https://www.amazon.co.uk/TA-VIGOR-M10-Stainless-Automotive-Furniture/dp/B0CJJKVHQM?th=1 , don't have a welder, so that was the easiest route , You'll need the insertion tool though
I went with this one, it comes with a good selection of Rivet Nuts too https://www.amazon.co.uk/VonHaus-Rivet-Gun-Riveter-Assorted/dp/B09GW6FY2L
LE500 Bumper, and TF headlights fitted to an MGF
Last Edit:1 year 2 months ago
by psymon
Last edit: 1 year 2 months ago by psymon.
Please Log in or Create an account to join the conversation.
Thank you very much Psy
I didn’t know that piece of hardware existed
Something new and useful to learn, and I only own a small welder.
Great

Lovely car, BTW
I didn’t know that piece of hardware existed
Something new and useful to learn, and I only own a small welder.
Great
Lovely car, BTW
by Red110
Please Log in or Create an account to join the conversation.
- Airportable
-
 Offline
- Master MGer
-

Site Supporter
- Posts: 3675
- Thanks: 912
Rivnuts are a very useful item to have about in the workshop, I use them on a regular basis & not just with the tool. For instance, if you want a thread in some thin plastic, they can be epoxy glued in.
The job I’m on with at the moment has nuts in the daftest places, whilst easily accessible one are captive.
They are available in aluminium, mild & stainless steel. You can insert them with a “pop rivet” type gun as well as the one illustrated. You can also get size dedicated items, which are small in comparison & it is these that are the type I use.
You can insert inserts into interesting places, where the other tools aren’t applicable.
I’m now of out to insert the last three on this job.
If required I’ll post some pictures later.
M
The job I’m on with at the moment has nuts in the daftest places, whilst easily accessible one are captive.
They are available in aluminium, mild & stainless steel. You can insert them with a “pop rivet” type gun as well as the one illustrated. You can also get size dedicated items, which are small in comparison & it is these that are the type I use.
You can insert inserts into interesting places, where the other tools aren’t applicable.
I’m now of out to insert the last three on this job.
If required I’ll post some pictures later.
M
by Airportable
Please Log in or Create an account to join the conversation.
Time to create page: 2.559 seconds