How to fit a modified alternator adjuster.
It’s been a while since I last did a how to, so I thought I would get back into the habit again.
One of the more fiddly jobs on the F/TF is ensuring the correct tension on the alternator belt to prevent it slipping. This often involves tightening the belt every now and then as the belt stretches over time.
A how to on tightening the belt can be found here http://www.the-t-bar.com/forum/22-cjj-s-guides/30615-how-to-adjust-the-alternator-belt
People who have adjusted the belt will tell you that the bolts can be a pain to get at to loosen and the small adjuster bolt often goes missing.
Well, there is now an alternative modification which is quick and easy to fit and should make the process of adjusting a lot simpler.
The adjuster is quite a clever use of rose joints and a turnbuckle with locknuts.
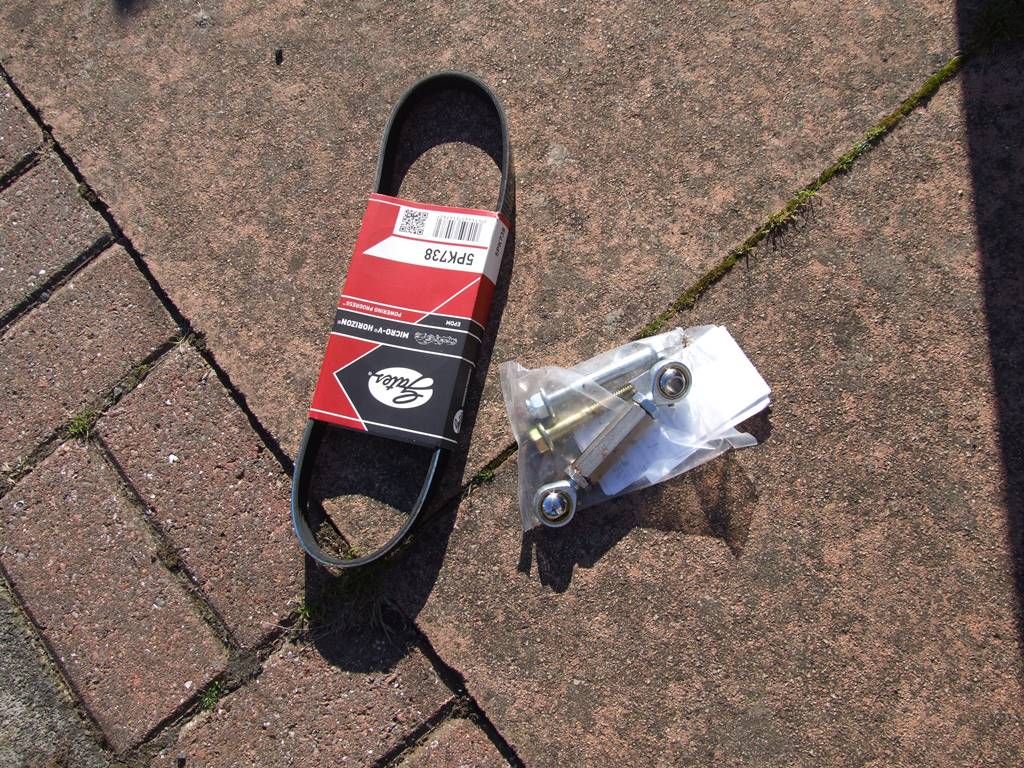
I bought the adjuster from MGMania Ltd. I also bought a new belt to fit while I was in there.
First thing to do is raise the offside rear of the car off the ground, support with axle stands and remove the wheel.
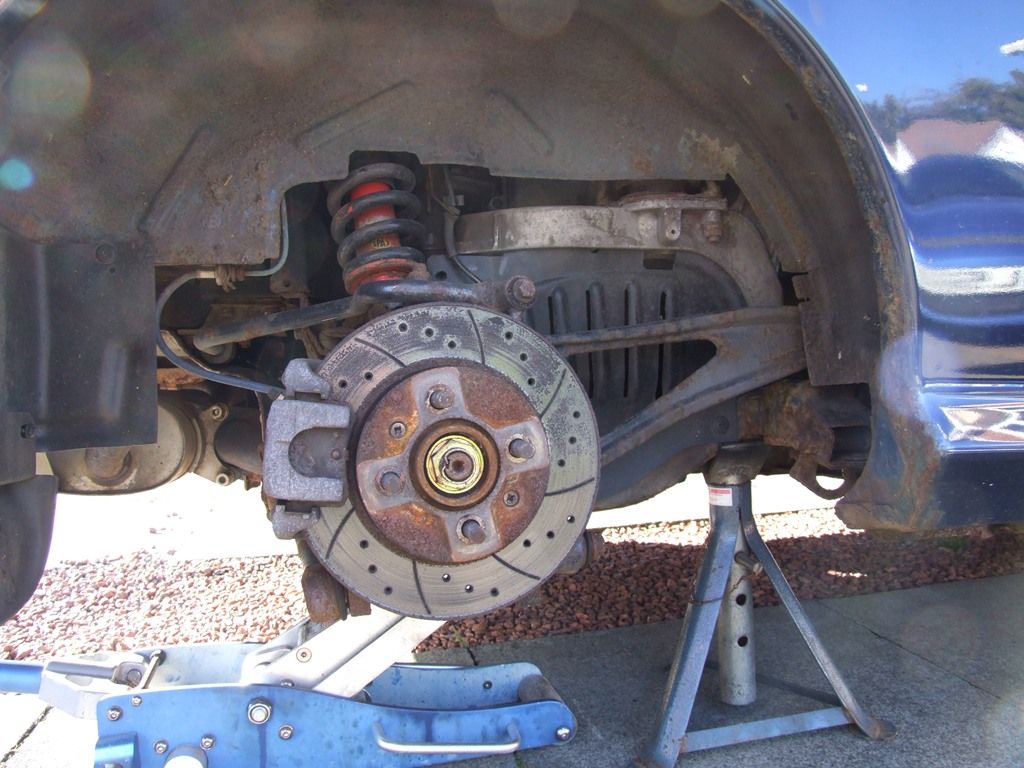
Which exposes the plastic cover. To remove the cover, use a good fitting cross point screwdriver and screw out the inner part of the 3 Scrivets which hold the cover in place.
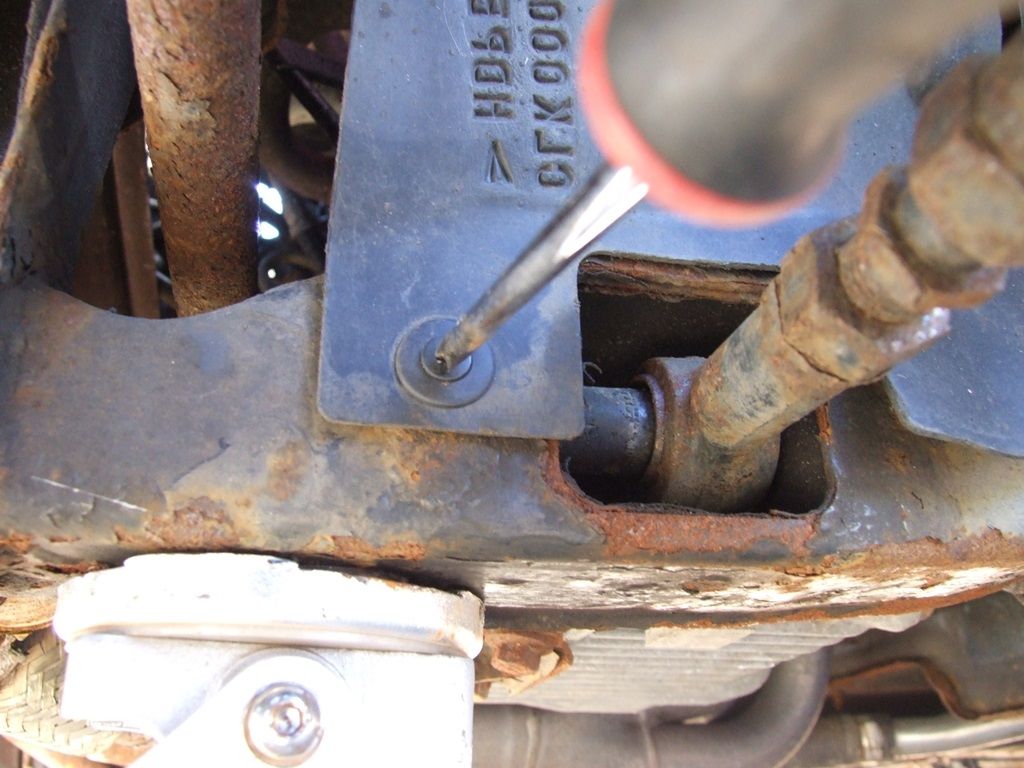
Now pull the plastic cover down out of the way. You might need to bend it a little to get it out.
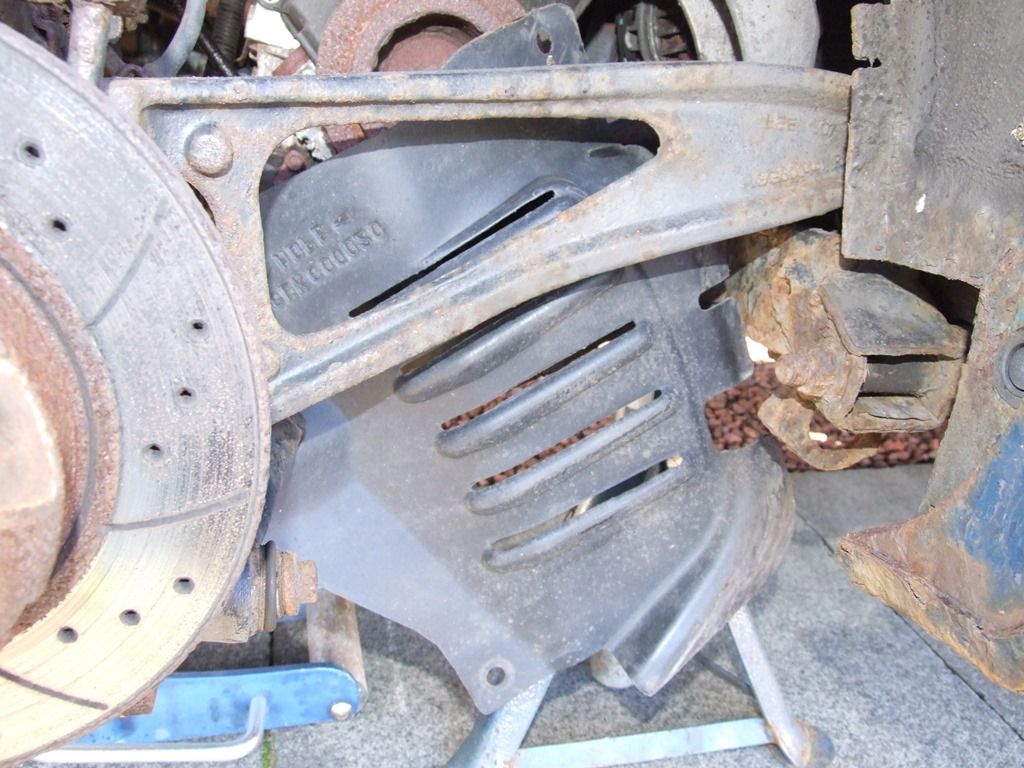
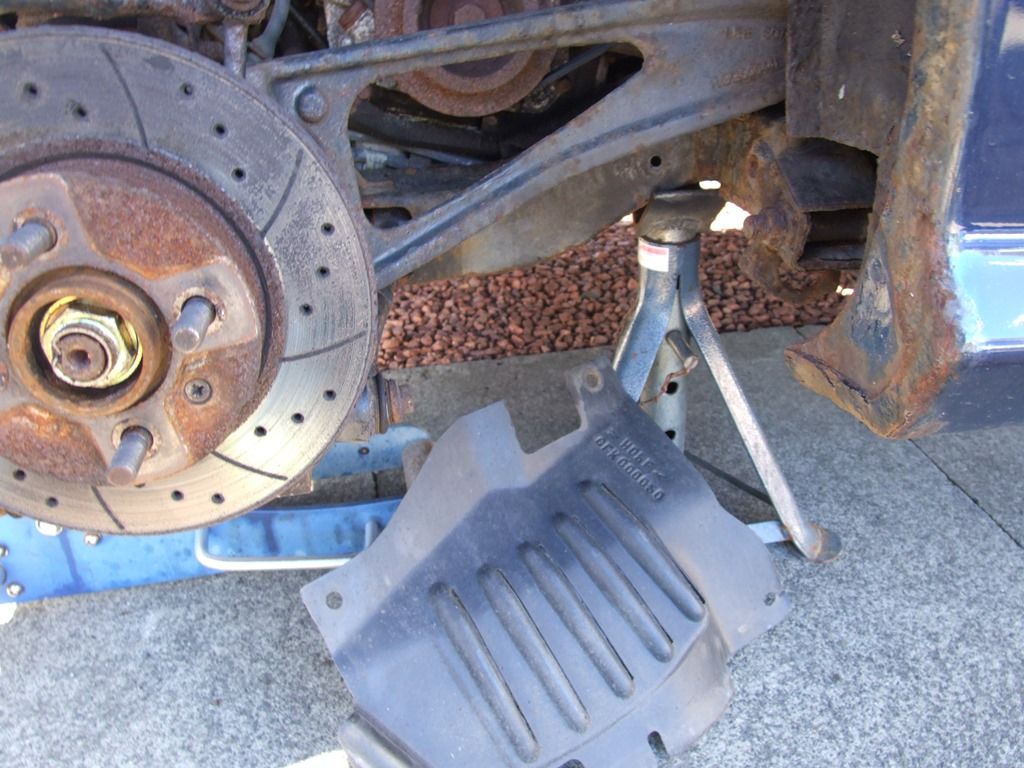
This exposes the engine bottom pulley, alternator and auxiliary belt.
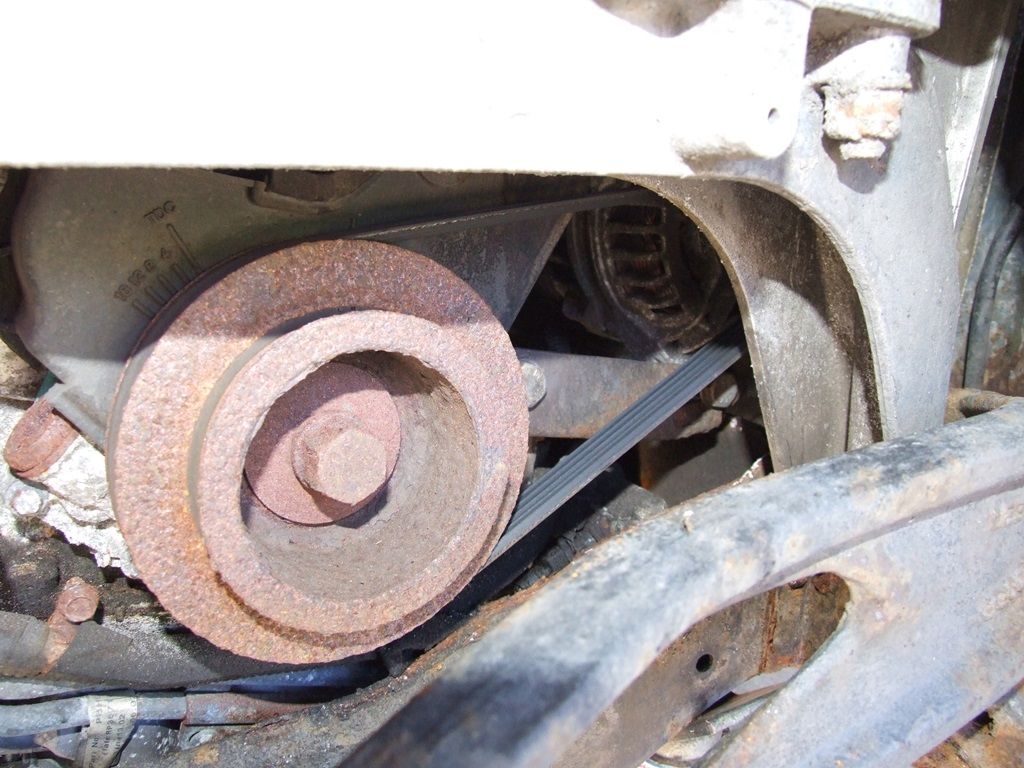
You now need to remove the adjuster bracket. Remove the 17mm bolt holding the bracket to the engine block
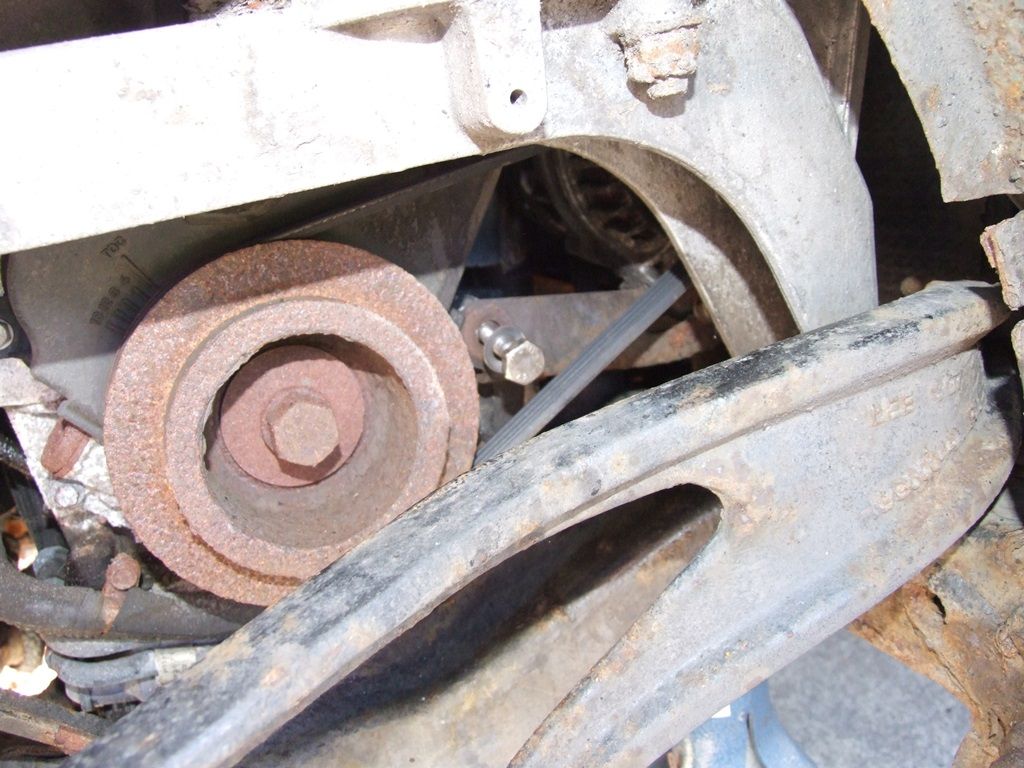
And remove the bolt that holds the bracket to the alternator
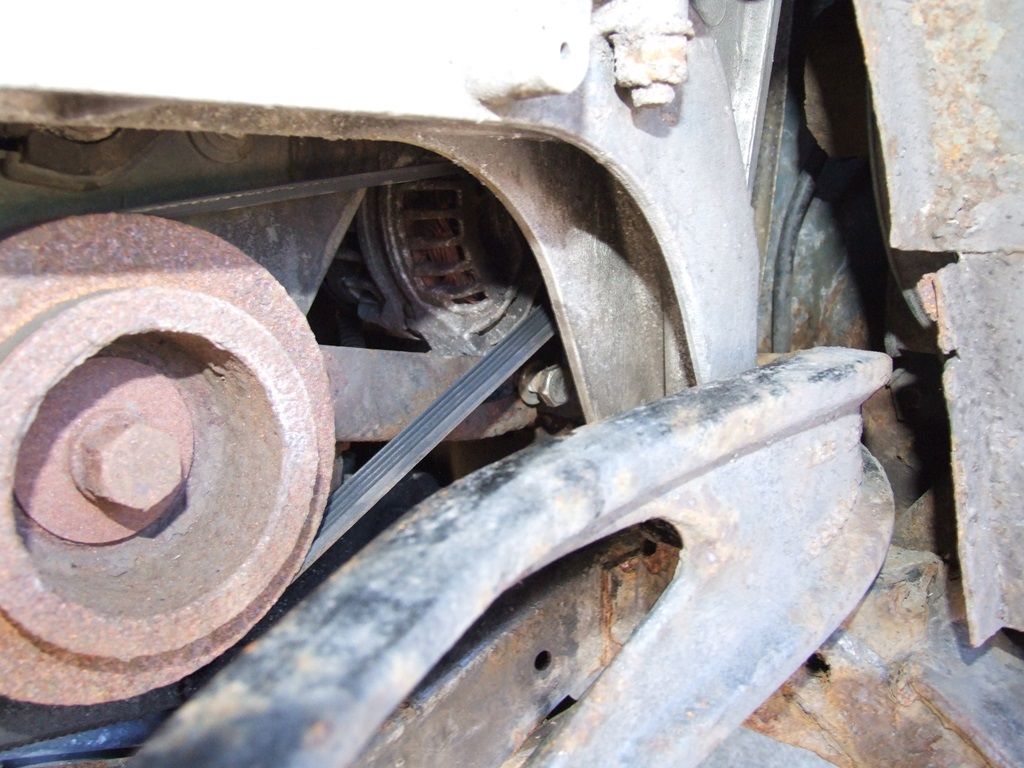
The bracket and spacer can now be removed.
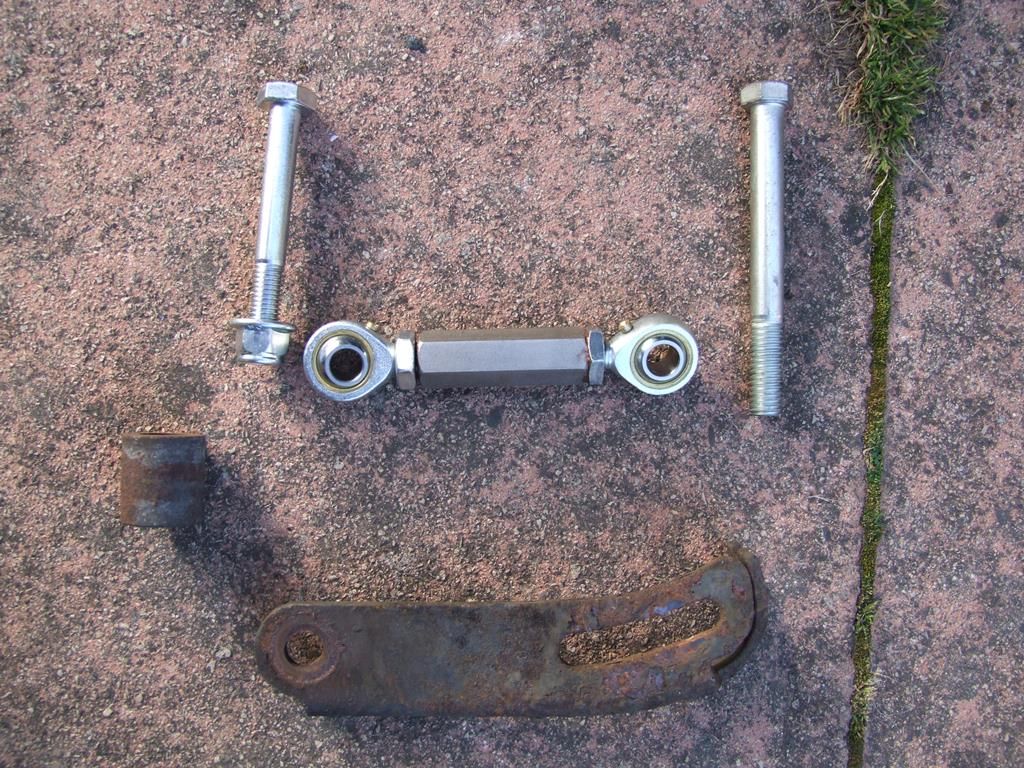
The new adjuster comes with longer bolts to compensate for the extra thickness of the rose joints.
Take the shorter of the two bolts and fit it through one end of the new adjuster and the spacer.
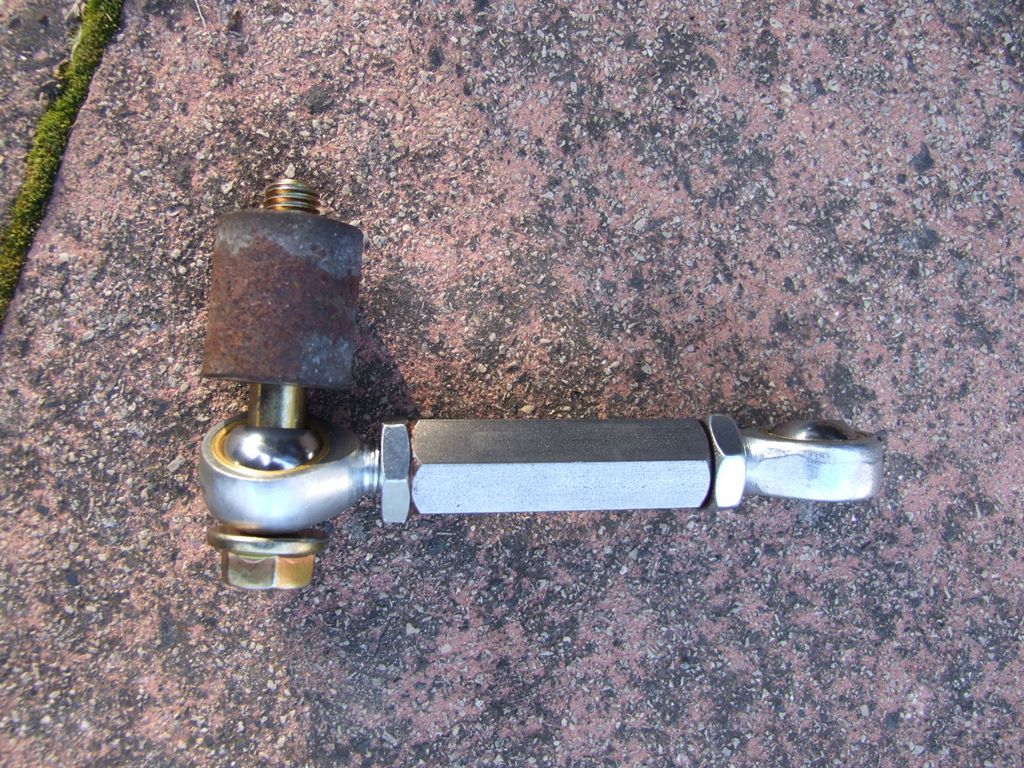
And screw it into the engine block
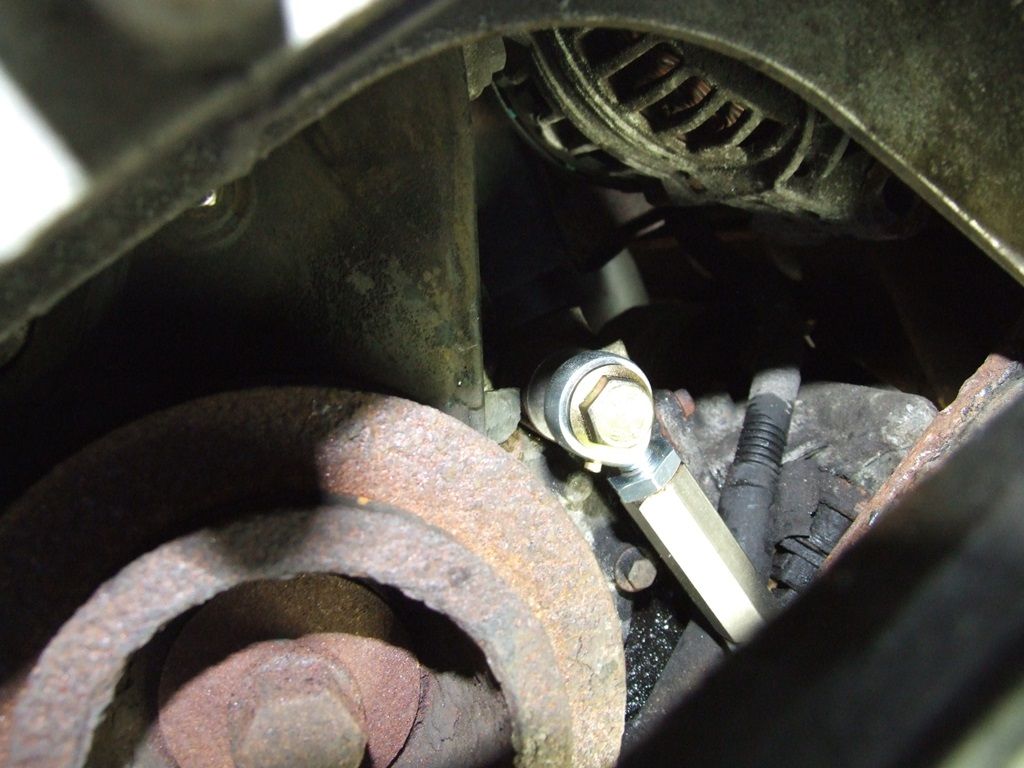
But don’t tighten it yet.
Adjust the adjuster so that the hole lines up with the alternator. Alternatively, if the alternator is loose enough, move it to line the holes up and fit the other bolt through the alternator.
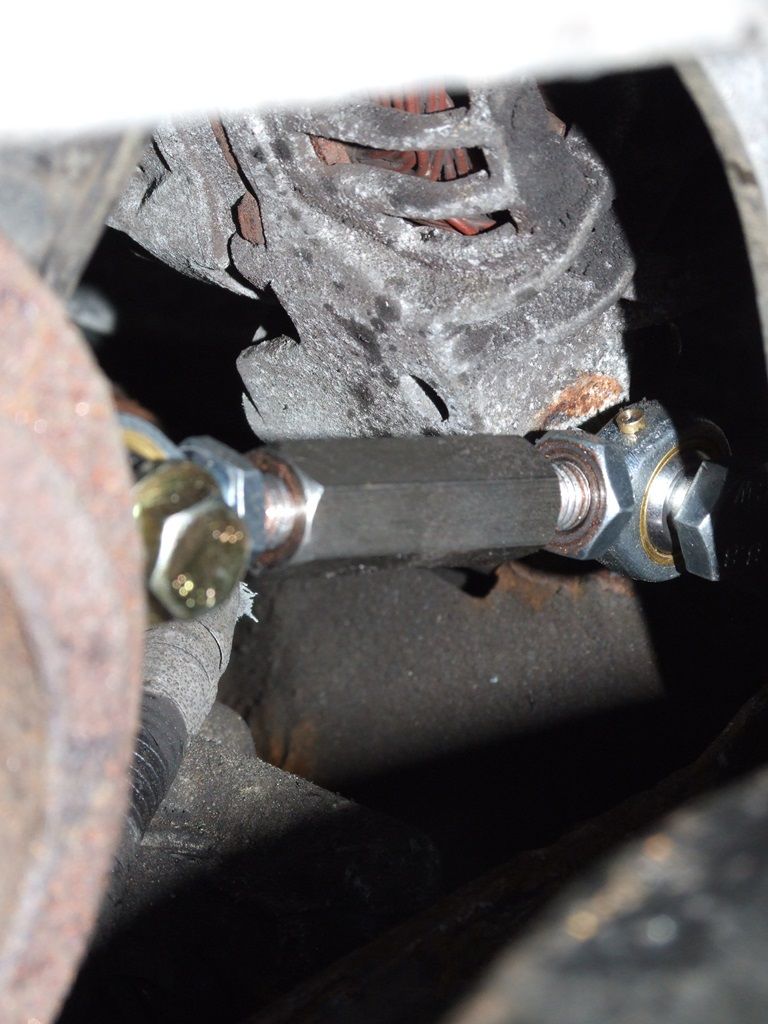
Tighten the 2 17mm bolts. I kept the original nut on the inside of the alternator as it sits in a nut shaped hole and doesn’t need you holding a spanner on it. The kit does come with a new nyloc nut.
If you are changing the belt at this point then turn the adjuster so that it is at its shortest and remove the belt. You may need to slacken off the locknuts. Remember that one side is a right hand thread and the other a left hand thread.
Fit the new belt and adjust the turnbuckle to lengthen the adjuster.
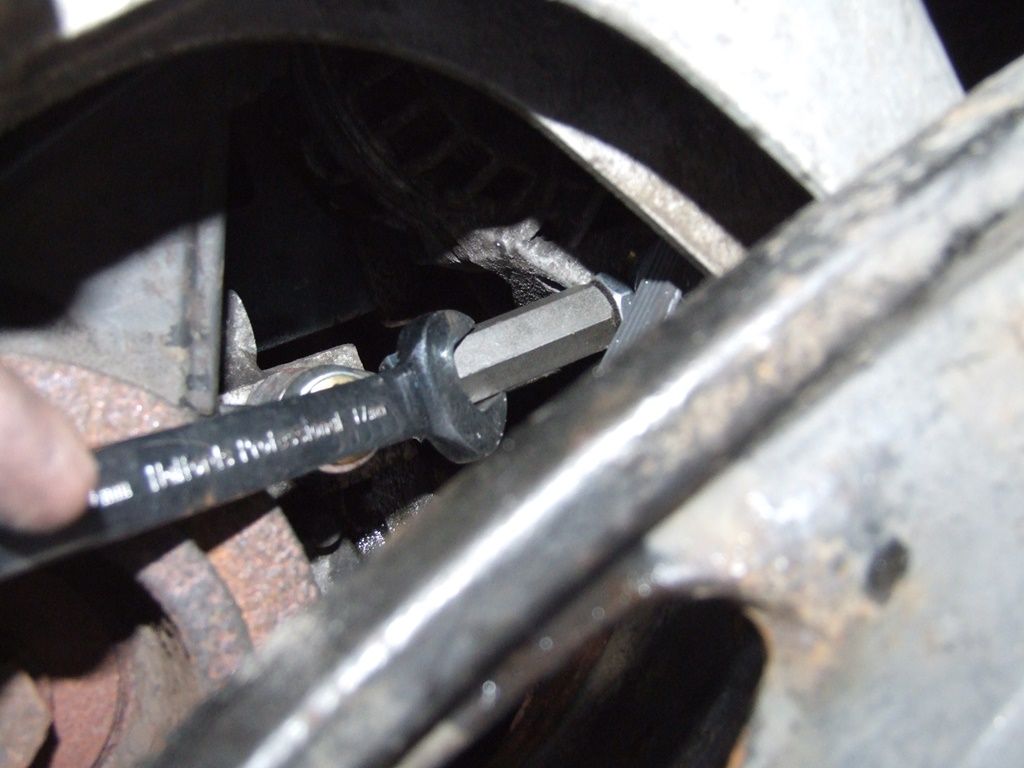
Until you can only just twist the belt through 90 degrees.
Tighten the locknuts.
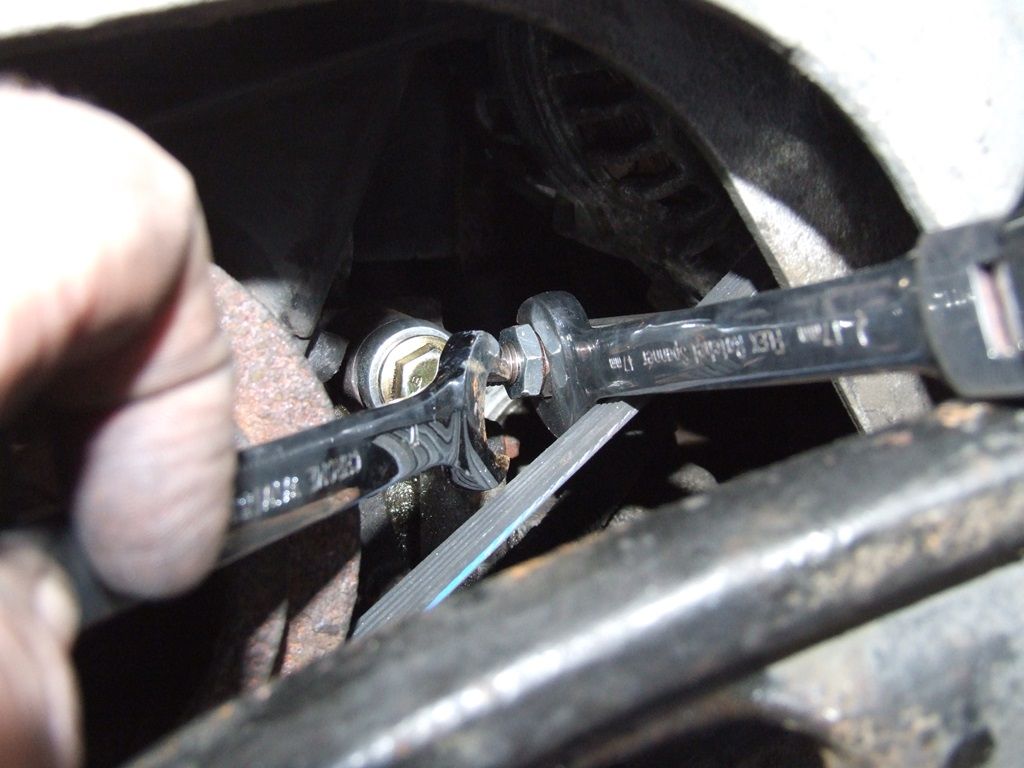
At both ends.
Now, start the car and ensure that the belt doesn’t slip or squeal. Put the blowers on full and the headlights on main beam to load the alternator.
If the belt does slip, then slacken the locknuts again and adjust to tension the belt a little more and retest. Be careful not to overtighten the belt as this can cause bearing failure in the alternator and/or premature failure of the belt.
If all is OK then refit the plastic cover and wheel and lower the car back down off the axle stand.
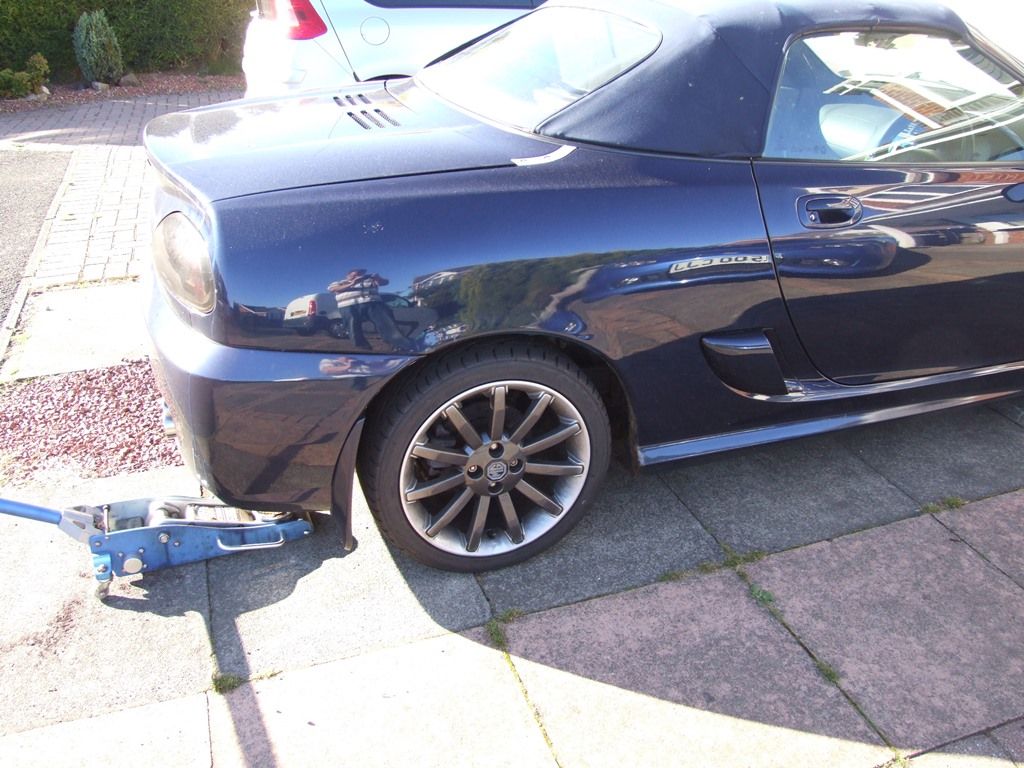
You now have a new adjuster.
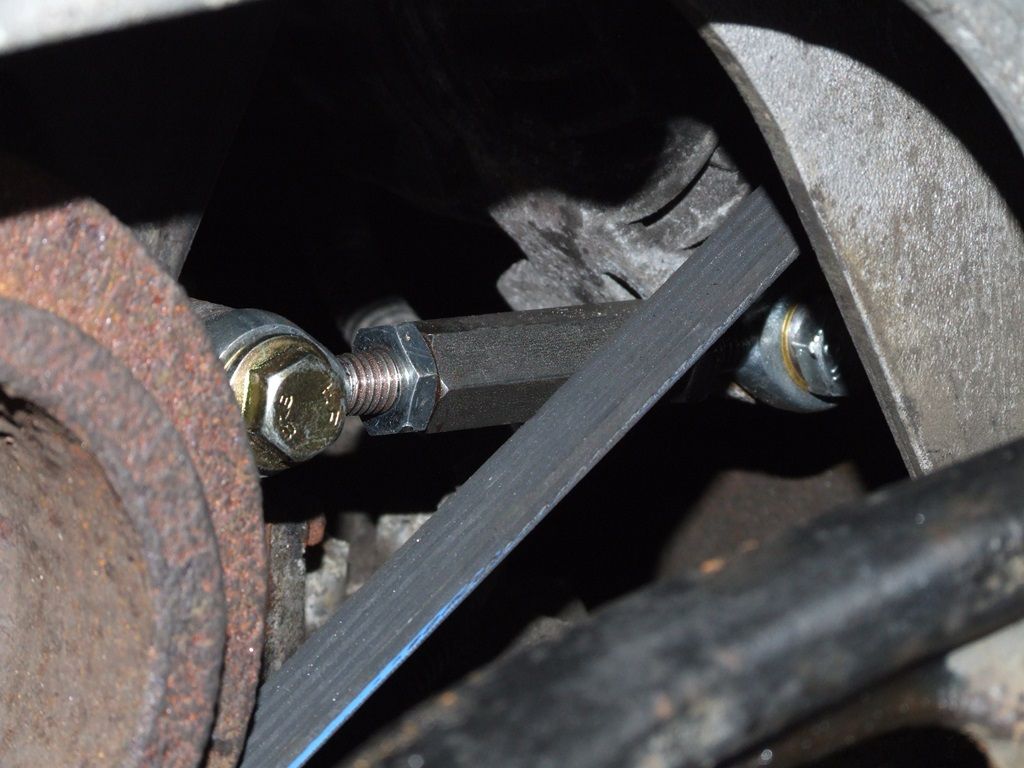
Due to the way the rose joints work, in the future, you should never have to loosen the bolts that hold the adjuster. All you need to do to adjust is slacken the 2 lock nuts and turn the turnbuckle to tighten the belt.
An alternative how to on fitting this type of adjuster has been posted by David, and can be found here, http://www.the-t-bar.com/forum/21-david-aiketgate-s-guides/91508-alternator-adjuster-bracket-how-to-upgrade
One of the more fiddly jobs on the F/TF is ensuring the correct tension on the alternator belt to prevent it slipping. This often involves tightening the belt every now and then as the belt stretches over time.
A how to on tightening the belt can be found here http://www.the-t-bar.com/forum/22-cjj-s-guides/30615-how-to-adjust-the-alternator-belt
People who have adjusted the belt will tell you that the bolts can be a pain to get at to loosen and the small adjuster bolt often goes missing.
Well, there is now an alternative modification which is quick and easy to fit and should make the process of adjusting a lot simpler.
The adjuster is quite a clever use of rose joints and a turnbuckle with locknuts.

I bought the adjuster from MGMania Ltd. I also bought a new belt to fit while I was in there.
First thing to do is raise the offside rear of the car off the ground, support with axle stands and remove the wheel.

Which exposes the plastic cover. To remove the cover, use a good fitting cross point screwdriver and screw out the inner part of the 3 Scrivets which hold the cover in place.

Now pull the plastic cover down out of the way. You might need to bend it a little to get it out.


This exposes the engine bottom pulley, alternator and auxiliary belt.

You now need to remove the adjuster bracket. Remove the 17mm bolt holding the bracket to the engine block

And remove the bolt that holds the bracket to the alternator

The bracket and spacer can now be removed.

The new adjuster comes with longer bolts to compensate for the extra thickness of the rose joints.
Take the shorter of the two bolts and fit it through one end of the new adjuster and the spacer.

And screw it into the engine block

But don’t tighten it yet.
Adjust the adjuster so that the hole lines up with the alternator. Alternatively, if the alternator is loose enough, move it to line the holes up and fit the other bolt through the alternator.

Tighten the 2 17mm bolts. I kept the original nut on the inside of the alternator as it sits in a nut shaped hole and doesn’t need you holding a spanner on it. The kit does come with a new nyloc nut.
If you are changing the belt at this point then turn the adjuster so that it is at its shortest and remove the belt. You may need to slacken off the locknuts. Remember that one side is a right hand thread and the other a left hand thread.
Fit the new belt and adjust the turnbuckle to lengthen the adjuster.

Until you can only just twist the belt through 90 degrees.
Tighten the locknuts.

At both ends.
Now, start the car and ensure that the belt doesn’t slip or squeal. Put the blowers on full and the headlights on main beam to load the alternator.
If the belt does slip, then slacken the locknuts again and adjust to tension the belt a little more and retest. Be careful not to overtighten the belt as this can cause bearing failure in the alternator and/or premature failure of the belt.
If all is OK then refit the plastic cover and wheel and lower the car back down off the axle stand.

You now have a new adjuster.

Due to the way the rose joints work, in the future, you should never have to loosen the bolts that hold the adjuster. All you need to do to adjust is slacken the 2 lock nuts and turn the turnbuckle to tighten the belt.
An alternative how to on fitting this type of adjuster has been posted by David, and can be found here, http://www.the-t-bar.com/forum/21-david-aiketgate-s-guides/91508-alternator-adjuster-bracket-how-to-upgrade
by cjj
Please Log in or Create an account to join the conversation.
- David Aiketgate
-
 Offline
- David
-

- mgf mk2 freestyle mpi 16" wheels, in Anthracite.
- Posts: 20354
- Thanks: 4453
Replied by David Aiketgate on topic How to fit a modified alternator adjuster.
Posted 9 years 2 months ago #162715
Nice one! You've got better pictures in yours!:lol:
David
:shrug:
Please Log in or Create an account to join the conversation.
Replied by cjj on topic How to fit a modified alternator adjuster.
Posted 9 years 2 months ago #162719
Ha ha. The photography part calms me down and stops me attacking it with a sledge hammer when things go wrong. :bat:
by cjj
Please Log in or Create an account to join the conversation.
- talkingcars
-
 Offline
- Moderator
-

- Posts: 6876
- Thanks: 1296
Replied by talkingcars on topic How to fit a modified alternator adjuster.
Posted 9 years 2 months ago #162724
This is the ONLY mod I am making on my mk1 MPi.
On my mk1 VVC there is a small rubber o ring that holds the spacer in place on the bolt, there is a recess on the spacer for it to fit into.
There wasn't one on the MPi.
On my mk1 VVC there is a small rubber o ring that holds the spacer in place on the bolt, there is a recess on the spacer for it to fit into.
There wasn't one on the MPi.
Home to black Alfa Romeo 159 3.2 V6 Q4 ,green MGF VVC and red MG Maestro T16.
MG - the friendly marque.
Last Edit:9 years 2 months ago
by talkingcars
Last edit: 9 years 2 months ago by talkingcars.
Please Log in or Create an account to join the conversation.
Replied by Snape on topic How to fit a modified alternator adjuster.
Posted 9 years 3 weeks ago #163773
Hope it's as easy as you make it look! Just embarking on alternator/belt change & thought I'd fit modified adjuster at same time. Muppets at garage over-tightened alternator belt following head gasket work & bearing failed. These posts with DIY pictures are brilliant cos the cars look like mine underneath - not all clean & shiny like in a Haynes manual.
by Snape
The following user(s) said Thank You: Leigh Ping
Please Log in or Create an account to join the conversation.
- bluesunshine
-
 Offline
- Apprentice MGer
-

- Posts: 30
- Thanks: 13
Replied by bluesunshine on topic How to fit a modified alternator adjuster.
Posted 8 years 6 months ago #168796
Excellent guide . Ive fitted one myself and think its a very worthwhile upgrade
by bluesunshine
The following user(s) said Thank You: Leigh Ping, Bob
Please Log in or Create an account to join the conversation.
Time to create page: 0.523 seconds
