
HOW TO: Replace a fuel gauge sender unit
HOW TO: Replace a fuel gauge sender unit was created by amtcoupe
Posted 12 years 2 months ago #81481
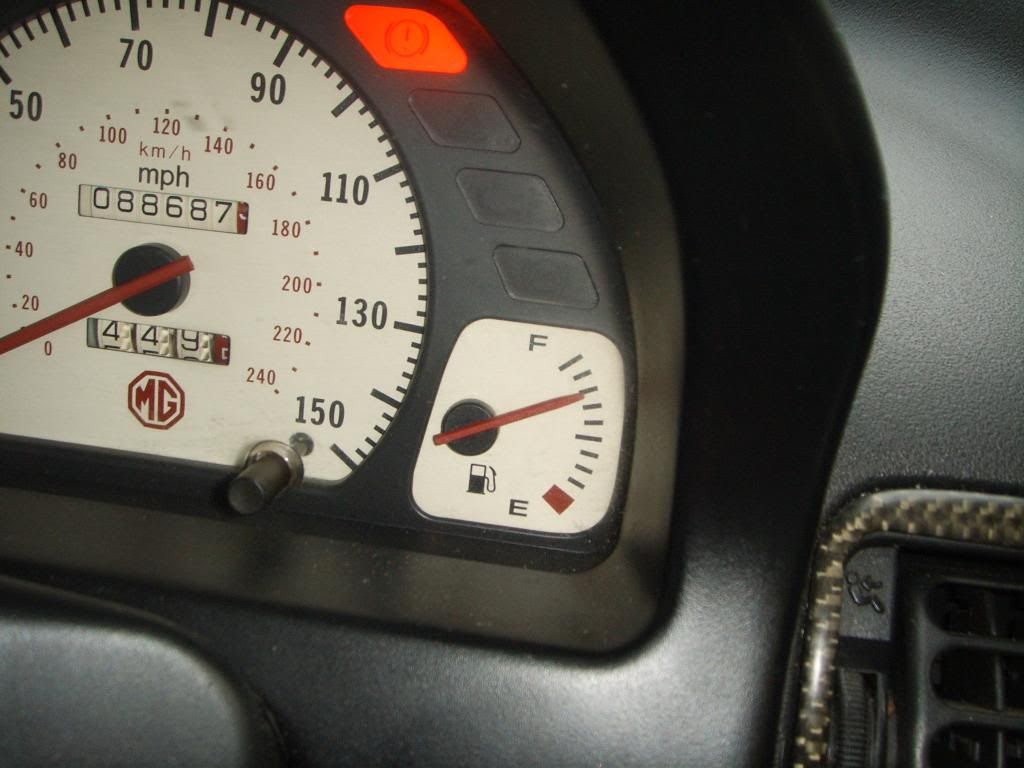
OK an other annoyance but probably reasonably serious fault with the "F" was the lack of a fuel gauge , it was firmly pointed at zero and as there was a used pump / sender assembly in the boot I suspected but wasnt sure that a previous owner had tried to sort it but I thought I'd have a wee look and rule out the sender for sure before buying a new instrument cluster .
DO NOT MESS WITH THE FUEL TANK UNLESS YOU ARE CONFIDENT OF YOUR ABILITIES !
WEAR SUITABLE GLOVES AND GOGGLES !
KEEP IGNITION SOURCES AWAY
CLEAN UP SPILT JUICE ASAP !.
Ok first job , have a ciggy 'cos you wont be having one for the next half hour or so :lol:
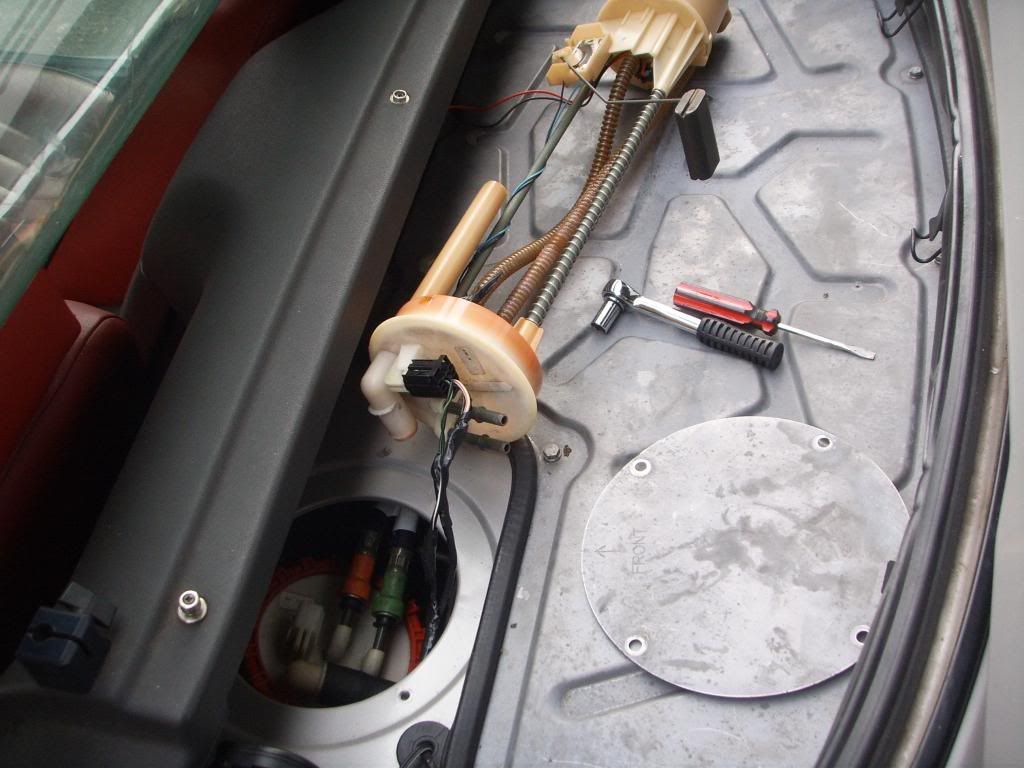
unclip the rear of the hood and remove the carpet exposing the engine cover and the fuel tank cover .
Take off the 4x10mm bolts holding the fuel tank cover in place
I then unplugged the electrical connector from the pump assembly and plugged it in to the spare assembly that was lying in the boot .
My pessimism was unwarranted as the gauge sprung into life .....GET IN !
so it turns out the previous owner must have replaced the pump assembly due to a failed pump and managed to knacker the sender during refitting
ok time to get serious !
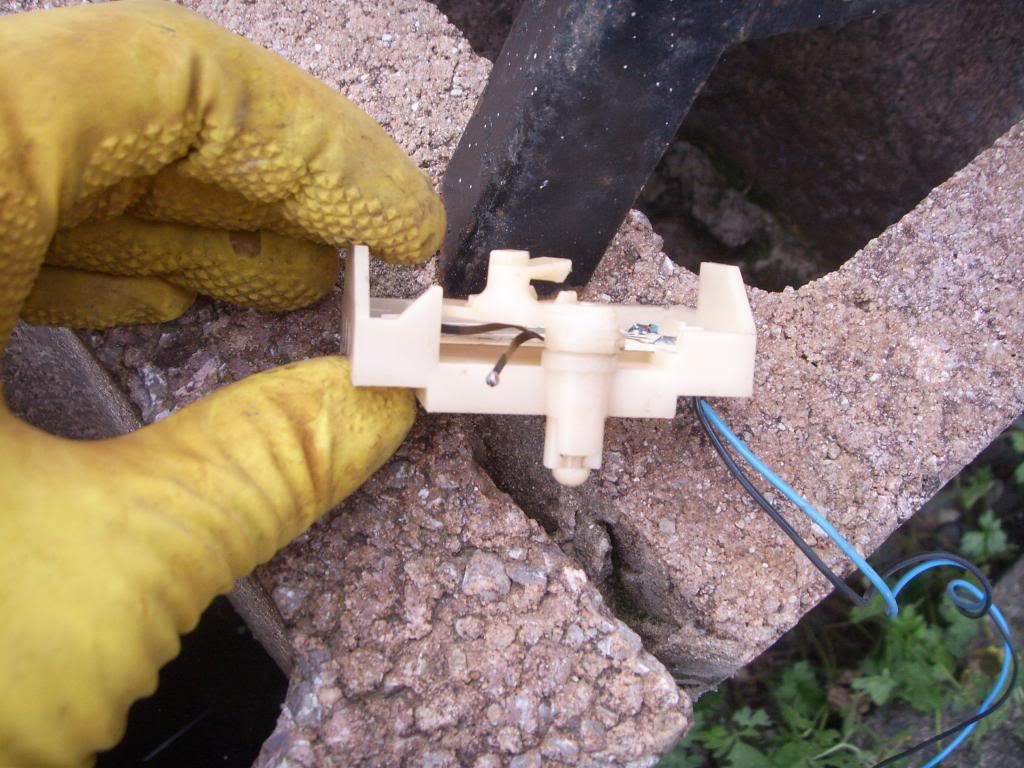
In the above pic prise back the thick black rubber breather hose (yours will have a jubilee clip ..mine didnt grrr
then release the orange and green fuel and return hoses , push the black section towards the coloured section and then pull the connector off the pipe . have a rag handy as fuel will spill , safety glasses and gloves are a must as well .
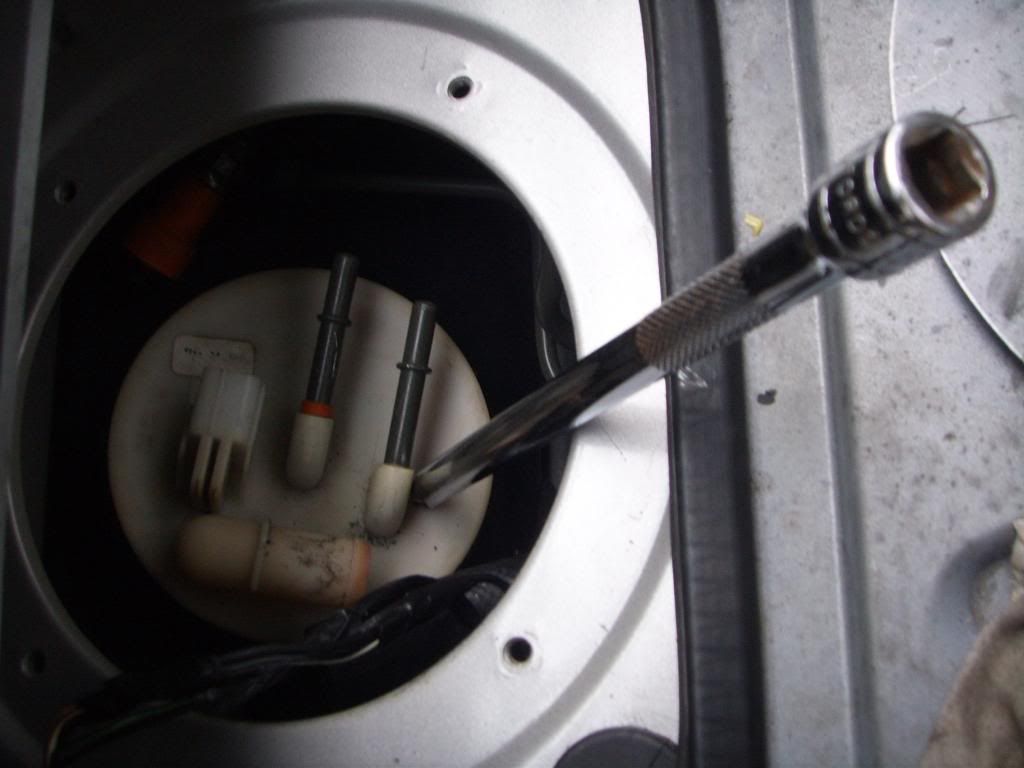
Undo the big red securing ring anticlockwise , You may have to knock this with a suitable piece of wood and a hammer to get it started as it will be on tight .
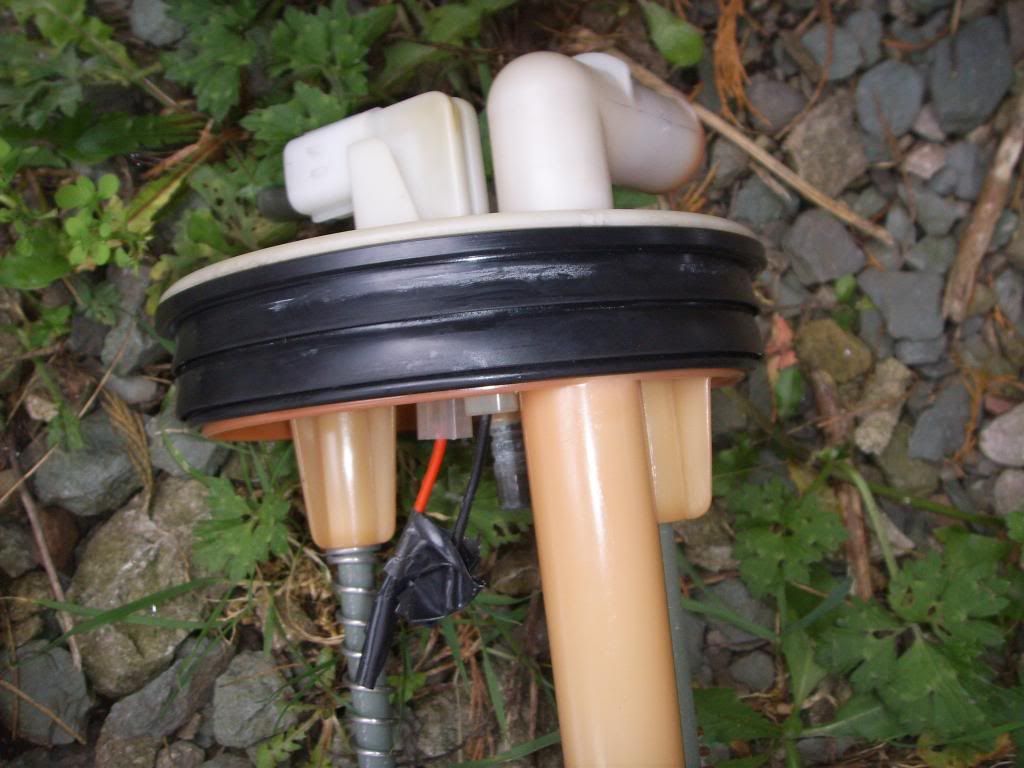
remove the red securing ring out the hole and wiggle the pump assembly to release the black rubber gasket that makes a seal round the neck of the tank opening , lift the whole assembly upwards and allow remaining fuel in the cup at the bottom to drain back into the tank , withdraw whole assembly from the car .
Now the next stage may not apply to you , If you have a whole new pump assembly to replace you can skip the next couple of pics . i had a pump assembly sans pump so had to swap the sender units over
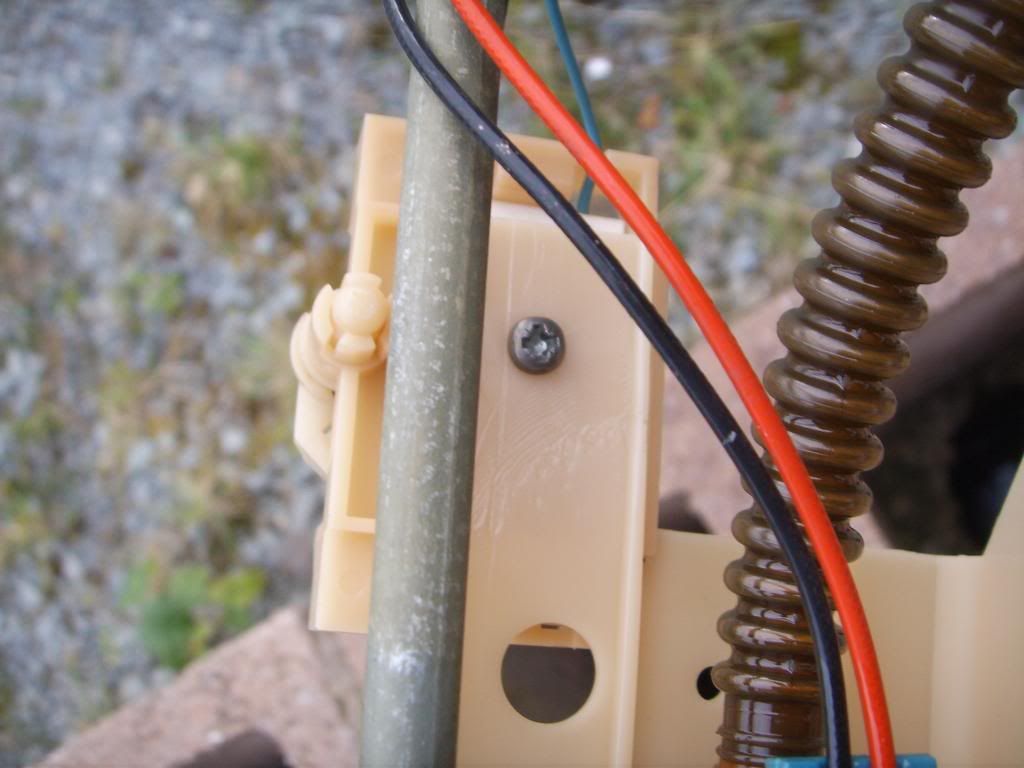
undo the blue and black connectors from the terminals at the top of the assembly and unwind the wires from the assembly

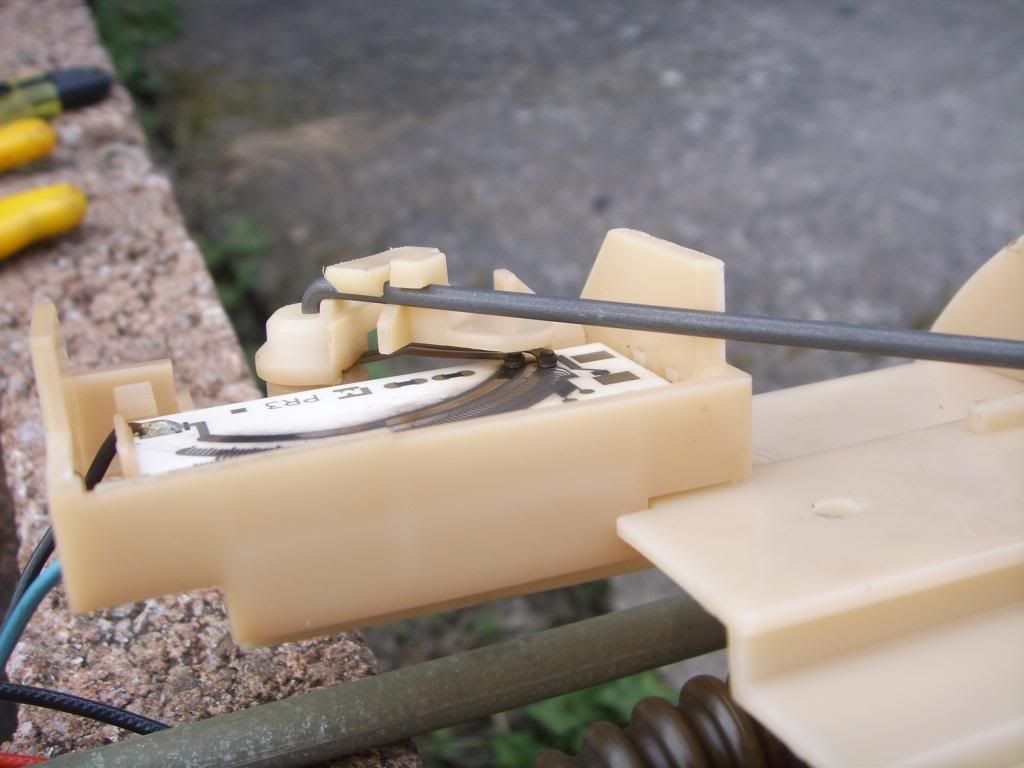
Heres a close up of the sender unit (this pic is of the "good" one we'll get back to the duff one later )
undo the one screw that holds the sender to the assembly
and remove , do the same with the duff unit and swap them over remembering to plug the wires back in
Now I found it impossible to refit the assembly into the tank with the float and arm for the sender attached , I'm not saying its impossible just that I found it impossible , I also suspect this is where the previous owner had gone wrong as well .
So unclip the float arm and insert it into the tank while holding onto it , slide the pump assembly in next and then reclip the float/ arm back onto the pump assembly .
slide the black rubber gasket round the assembly neck as low as you can down the neck of the assembly and make sure it is in the neck of the tank ok , You will NOT get it to fit back into the tank if its tight up to the top of the pump assembly as in this pic
Push the assembly back into the tank and tap down so its all tight , I used a socket extension but in retrospect a suitable piece of wood would have been better to eliminate the risk of sparks .
Refit the red securing ring , the fuel hoses and the breather pipe ( I fitted the jubilee clip the previous owner had neglected )
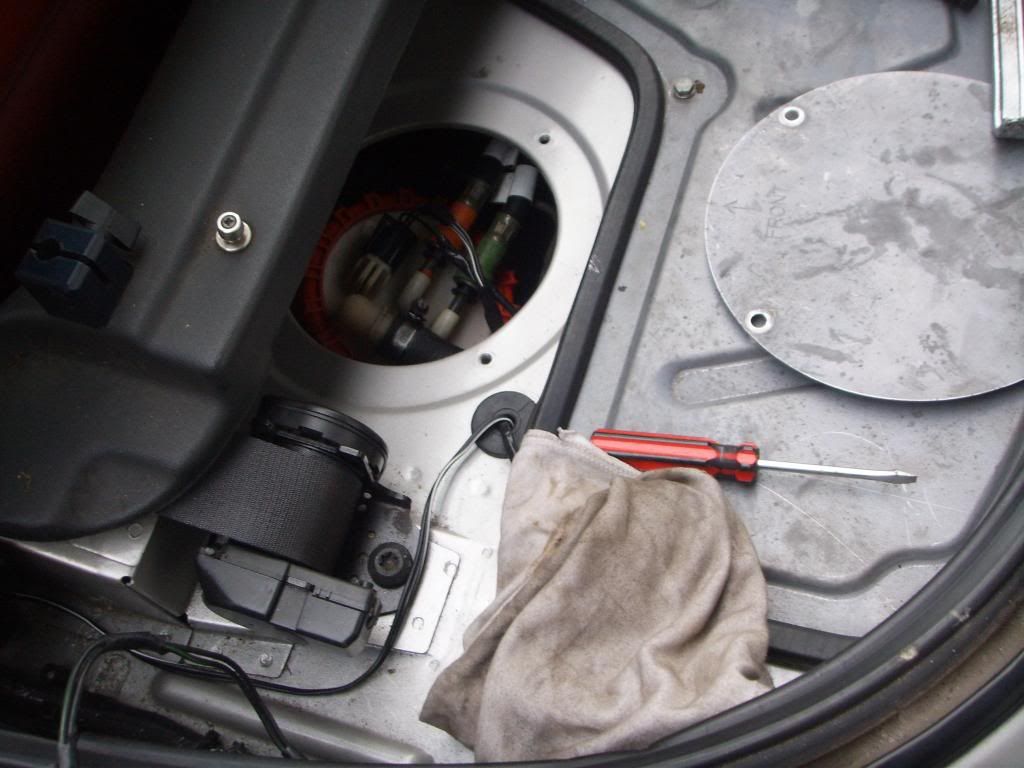
Start the car and check there is no fuel leaking or smells . (mine was stinking of petrol ........then I realised the oily rag I had used to soak up the spilt fuel was under my nose ......doh ! see above pic )
Scuttle back to the cab , grab your crotch with one hand while pumping the other fist in the air and proclaiming yourself "A god amongst amateur mechanics "
:woohoo:
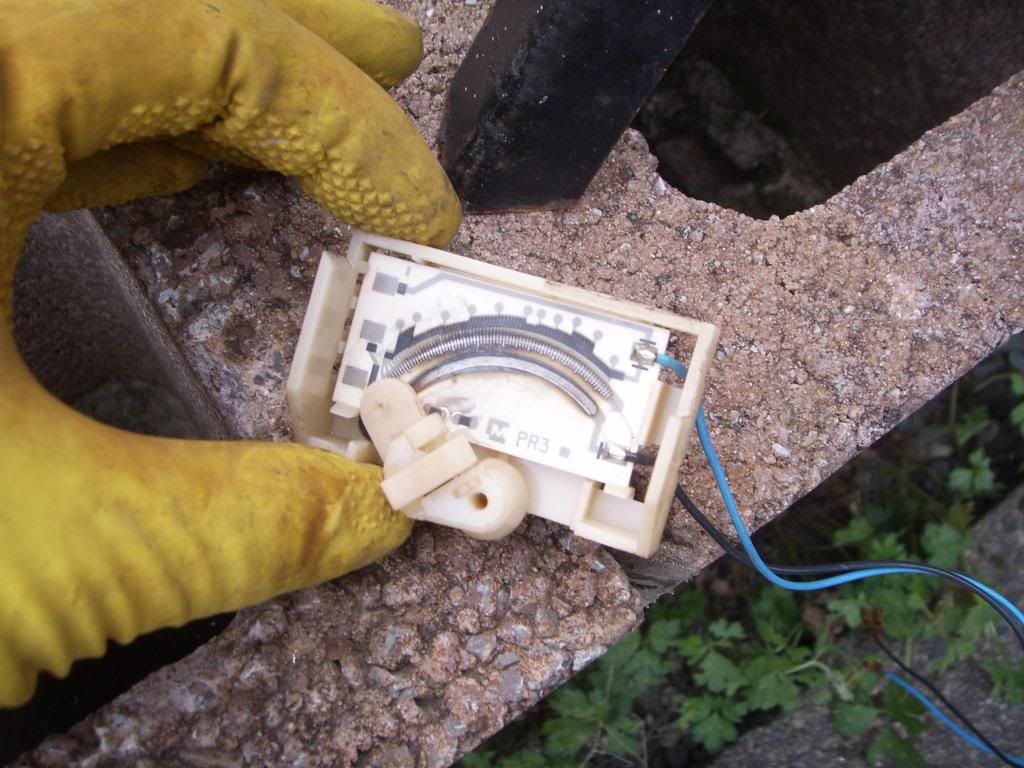
ok heres the duff sender , I suspect a previous owner had forced the assembly into the tank with the float / arm attached and had dislodged the 2 pins that should run up and down the resistor plate thingy to generate a signal
duff one
good one
and the damaged pins
Patience is a virtue my friends
DO NOT MESS WITH THE FUEL TANK UNLESS YOU ARE CONFIDENT OF YOUR ABILITIES !
WEAR SUITABLE GLOVES AND GOGGLES !
KEEP IGNITION SOURCES AWAY
CLEAN UP SPILT JUICE ASAP !.
Ok first job , have a ciggy 'cos you wont be having one for the next half hour or so :lol:
unclip the rear of the hood and remove the carpet exposing the engine cover and the fuel tank cover .
Take off the 4x10mm bolts holding the fuel tank cover in place
I then unplugged the electrical connector from the pump assembly and plugged it in to the spare assembly that was lying in the boot .
My pessimism was unwarranted as the gauge sprung into life .....GET IN !
so it turns out the previous owner must have replaced the pump assembly due to a failed pump and managed to knacker the sender during refitting
ok time to get serious !
In the above pic prise back the thick black rubber breather hose (yours will have a jubilee clip ..mine didnt grrr
then release the orange and green fuel and return hoses , push the black section towards the coloured section and then pull the connector off the pipe . have a rag handy as fuel will spill , safety glasses and gloves are a must as well .
Undo the big red securing ring anticlockwise , You may have to knock this with a suitable piece of wood and a hammer to get it started as it will be on tight .
remove the red securing ring out the hole and wiggle the pump assembly to release the black rubber gasket that makes a seal round the neck of the tank opening , lift the whole assembly upwards and allow remaining fuel in the cup at the bottom to drain back into the tank , withdraw whole assembly from the car .
Now the next stage may not apply to you , If you have a whole new pump assembly to replace you can skip the next couple of pics . i had a pump assembly sans pump so had to swap the sender units over
undo the blue and black connectors from the terminals at the top of the assembly and unwind the wires from the assembly
Heres a close up of the sender unit (this pic is of the "good" one we'll get back to the duff one later )
undo the one screw that holds the sender to the assembly
and remove , do the same with the duff unit and swap them over remembering to plug the wires back in
Now I found it impossible to refit the assembly into the tank with the float and arm for the sender attached , I'm not saying its impossible just that I found it impossible , I also suspect this is where the previous owner had gone wrong as well .
So unclip the float arm and insert it into the tank while holding onto it , slide the pump assembly in next and then reclip the float/ arm back onto the pump assembly .
slide the black rubber gasket round the assembly neck as low as you can down the neck of the assembly and make sure it is in the neck of the tank ok , You will NOT get it to fit back into the tank if its tight up to the top of the pump assembly as in this pic
Push the assembly back into the tank and tap down so its all tight , I used a socket extension but in retrospect a suitable piece of wood would have been better to eliminate the risk of sparks .
Refit the red securing ring , the fuel hoses and the breather pipe ( I fitted the jubilee clip the previous owner had neglected )
Start the car and check there is no fuel leaking or smells . (mine was stinking of petrol ........then I realised the oily rag I had used to soak up the spilt fuel was under my nose ......doh ! see above pic )
Scuttle back to the cab , grab your crotch with one hand while pumping the other fist in the air and proclaiming yourself "A god amongst amateur mechanics "
:woohoo:
ok heres the duff sender , I suspect a previous owner had forced the assembly into the tank with the float / arm attached and had dislodged the 2 pins that should run up and down the resistor plate thingy to generate a signal
duff one
good one
and the damaged pins
Patience is a virtue my friends
Last Edit:12 years 2 months ago
by amtcoupe
Last edit: 12 years 2 months ago by amtcoupe. Reason: cleaning up spelling mistakes
Please Log in or Create an account to join the conversation.
- David Aiketgate
-
 Offline
- David
-

- mgf mk2 freestyle mpi 16" wheels, in Anthracite.
- Posts: 20385
- Thanks: 4464
Replied by David Aiketgate on topic Re: HOW TO: Replace a fuel gauge sender unit
Posted 12 years 2 months ago #81522
Nice one, mate. Worthy of a place in the hall of fame, otherwise known as the How to section.
David

Please Log in or Create an account to join the conversation.
- Leigh Ping
-
 Online
- Moderator
-

- Posts: 6838
- Thanks: 1631
Replied by Leigh Ping on topic Re: HOW TO: Replace a fuel gauge sender unit
Posted 12 years 2 months ago #81556
Great guide. Appreciated.
by Leigh Ping
Please Log in or Create an account to join the conversation.

Replied by VJSantos on topic HOW TO: Replace a fuel gauge sender unit
Posted 7 months 1 day ago #207309
Now I have something to do this weekend!!
by VJSantos
Please Log in or Create an account to join the conversation.
Replied by VJSantos on topic HOW TO: Replace a fuel gauge sender unit
Posted 7 months 1 day ago #207310
¡¡Ya tengo algo que hacer este fin de semana!!
by VJSantos
Please Log in or Create an account to join the conversation.
Time to create page: 0.446 seconds