
How to repair Door handle & Disable Superlock
How to repair Door handle & Disable Superlock was created by tnjk
Posted 4 months 4 days ago #208376
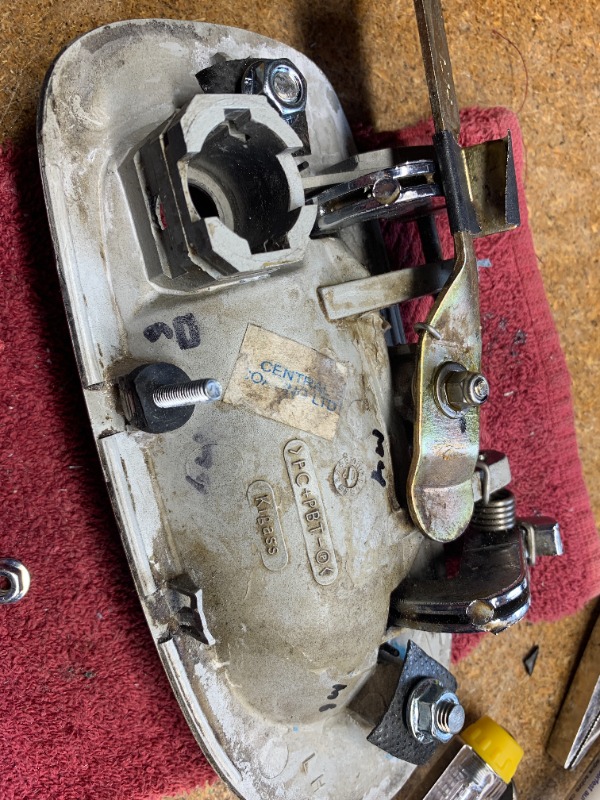
My driver side door handle was nog working anymore, the plastic mouning points had broken, as well as one of the tabs at the bottom.
Repaired all this with threaded M6 and M4 rods, used Colad Maxic Fix to bond these in the holes.
Fixed it and it works great. See the pics
Replaing the plastic tab at the bottom was the most difficult part, hardly any mounting to mount it on, and need some spacers to thigthen it with the nut to the piece of metal in the door.
In the next version, when the other handle also breaks, I'll be using threaded bushes, makes mounting easier, and for the tab replacement at the bottom there is also room for improvent, perhaps use some kind of stainless steel flat spring.
One question to finish the job : I would also like to disable Superlock, normal lock funtion seems good enough, and I want to prevent the door being superlocked forever, which seems to be a risk.
How do I disable superlock, cutting a wire in one of the 2 wire connectors ? Or another way ?
Last Edit:4 months 2 days ago
by tnjk
Last edit: 4 months 2 days ago by David Aiketgate. Reason: Convert to how to
Please Log in or Create an account to join the conversation.
- Notanumber
-
 Offline
- Senior MGer
-

- Posts: 1020
- Thanks: 170
Replied by Notanumber on topic How to repair Door handle & Disable Superlock
Posted 4 months 4 days ago #208377
That looks a seriously purposeful repair you have worked out.
I hope the Admins can move this to the How To library so that others can benefit.DONE
The default has often been to swap for a 2nd hand replacement handle but as these become less available over time the need for an effective repair becomes ever more important.
The wire for the Superlock function is Brown/Pink striped. You will find it in the door loom taped along with the Orange and the Pink wires which run the normal central locking function.
Only cut the Brown/Pink striped wire.
2003 TF 135 sunstorm
Last Edit:4 months 2 days ago
by Notanumber
Last edit: 4 months 2 days ago by David Aiketgate.
Please Log in or Create an account to join the conversation.
Replied by tnjk on topic How to repair Door handle & Disable Superlock
Posted 4 months 3 days ago #208398
Thanks, that will be an easy mod.
by tnjk
Please Log in or Create an account to join the conversation.
Replied by tnjk on topic How to repair Door handle & Disable Superlock
Posted 4 months 3 days ago #208399
Two last must do's :
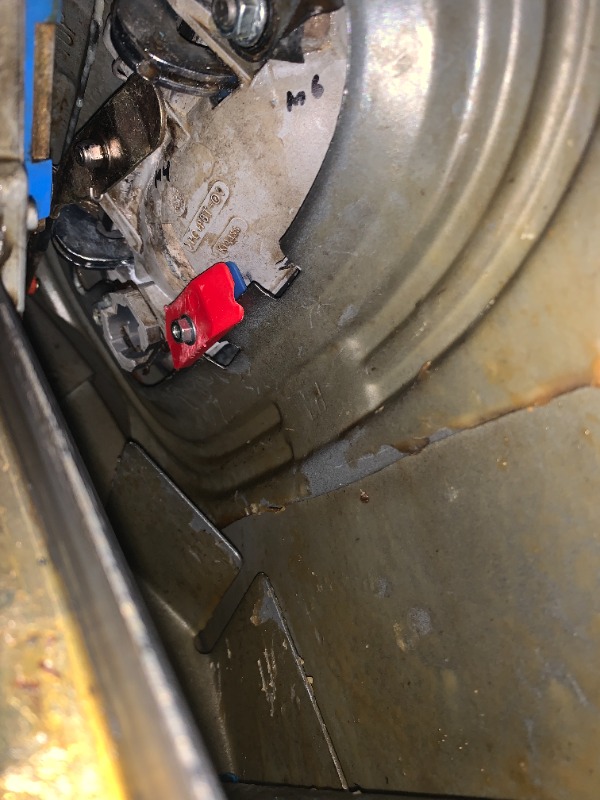
1. First mount the door handle, and the last job to do is to push in the lock barrel, working from the inside of the door. Is a bit fiddly, and the rod can play tricks on you to get in the wrong angle. So before mounting the handle in the door, through the hole pre-position the barrel so it is in the right position. Next mount the door handle, fix the screws, and finally pusth in the barrel. Doing it in a different manner makes fixing the screws much more difficult.
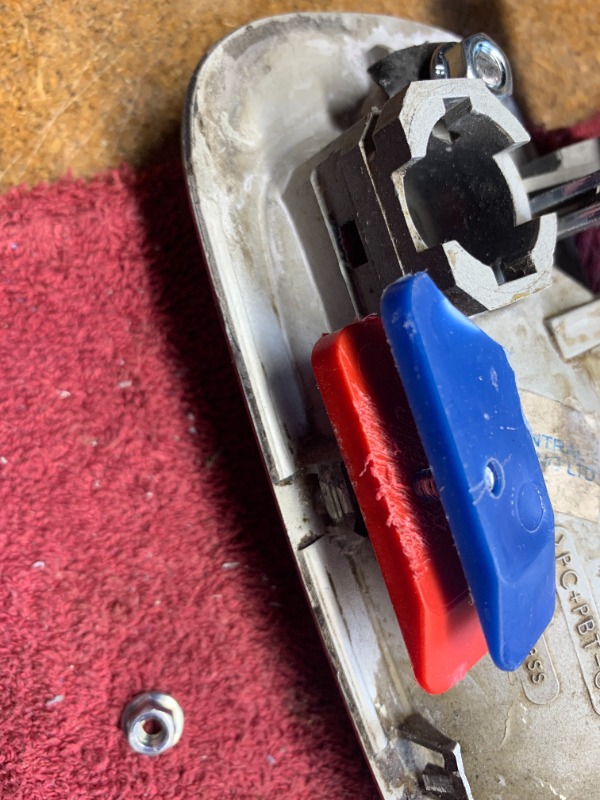
2. The u shaped spring that holds the barrel must of course be mounted in the door handle before mounting the handle, so the barrel can snap in. But from the factory this spring is positioned with the legs downward, so the top of the spring is in a position that makes it very difficult to remove for dis-assembly whenever needed. You can hardly pull the sping out. So better is to turn the sping around 180 degrees, so the legs are pointing upward. This way the U shape is facing downward, and is easy to remove from the inside of the door, whenever de barrel needs to be removed.
I also know why MG engineers thought the tedious way was better : in my way the end of one of the legs is in the way of the mounting screws, so the mod is to cut a little bit from the end of one of the legs so it is no obstruction to the mounting screws. Not too much, just a few mm. See the pics for understanding this last instruction. The red arrow shows the spring to be turned around. The red line shows where to cut a few mm off the spring.


1. First mount the door handle, and the last job to do is to push in the lock barrel, working from the inside of the door. Is a bit fiddly, and the rod can play tricks on you to get in the wrong angle. So before mounting the handle in the door, through the hole pre-position the barrel so it is in the right position. Next mount the door handle, fix the screws, and finally pusth in the barrel. Doing it in a different manner makes fixing the screws much more difficult.
2. The u shaped spring that holds the barrel must of course be mounted in the door handle before mounting the handle, so the barrel can snap in. But from the factory this spring is positioned with the legs downward, so the top of the spring is in a position that makes it very difficult to remove for dis-assembly whenever needed. You can hardly pull the sping out. So better is to turn the sping around 180 degrees, so the legs are pointing upward. This way the U shape is facing downward, and is easy to remove from the inside of the door, whenever de barrel needs to be removed.
I also know why MG engineers thought the tedious way was better : in my way the end of one of the legs is in the way of the mounting screws, so the mod is to cut a little bit from the end of one of the legs so it is no obstruction to the mounting screws. Not too much, just a few mm. See the pics for understanding this last instruction. The red arrow shows the spring to be turned around. The red line shows where to cut a few mm off the spring.
Last Edit:4 months 3 days ago
by tnjk
Last edit: 4 months 3 days ago by tnjk.
Please Log in or Create an account to join the conversation.
Time to create page: 0.442 seconds