Coolant system. - How to fill and bleed
The first is due to the age of the coolant. It should be changed every 60,000 miles or 4 years, whichever comes first.
The second reason to fill the system is post intrusive maintenance, such as changing the head gasket, the under floor pipes, any part of the cooling system, radiator, heater etc etc. All of these would involve draining the coolant and refilling once complete.
The problem with the F/TF is that the cooling system is quite complex and has many areas which can trap air. If the system was left in this state you can get hotspots in the engine, lack of cooling and other problems which could very easily lead to the dreaded head gasket failure (HGF).
It is essential that you bleed the system and purge it of any air.
The recommended way to fill the system is to use a vacuum filler. This essentially sucks out all the air, creating a vacuum, which then sucks in the coolant. The following process is the more common DIY method, which assumes you do not have a vacuum filler.
To drain the system, there isn't really a proper drain to use.
First take the coolant expansion tank cap off.
This will help the coolant drain faster.
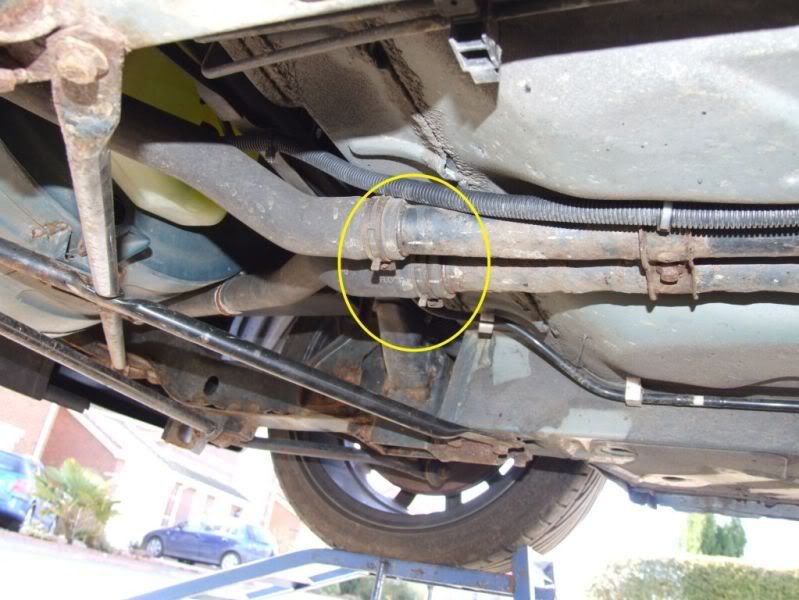
The best place to drain the coolant off is at the front end of the underfloor coolant pipes. Remove the clips by pressing the ends together and sliding them along the pipe away from the connection. The rubber hose will be stuck on the metal pipe after years of sitting in place. I loosened them by gripping them with mole grips, or similar, and turning until the seal is broken.
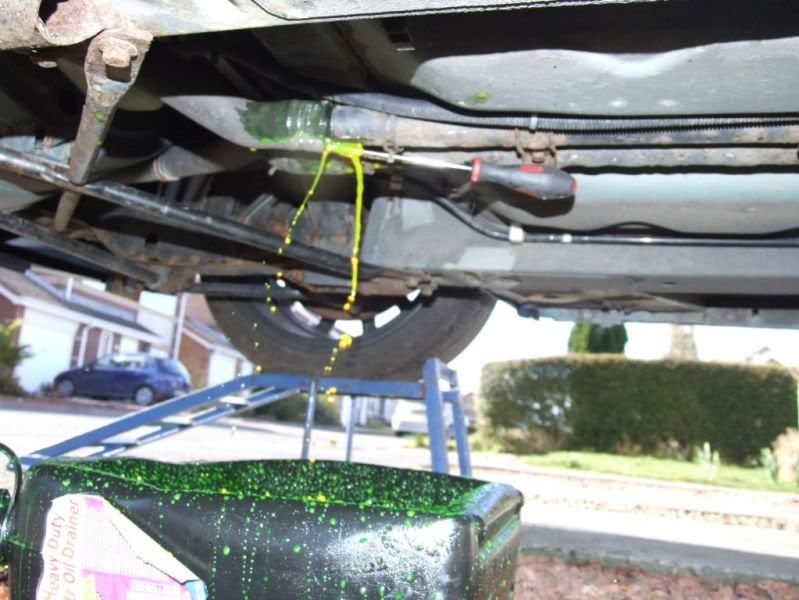
Rather than pulling the hose straight off and getting soaked I slid a screwdriver down the inside of the hose to create a small bleed.
Now just leave that to drain. Check once in a while to make sure that the container doesn't overflow.
Be careful as it is easy to get the coolant in your eyes. Obviously I didn't, being the professional that I is. I said I didn't, right. And it stings, er, or so I heard somewhere.
You can aid the draining by opening the bleed points.
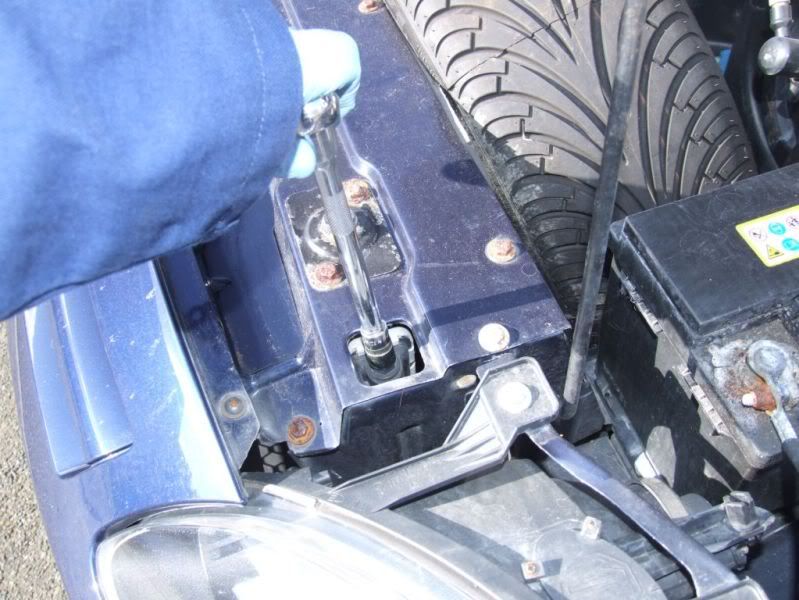
There is one at the top nearside of the radiator. Be very careful when opening this one as it is only plastic and often shears off. If it does shear off then one of the ways to remove the remaining threaded portion is to heat up a screwdriver end to F hot and melt it into the plastic bolt, let it cool and screw it out.
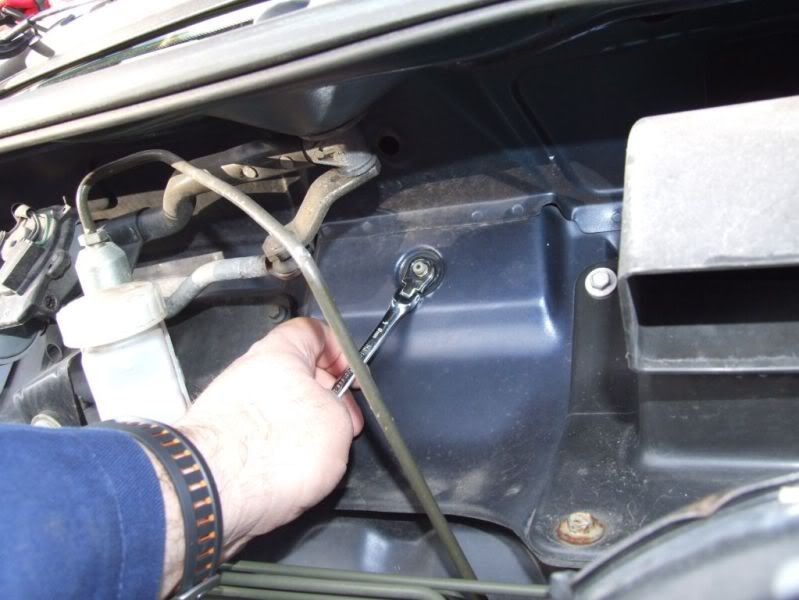
While you are under the bonnet, remove the plastic cover on the bulkhead and you will see another bleed point for the heater matrix. Make sure that you have the heater set to hot to allow the coolant to drain.
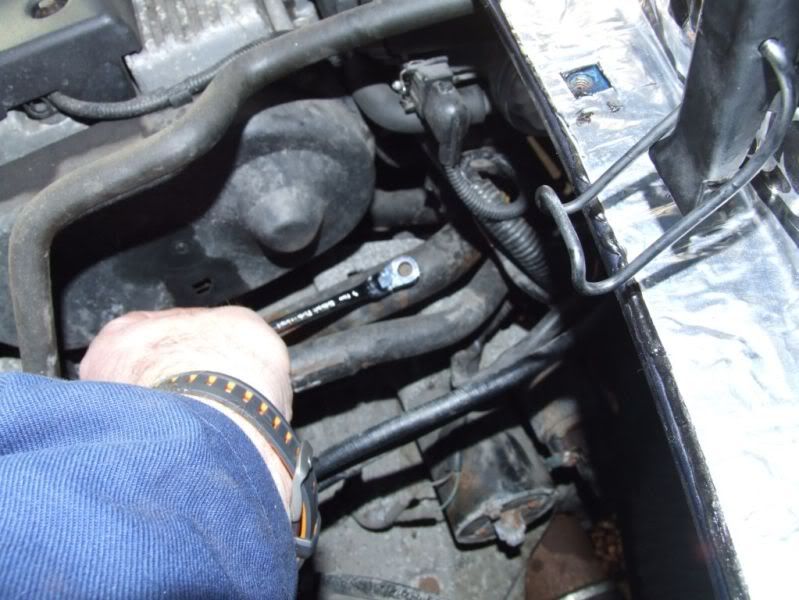
And one in the engine compartment, above the starter motor.
Once all the coolant is drained you can carry out whatever maintenance/repairs that you need to.
If you are simply changing the coolant then you should now reconnect the front coolant pipes.
Next you need to prepare your coolant. MOST of the Fs and all of the TFs specify a 50/50 mix of OAT (Organic Acid Technology) coolant and demineralised water. It comes in many colours but generally looks very bright. Common colours are green, orange and blue. Normal water should not be used as it contains minerals etc that can cause deposits in the engine and radiator (just look in your kettle).
Some older Fs recommend you use ethylene glycol, which is the more traditional coolant. Many people have converted to the better OAT coolant, but if you do, make sure that you thoroughly flush the system first as the two coolants do not mix well.
You can get OAT from most automotive car shops. I got mine from Halfords. You can buy 50/50 ready mixed or concentrated and a seperate container of demineralised water.
I mixed my own in a suitable container.
Close all of the bleed points opened previously and fill the expansion tank untill it won't take any more coolant, leave the expansion cap off.
Next you will be bleeding any air out of the system. Ideally it is a 2 person job as you need to make sure the expansion tank does not empty as it will introduce more air. I did it on my own and it is fine as long as you keep checking the coolant level and top up as necessary.
First, loosen the radiator bleed screw
and then loosen it further with your fingers (do not do this with a hot engine as you will scald your hands).
You should hear hissing as the weight of the coolant forces the air out of the radiator. Tighten the bleed screw regularly and check/top up the coolant. Go back and loosen the screw again. Do this as many times as it takes until coolant starts to come out without any bubbles. This may take some time as the radiator will be full of air.
Once the radiator is bled, move on to the heater bleed screw. As mentioned earlier, this is behind a plastic cover which should be removed and is roughly above where you fill up the windscreen washer fluid.
Make sure that the car heater is set to fully on (hot) and undo the screw until the air starts coming out. Again, keep checking the coolant level and continue until no more air comes out. You should just have coolant with no major bubbles coming out.
Next, you should slacken off the bleed point in the pipe above the gearbox.
Again, bleed until only coolant comes out.
Fully tighten all bleed points and check the coolant level.
Cross your fingers (I did and think it is an essential part of the procedure
Check the hoses where you disconnected and reconnected earlier for any leaks.
Wipe up any coolant around the bleed points.
Recheck that the bleed points are correctly tightened.
Run the engine and check for any leaks.
You have now changed your coolant.
You will suffer from coolant induced paranoia for the next month, this is normal.
DO, check your coolant level regularly for the first couple of days (Before and after every run). Then revert to normal checks after that.
If there is still air in the system you will get tell tale signs, such as no heat from the blowers in the car, erratic coolant level, sudden drop in level as the air escapes.
If you suspect there is air, then re-bleed the system.
If you feel the need, then the torque settings for the bleed screws are:
Radiator Bleed Screw......................5Nm
Heater Bleed Screw........................7Nm
Radiator Return Line Bleed Screw......9Nm
The cooling system takes 10.5 Litres from dry.
Please Log in or Create an account to join the conversation.
Replied by chrisd300 on topic Re: Coolant system. - How to fill and bleed
Posted 13 years 1 month ago #29514Please Log in or Create an account to join the conversation.
- David Aiketgate
-
 Offline
- David
-

- mgf mk2 freestyle mpi 16" wheels, in Anthracite.
- Posts: 20330
- Thanks: 4436
Replied by David Aiketgate on topic Re: Coolant system. - How to fill and bleed
Posted 13 years 1 month ago #29517If the bolt is too damaged for them, I use Irwin bolt grips like these .
David
:shrug:
Please Log in or Create an account to join the conversation.
Replied by cjj on topic Re: Coolant system. - How to fill and bleed
Posted 13 years 1 month ago #29524If you don't have any suitable tools then a pair of molegrips should shift it, but you must get the grip as tight as possible before trying to loosen the bolt.
Please Log in or Create an account to join the conversation.
Replied by chrisd300 on topic Re: Coolant system. - How to fill and bleed
Posted 13 years 1 month ago #29533Please Log in or Create an account to join the conversation.
Replied by chrisd300 on topic Re: Coolant system. - How to fill and bleed
Posted 13 years 1 month ago #29534Please Log in or Create an account to join the conversation.
- David Aiketgate
-
 Offline
- David
-

- mgf mk2 freestyle mpi 16" wheels, in Anthracite.
- Posts: 20330
- Thanks: 4436
Replied by David Aiketgate on topic Re: Coolant system. - How to fill and bleed
Posted 13 years 1 month ago #29537David
:shrug:
Please Log in or Create an account to join the conversation.
Replied by graham1 on topic Coolant system. - How to fill and bleed
Posted 7 years 10 months ago #175117Thanks Graham
Please Log in or Create an account to join the conversation.
- Airportable
-
 Offline
- Senior MGer
-

- Posts: 2111
- Thanks: 474
Replied by Airportable on topic Coolant system. - How to fill and bleed
Posted 7 years 10 months ago #175119Please Log in or Create an account to join the conversation.
- mikemike3100
-
 Offline
- Novice MGer
-

- Posts: 1
- Thanks: 0
Replied by mikemike3100 on topic Coolant system. - How to fill and bleed
Posted 7 years 3 months ago #179479Please Log in or Create an account to join the conversation.
- talkingcars
-
 Offline
- Moderator
-

- Posts: 6876
- Thanks: 1296
Replied by talkingcars on topic Coolant system. - How to fill and bleed
Posted 7 years 3 months ago #179496mikemike3100 wrote: Great info thanks . Mine is all sludged up , how would you flush the system please?
How much effort do you want to put in?
Personally I would disconnect the radiator and reverse flush until the water runs clear.
Then disconnect both ends of the under car pipes and do the same.
Open the interior heated valve to hot and reverse flush through the hoses in the engine bay.
Finally do the same with the engine, to be 100% you should remove the thermostat as this restricts flow of flush around the engine.
Alternatively do the above apart from the engine, add 2 dish washer tablets to the header tank, run the car for a couple of days with just water and finish by flushing everything again before refilling with a 50% mix of OAT.
Home to black Alfa Romeo 159 3.2 V6 Q4 ,green MGF VVC and red MG Maestro T16.
MG - the friendly marque.
Please Log in or Create an account to join the conversation.
Replied by digcot65 on topic Coolant system. - How to fill and bleed
Posted 1 year 7 months ago #201654Please Log in or Create an account to join the conversation.


