
Gear change changes.


Please Log in or Create an account to join the conversation.
- Airportable
-
 Offline
Topic Author
Offline
Topic Author
- Master MGer
-

Site Supporter
- Posts: 3675
- Thanks: 912
The block was an off cut of square section, chucked in a four jaw, pilot drilled & bored out, then drilled to hold the two halves together once cut. The screw & pin exit hole were drilled, the exit larger than the scroll & the threaded hole tapped.
Finally the finished block was slit.
As an amateur workshop go I’m well equipped & I realise I’m extremely fortunate, my father was an astute buyer of equipment & I have stepped carefully in his foot steps.
M
Please Log in or Create an account to join the conversation.
- Airportable
-
Offline
Topic Author
- Master MGer
-
Site Supporter
- Posts: 3675
- Thanks: 912
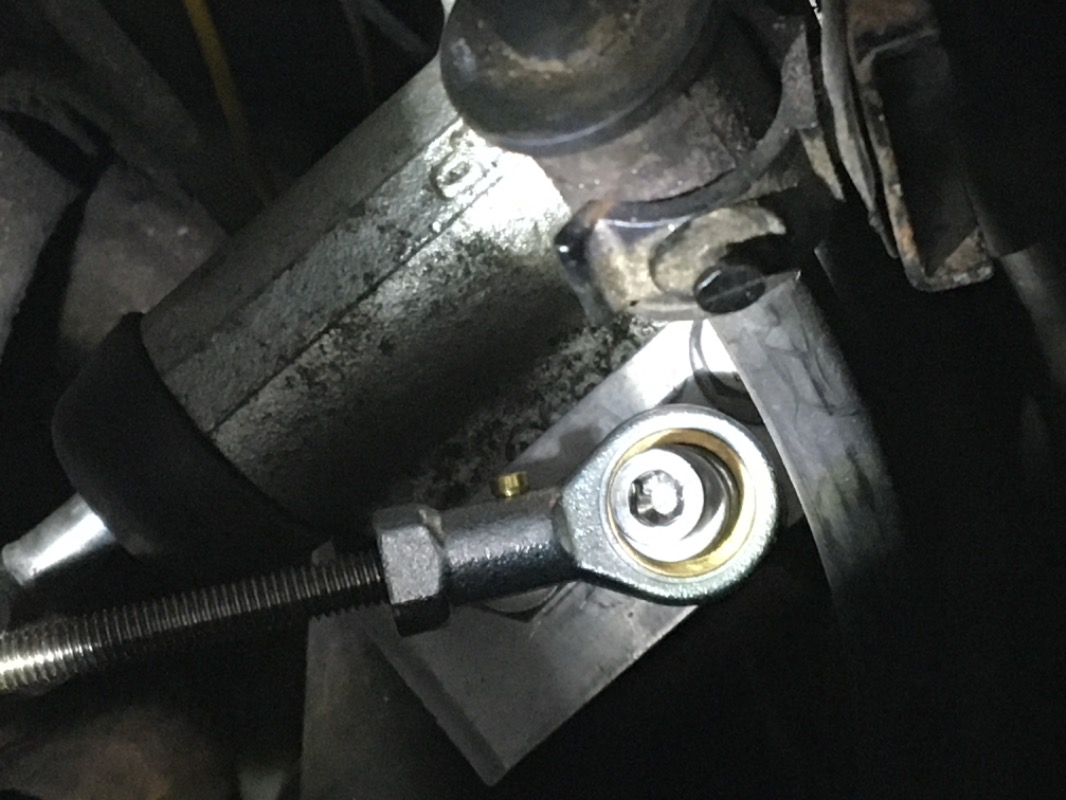
There has been talk about the clutch slave cylinder brace, as I was in the engine compartment changing the brown temperature sensor, I’m trying to find out why the front fan comes on when not required.
I made a plate to mount above the cylinder & a bracket to mount under a bell housing bolt.
I ran out of enthusiasm & didn’t take it for a run, I’ve had a busy day.
m
Please Log in or Create an account to join the conversation.
- Airportable
-
Offline
Topic Author
- Master MGer
-
Site Supporter
- Posts: 3675
- Thanks: 912
M
Please Log in or Create an account to join the conversation.
- Airportable
-
Offline
Topic Author
- Master MGer
-
Site Supporter
- Posts: 3675
- Thanks: 912
If I were to have paid full chuck for the uprated bell crank etc & for the clutch brace, I’m not sure I’d view the new feel as great value.
A track dayer would be happy to swap old for new, but that’s not my scene.
The entire job cost £10 in bits plus engineering time, I’m not costing the abrasions & cuts there free as they always are.
M
Please Log in or Create an account to join the conversation.

I hope to get the GT blasted and primed before we head into the winter so that is the over riding priority. My third iteration of engine mounts has finally got the Jaguar engine RX8 gearbox combination into its final position.
Please Log in or Create an account to join the conversation.
- Airportable
-
Offline
Topic Author
- Master MGer
-
Site Supporter
- Posts: 3675
- Thanks: 912
I would have had to have felt very dissatisfied with the clutch operation, to go to the extent of stripping out all the junk at the rear of the car to bugger about with a commercial brace.
I had the cover off to change a sensor & having read with interest the discourse on gear changing I had a look to see what could be done.
Was it worth it? From an engineering standpoint it wasn’t difficult, I just wander around my collection of old iron, did a few measurements, drew an idea on my work table & made Mk1. Mk3 was a repositioning of the truss rod & the removal of metal as it interfered with a pipe.
The most difficult bit was getting two hands into too small a space!
There is now no perceived movement in the system,(is that a good thing?) & the entire assembly feels more taut. Clutch operation happens within a reduced portion of the clutch pedal travel, possibly requiring more precision in balancing the clutch.
Over the summer months wife & I do a lot of walking & our kit lives in the MG boot, however I hurt my foot whilst out & I’ve been told to rest it. Bugger that, I’m not sitting with my foot on a cushion, so with this lot blowing I say on an office chair in the workshop & made this & did the modifications to the gear change (the doctor didn’t say anything about going into the pit),
I should have done one & absorbed that & done the next.
Has it made a difference? Yes, was it worth the effort? At the end of the day that would be a balancing act of your expectation / price paid for a commercial item.
If you can make your own, take that route.
Or root if you’re in Oz!
M
Please Log in or Create an account to join the conversation.

you have constructed a very sensitive means of connecting the gear change cables to the selector rod using a standard bell crank,
AND braced the clutch slave cylinder to the bellhousing using the “spare” rose joints and some form of bracket that stiffens the existing support?
if so I’m not following exactly how you did that and it would be helpful to have some sketch details of that arrangement please.
Please Log in or Create an account to join the conversation.
- Airportable
-
Offline
Topic Author
- Master MGer
-
Site Supporter
- Posts: 3675
- Thanks: 912
M
Please Log in or Create an account to join the conversation.
[size=10pt]Mark[/size]
95 MGF
Please Log in or Create an account to join the conversation.
- Airportable
-
Offline
Topic Author
- Master MGer
-
Site Supporter
- Posts: 3675
- Thanks: 912
The geometry of the original & the Satur upgrade must by necessity be the same as this is governed by the gizzards within the PG1.
Other than the rose joints the only upgrade would be one of rigidity & I suspect you would have to have formed a tight symbiotic relationship with the car for you to notice the difference between the AR fabrication & that by Mike Satur.
Not withstanding that I’m glad I did the experiment & that bitter pill of cost was sweetened somewhat by making the bit to do the mods myself.
I’ve to do some drawings for Delbout shortly, it had slipped my mind or what’s left of it.
M
Please Log in or Create an account to join the conversation.
- Airportable
-
Offline
Topic Author
- Master MGer
-
Site Supporter
- Posts: 3675
- Thanks: 912
Satur claim the rose joints are unique to them, the difference might lay there, although I’m not sure how one single ended rose joint can differ from another once the ball is packed & sealed.
MG Mania no longer list the slave cylinder brace, or more accurately, I couldn’t find it on their website, whereas the MGOC have the same device listed.
This may be useful, it’s just a thought.
M
Please Log in or Create an account to join the conversation.