
Hello from Dorking!


Looking at the valves the first thing I noticed is the the exhaust valves look like they've been a bit hot.
Remember your engine is much more highly stressed than our normally aspirated engines so you must be on the ball to make sure everything is 100% as you have much less wiggle room than us mere mortals!
"Keep calm, relax, focus on the problem & PULL THE BLOODY TRIGGER"
Please Log in or Create an account to join the conversation.
- Airportable
-
 Offline
- Master MGer
-

Site Supporter
- Posts: 3675
- Thanks: 912
I wonder how many K series engines Turbo Tech' worked over?
M
Please Log in or Create an account to join the conversation.


I am fairly sure the block will clean up ok.
The head needs an overhaul. Those valves need lapping in again so its a dismantle job.
Most cylinder heads can be checked with a straight edge quite confidently if you are careful...but as Cobber says your engine is under more stress than mine so if you can get a refurbished head for£250 it might work out cheaper than possibly some new valves but more importantly give you peace of mind.
Great project mate. I wish you luck but you are certainly approaching everything in the right way so perhaps no luck required!
Please Log in or Create an account to join the conversation.
- MartianSkippy
-
 Offline
Topic Author
Offline
Topic Author
- Apprentice MGer
-

Registered
- Posts: 40
- Thanks: 9
I think you are spot o as I also noticed the 2and 3 piston surface having less carbon build up and close to clean silver colour on the edge close to where the gasket was in the worse state.It appears that the gasket went between cylinders 2and 3 and those intake valves look lighter in colour..possibly from steam cleaning.
Thanks for that - I've definitely gone farther with the project than I ever would, but I think the car deserves it, and while hard at times and certainly expensive, I'm really enjoying myself and gaining confidence with every step.Great project mate. I wish you luck but you are certainly approaching everything in the right way so perhaps no luck required!
Please Log in or Create an account to join the conversation.
It is a special car.
Please Log in or Create an account to join the conversation.
- MartianSkippy
-
Offline
Topic Author
- Apprentice MGer
-
Registered
- Posts: 40
- Thanks: 9
Thanks @Cobber - I have this mantra literally etched in my brain after seeing/hearing it in every "how to" I studiedDon't try to rotate the crankshaft with the head removed unless you have something to secure the cylinder liners in place, otherwise you risk dislodging the liners and will have more problems,

Turns out that I did not even need straight edge and feeler gauges to check the head - after the initial clean it became quite clear that the head suffered way too much to be reusable in it's current condition, and potentially even after a ful recondition

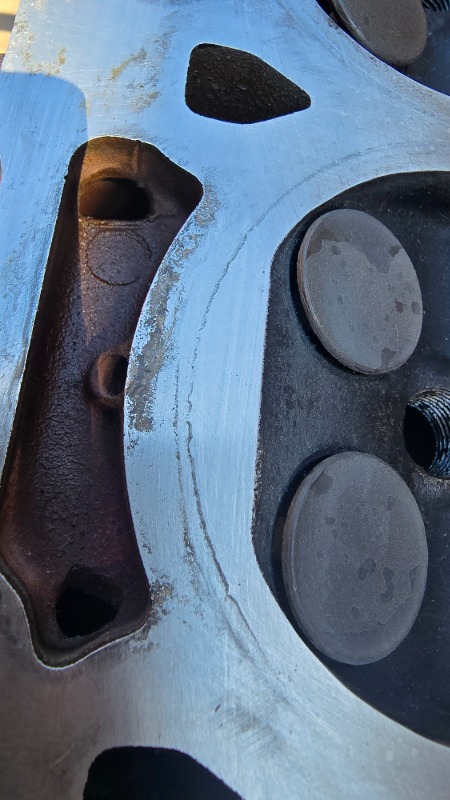
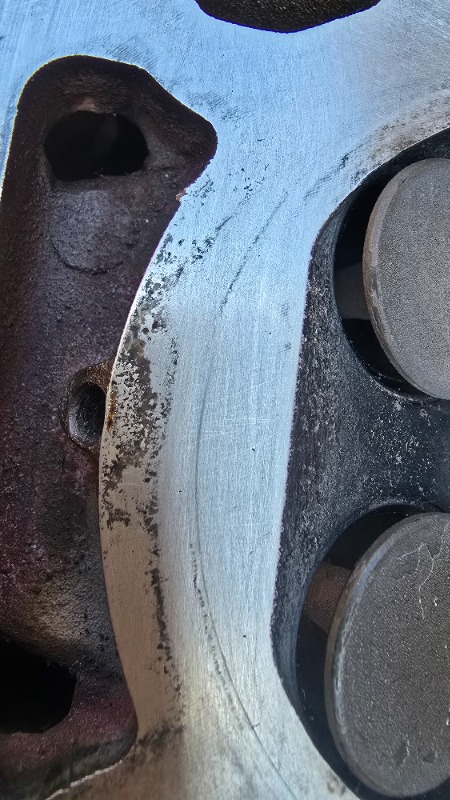
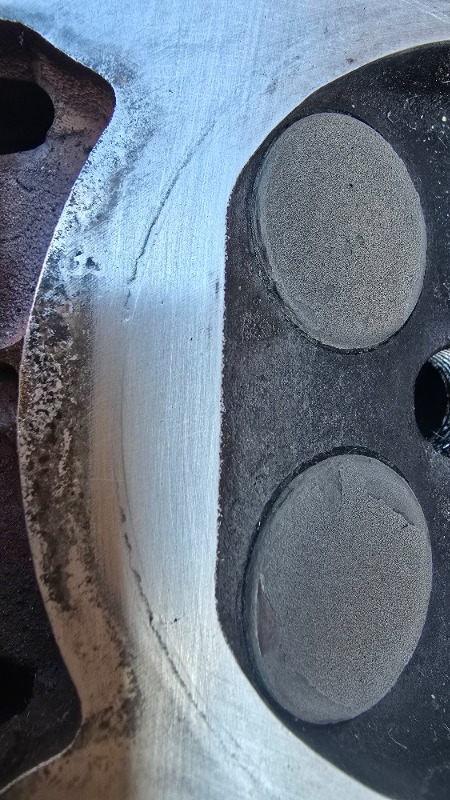
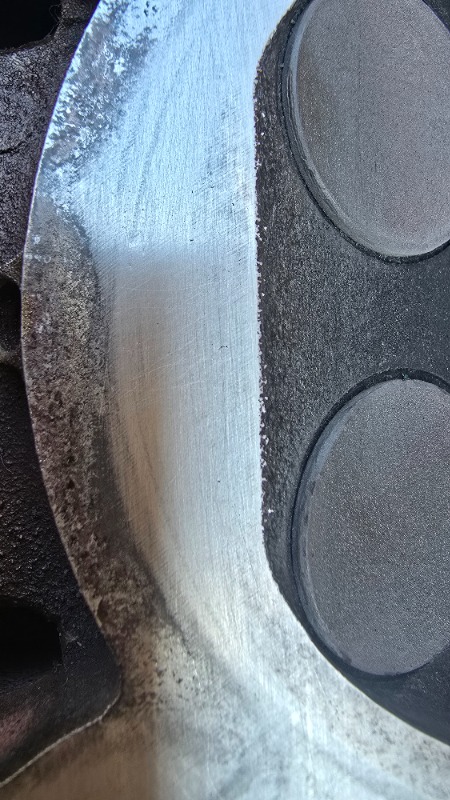
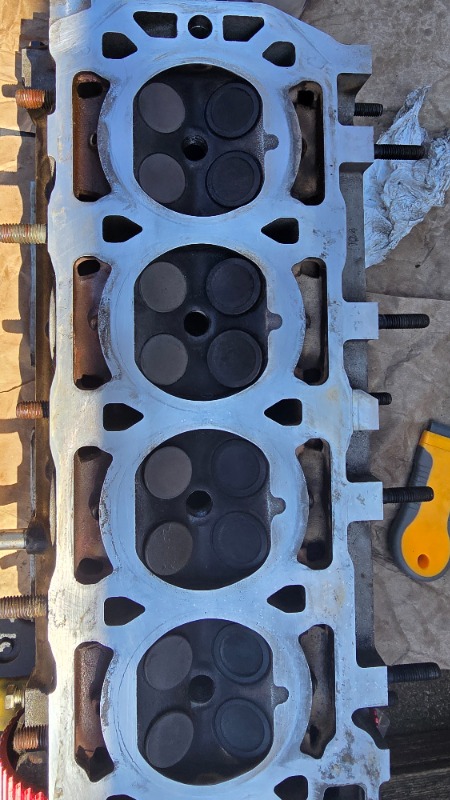
Clear indentations felt on the exhaust side across all cylinders to the pint of cracking on cylinders 1 and 2, not to mention a lot of corrosion/pitting. I don't think it would even be a candidate for reskimming as it probably already had one reskim when the payen gasket and shim were added and there is very little material clearance between head surface and top of the valves..
Reconditioned head from mgfntfbitz ordered today - thank god for paypal pay in 3 option! I might still have to take it to a machine shop to have a couple of mounting holes drilled and threaded which serve as mounting points for the Turbo T kit, unless of course I am mistaken and these are present on all MGF heads. Plus of course I will need to transfer over the Piper Cams and think of what shim I need to keep the compression ratio in line with Turbo T's intended values..
Onwards and upwards!
M
Please Log in or Create an account to join the conversation.
It does look like that head has been heavily skimmed to me. Your new head may not have been skimmed at all and that may help with finding a head gasket. Most, but not all headgaskets are about 1.5mm.
When you say shim it's not just the base layer of a MLS gasket is it?
Please Log in or Create an account to join the conversation.
- MartianSkippy
-
Offline
Topic Author
- Apprentice MGer
-
Registered
- Posts: 40
- Thanks: 9
Good question @TA22GT and one I've been asking myself as looks like this Payen kit is discontinued so could not find much info about it to work out if I have a two layer gasket or a gasket and a shim. This is what I have:I agree about the head. It looks like wear at every water jacket point.
It does look like that head has been heavily skimmed to me. Your new head may not have been skimmed at all and that may help with finding a head gasket. Most, but not all headgaskets are about 1.5mm.
When you say shim it's not just the base layer of a MLS gasket is it?
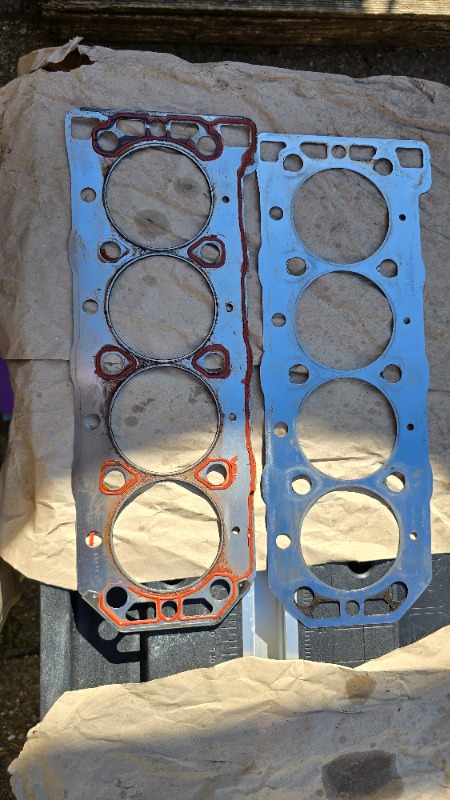
the bit on the right was at the top of the arrangement directly below the head. It is a fully flat piece of stainless steel marked with "Payen HeadSaver KM5001" I measured it at 0.45mm. To the left is what looks like the head gasket proper with the polymer sealing strips. It is marked with LVB000230 which comes up as the original OEM Rover gasket. When pressed together they come to about 1.8mm thickness( depending how strongly i squeeze them) so I'm leaning more towards a gasket +shim set up but could be wrong.
Meanwhile another, potentially major issue came up - pitting on the engine block case

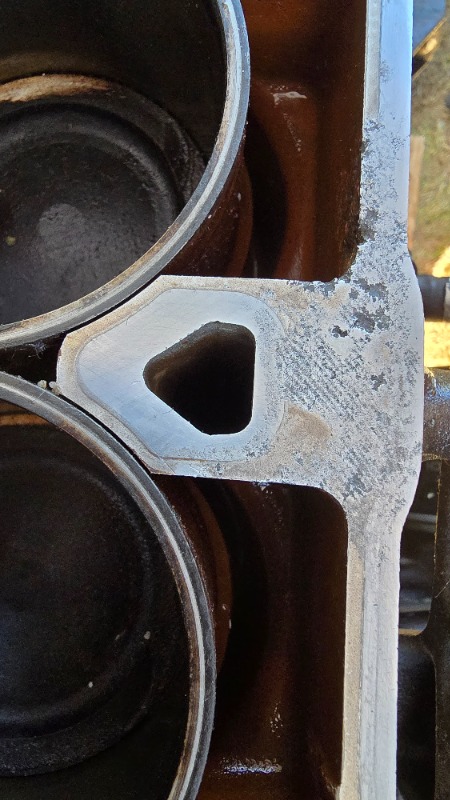
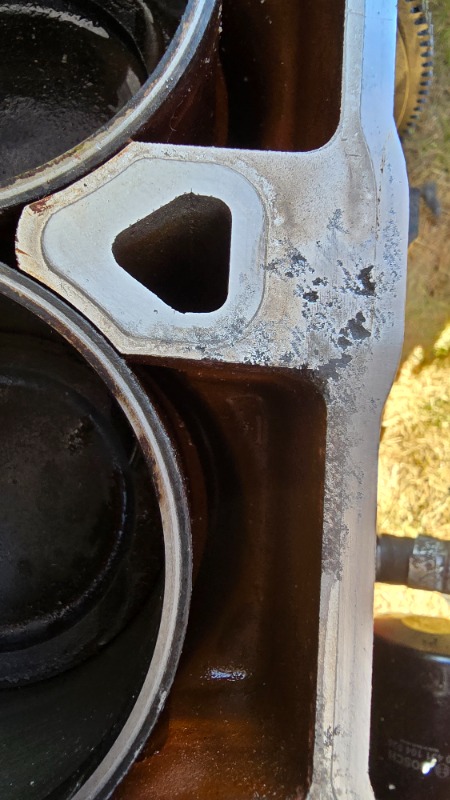
it goes as deep as 0.4mm in the worst place. While it's quite far from the firing rings and more towards the outside of the block, I'm now worried even the best ML gasket might not be able to seal this. I read that k series blocks can be skimmed, despite the floating liners, but at this point in wondering if I'm flogging a dead donkey here and the headgasket issue has condemned this block to the scrapyard

Opinions?
Please Log in or Create an account to join the conversation.
- Airportable
-
Offline
- Master MGer
-
Site Supporter
- Posts: 3675
- Thanks: 912
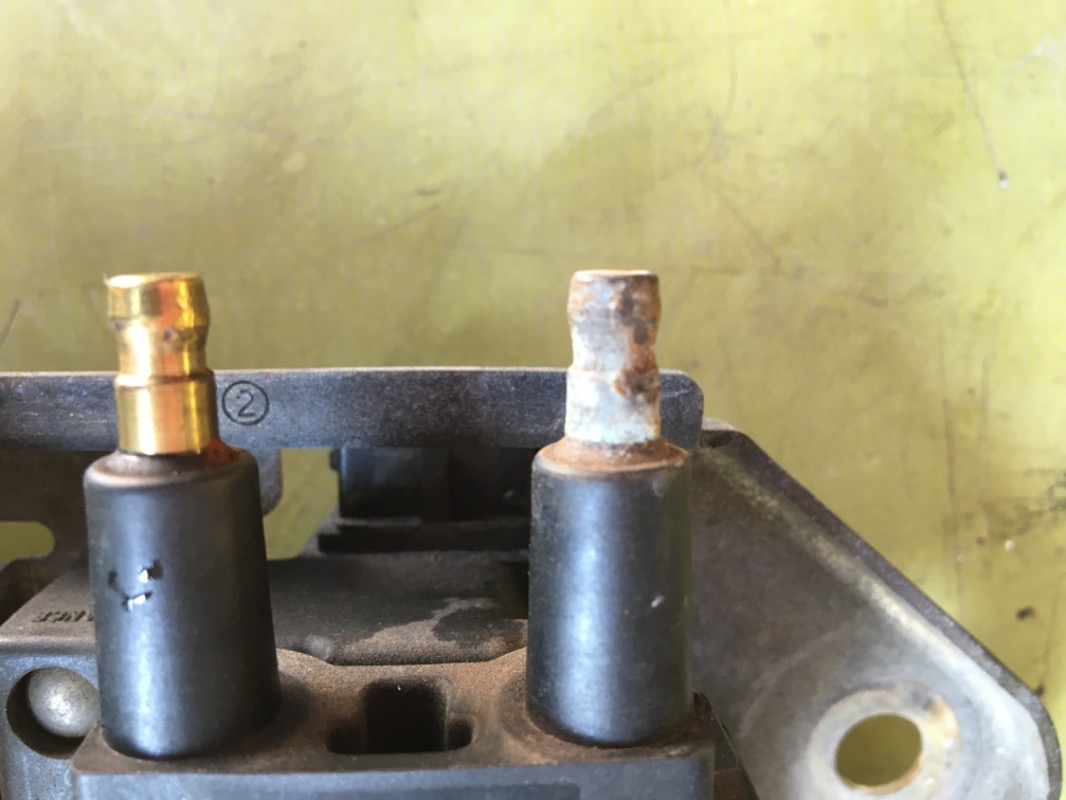
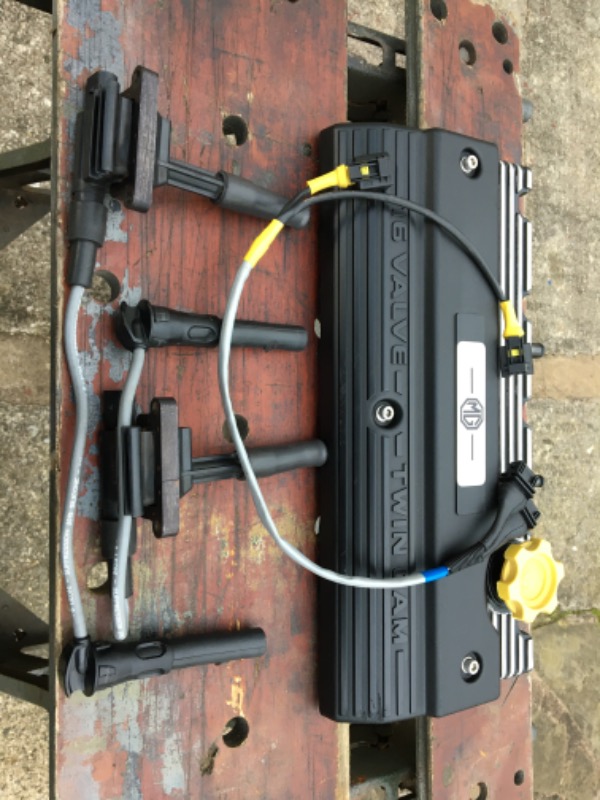
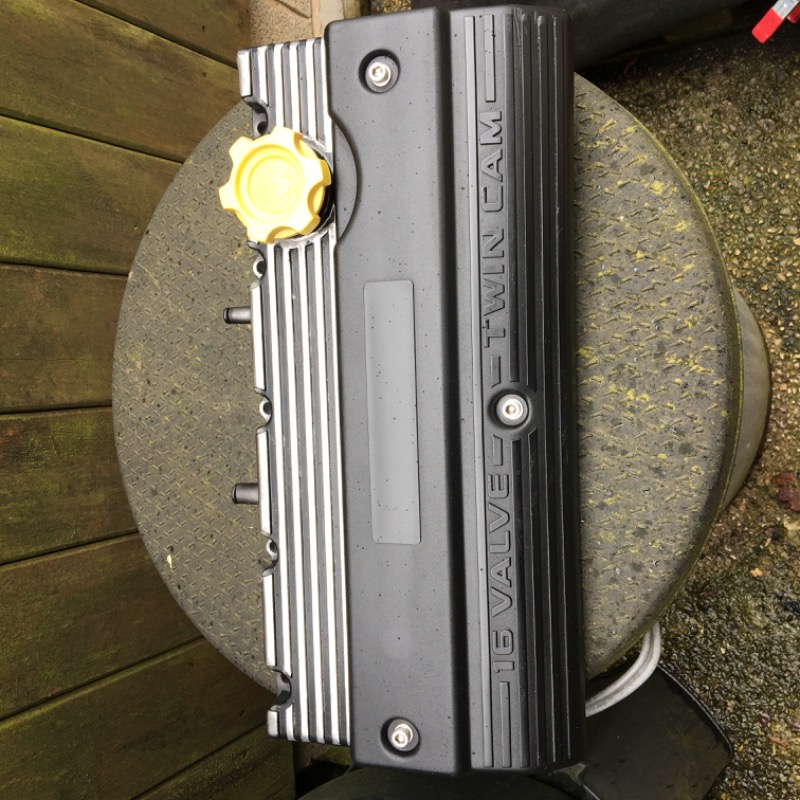
For a way above average engine this isn’t really what you want to see. However seeing it now is so much better than finding yourself on the A24 with steam from car & ears.
On another aspect.
Does your car have the coil pack block mounted on the rear of the engine? It’s not a great place to have a home, they can get very hot, especially with your blower.
I had one segment fail, which ends up a throw away job & the eBay replacement was grassed up.
I changed to the later spark plug top type. There is no performance advantage, they are easy to change & at worst you only need to replace two.
It’s relatively straightforward; you would have to make an adapter cable & a cam cover + packer of a later car to finish off. Mine came off a Rover 25.
I’ll see if I still have some pictures.
Please Log in or Create an account to join the conversation.
The pitting is well away from the water jacket..maybe worth a risk.
The MLS gaskets I have used are all 3 piece..steel..gasket..steel.
Others know far more about these engines than me but I think that is a "soft and thick" gasket to indeed save heads as it can fill pits like you have.
Please Log in or Create an account to join the conversation.
- MartianSkippy
-
Offline
Topic Author
- Apprentice MGer
-
Registered
- Posts: 40
- Thanks: 9
Thanks @TA22GT. The fact that the pitting is fairly far away from the neuralgic firing ring area is my main hope at the moment. The headgasket kit I got from MGOC spares is super thick (around 3mm) so I hope it will be able to make up for a lot of potential sealing issues + given the pitting is mostly towards the outside of the block, I might be able to cheat a bit by applying some high temp sealant in the area.. With the addition of the reconditioned head, my parts bill is fast approaching 2K so I'm simply not sure I can afford adding a cost of an an engine block to the tally. You can get half decent fully running MGFs for what I have spent on parts alone so farThat's a bummer about the block. The engines I build don't have liners..the top of the bore is the top of the block. No lip so easy to flatten carefully.
The pitting is well away from the water jacket..maybe worth a risk.
The MLS gaskets I have used are all 3 piece..steel..gasket..steel.
Others know far more about these engines than me but I think that is a "soft and thick" gasket to indeed save heads as it can fill pits like you have.

Complete engines go anywhere from a 100 quid to 3K, but as is always the case with second hand engines, you never know what you are getting, e.g. the state of the crank, conrods, pistons, bearings, etc.
Other option is buying just an engine block, again with options starting at 100 quid up to about 850 for a redesigned strenghtened block, but at we are talking huge amount of work (and possibly experience I do not have) to transfer all the internals over.. And this would open Pandora's box of "why I am transferring used components to a new block"...
I am currently thinking of risking it, unless someone way more knowledgeable than I, tells me I'm being an idiot here

Please Log in or Create an account to join the conversation.
- MartianSkippy
-
Offline
Topic Author
- Apprentice MGer
-
Registered
- Posts: 40
- Thanks: 9
Thanks @Airportable. The coil is indeed on the back of the engine on my one. I have not experienced any spark/misfire issues in the short period I was able to enjoy driving the car; is it a common failure area I should be aware of? Am I correct in thinking the set up you are suggesting gets rid of a single coil and instead uses two separate coil packs, each serving 2 cylinders, located in the crank cover/spark plug area?
For a way above average engine this isn’t really what you want to see. However seeing it now is so much better than finding yourself on the A24 with steam from car & ears.
On another aspect.
Does your car have the coil pack block mounted on the rear of the engine? It’s not a great place to have a home, they can get very hot, especially with your blower.
I had one segment fail, which ends up a throw away job & the eBay replacement was grassed up.
I changed to the later spark plug top type. There is no performance advantage, they are easy to change & at worst you only need to replace two.
It’s relatively straightforward; you would have to make an adapter cable & a cam cover + packer of a later car to finish off. Mine came off a Rover 25.
I’ll see if I still have some pictures.
Please Log in or Create an account to join the conversation.