
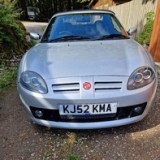
mg tf 160 bad head gasket
Short pistons..no wonder they like to rev.
I wonder if someone broke a ring whilst replacing them at some time.
Personally I would have left the liners in place unless scoured.
You are far enough on to do a great job of rebuilding it now and the satisfaction you will get is enormous. Well done.
Please Log in or Create an account to join the conversation.

Please Log in or Create an account to join the conversation.
Please Log in or Create an account to join the conversation.
I will leeave it at that.😉
Please Log in or Create an account to join the conversation.
I agree totally, DON'T attempt to weld up the piston!Do not even remotely try to weld up that piston!
I will leeave it at that.😉
"Keep calm, relax, focus on the problem & PULL THE BLOODY TRIGGER"
Please Log in or Create an account to join the conversation.
- Notanumber
-
 Offline
- Senior MGer
-

- Posts: 1006
- Thanks: 167
2003 TF 135 sunstorm
Please Log in or Create an account to join the conversation.
- Airportable
-
 Offline
- Senior MGer
-
- Posts: 2243
- Thanks: 509
M
Please Log in or Create an account to join the conversation.
- David Aiketgate
-
 Offline
- David
-

- mgf mk2 freestyle mpi 16" wheels, in Anthracite.
- Posts: 20372
- Thanks: 4459
In any case, they have 160 stamped into them on the piston top face.

Edit:- Scrub that, I think I can see 160 on your piston...

David
:shrug:
Please Log in or Create an account to join the conversation.
- David Aiketgate
-
Offline
- David
-
- mgf mk2 freestyle mpi 16" wheels, in Anthracite.
- Posts: 20372
- Thanks: 4459
Finally got around to removing the piston and can properly see the the damage, was actually pretty straight forward
. Struggling a bit to get the liners out so I'm soaking them in penetrating fluid.
It's got the number "135" stamped in the side. Could this be a piston from a 135 engine?(or are they the same and it doesn't matter?


David Aiketgate wrote:-
For some reason the 160 pistons do have 135 on the side. But as above, have 160 on the face.
David
:shrug:
Please Log in or Create an account to join the conversation.
I'm sure many of you have been in the same boat!
"Keep calm, relax, focus on the problem & PULL THE BLOODY TRIGGER"
Please Log in or Create an account to join the conversation.